Putting On The Red Hat
| The version I used for this install was Red Hat 8.0. Start by putting in the CD-ROM and rebooting your system. The boot menu will appear giving you the option of choosing either a graphical or text install. For almost every system out there, the graphical install will be just fine. All you need to do is click or press Install and the system will start booting. The system will identify devices and you'll see a number of messages scroll by. A few seconds later, you'll see an interesting message. RedHat's install has a media check option. Here's the idea. You have your installation CDs, but you don't know for sure if there is some kind of surface defect that will make installation impossible. Isn't it better to find out before you start on all this work? You can choose to test each CD in your set before you proceed or you can simply skip the step. After the media check option, the graphical install screen will appear. This is just a welcome screen and you can simply click Next and continue on. On the following screen, select the language you would like to use for the installation. I selected English and clicked Next again. What follows then is the keyboard selection screen. Once again, I selected the default of U.S. English and clicked Next which brings us to the mouse selection screen. On the mouse selection screen, the installer will do an autodetect and make a selection. Make sure that the mouse selected is more or less what you have. Notice the "Emulate 3 buttons" option at the bottom of the screen. If you do not have a three button mouse, select this because the Linux graphical X window system makes use of all three buttons. Clicking the left and right button simultaneously is the same as clicking the middle button on a three button mouse. The next screen is for installation type. The default option is "Personal Desktop" which RedHat suggests is "Perfect for personal computers or laptops." Most people will want to accept the default and click Next. On the next screen, you can accept the default to allow the install to automatically partition your disk. After clicking Next, you will be given some choices on Automatic Partitioning, to decide how the installer would make use of the available space. The default is to "Remove all Linux Partitions on this system" and this is probably the right choice. If you want to double check the decisions made by the installer, make sure that you check off the option to "Review (and modify if needed) the partitions created." A warning box will appear, letting you know that all data will be erased. Click OK. Depending on the size of your hard drive, you may get a warning to this effect "Boot partition /boot may not meet booting constraints for your architecture. Creation of a boot disk is highly encouraged." We'll talk about a boot disk later. The Boot Loader configuration is next. RedHat installs the GRUB boot loader by default, but it is possible to change it to LILO. Both work very well and in the end, it is your choice. I have personally grown to like GRUB quite a bit, but I still use LILO on other systems without a care. At this point, you also have the option of setting a password on the boot loader. Home users don't have to worry about this, but some network installations may want the additional security of having to enter a password when the system is booted. Before you move on, you may want to have a look at the labels the installer assigns. I mention this because if you are setting up a dual boot system, it will be identified as DOS. When you are happy with your choices, click Next. The following screen is for network configuration. If you do not have a network card installed, you can skip to the next step. If your Internet connection is through a DSL or cable modem connection, that will likely be the case. The default is to boot and pull an address via DHCP and this is what you would choose. If your PC is on a home or corporate network with fixed addresses, you will want to click Edit, check off the "Configure using DHCP" and enter your address information. If you are in an office, check with your systems administrator for this information. Otherwise, enter your IP address and netmask, then click OK. Enter your hostname, gateway, and DNS information, then click Next. The next section is very appropriate; the Firewall Configuration screen. There are many options here and you should take the time to read what each one offers. Network security is extremely important as the incidence of cyber-attacks continues to rise. Linux PCs aren't as susceptible to viruses, particularly if you don't run as the root or administrative user, but that doesn't mean you should let your guard down. If you are a single user on a home PC that is connected to the Internet, choose High and click Next. What follows is yet another language selection screen (Additional Language Support). That's because the OS can support multiple languages and you can change that default at a later time. Unless you have another language at your disposal, leave the choice as it is and click Next. On the next screen, you will be asked to enter your time zone (in my case, I chose America/Montreal). When you are done, click Next. When you arrive at the next screen, you will get your first taste of Linux's multi-user nature with the Account configuration. This is where you set your root password (root is the administrator login) and create other accounts. You should create at least one non-root account here before you continue on to the next screen, Package selection. If more than one person will be sharing this PC, you can enter their information here as well. You'll also have the opportunity to do this after the system is installed. The packages selected for the Personal Desktop are as follows: Desktop shell (GNOME) Office Suite (OpenOffice) Web browser (Mozilla) Email (Evolution) Instant messaging Sound and video applications Games Since I will be concentrating on KDE as the desktop, make sure that you click "Customize the set of packages to be installed" before you go on. Click Next and you will be on the Package Group Selection screen. You'll notice that packages are ordered into categories such as Desktops, Applications, and so on. Make sure that you check off the KDE Desktop Environment under Desktops. Then, click Details and make sure that all KDE packages have been selected before you click OK. Note
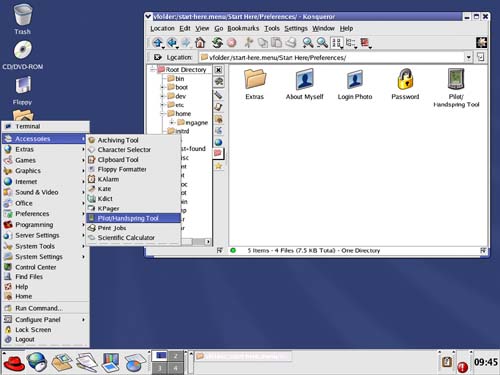
When you are done here, click Next. This is the last step before the installation takes off on its own. You'll be given a final opportunity to change your mind before committing to this installation. Click Next and you are on your way. Figure 3-2. RedHat 8.0 desktop.
Your partitions will be formatted and a progress bar will keep track of where you are in the installation. As the install progresses, you will be treated to some images hyping various things such as the new desktop design called Bluecurve, the included products such as Ximian Evolution, Mozilla, and the OpenOffice.org suite all packages that I will discuss later in the book. Incidentally, this is usually a good time to take a break and grab something to drink. From time to time, you'll need to change CDs (there are three). When the installation completes, you will be given the opportunity to create an emergency boot diskette. Follow the instructions to do so and label the diskette "Linux emergency boot diskette." When the diskette creation is done, click Next and you'll see the Graphical Interface (X) Configuration. The install will autodetect your video card, then suggest a resolution (such as 16 bit, high color at 1024x768). When you click Next again, it will be time to select your monitor type. Once again, the installer will autodetect it. If, for some reason, the autodetect fails to find your monitor, then select it from the list. When you click Next past this screen, you will have the opportunity to Test Setting. I highly recommend that you do not skip this step. After confirming that your video settings are okay, click Next and you will be informed that the installation has completed. Click Exit and the system will reboot. Note
On first boot, Red Hat Linux will autodetect your printer. There will also be a handful of final settings such as date and time and so on. This is a good time to register with the Red Hat Network so that you can do online updates. Aside from being a free service, this is the Red Hat way to keep your system secure and up to date. Finally, you'll be at the login screen. Make sure that we are on the same page by clicking "Session" (at the bottom of the login screen) and selecting KDE before you log in. |
EAN: 2147483647
Pages: 181