Getting Ready to Impress
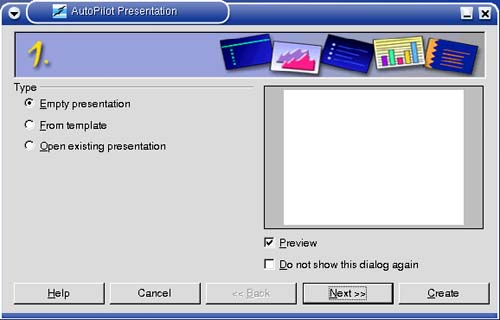
| After having worked with OpenOffice.org's Writer and Calc, you should feel right at home when it comes to using Impress. Working with menus, inserting text, spell checking, and customizing your environment all work in exactly the same way. The editing screen itself is probably more like Calc than Writer in some ways. The Impress work area will have tabbed pages so you can easily jump from one part of the presentation to the other. Each page is referred to as a slide. Given the history of business presentations specifically, the making of these 35-mm slides it's probably no wonder that we still use the same terms when creating presentations with software like Impress. To start Impress, click on your application starter (the big K), select OpenOffice.org (or Office), and click on OpenOffice.org Impress in the submenu. You can also start a new presentation from any other OpenOffice.org application, such as Writer or Calc. Just click File on the menu bar, select New, and choose Presentation from the submenu. When you start up Impress for the first time, you'll be presented with a number of choices. You can start with an empty presentation (Figure 15-1), work from a template, or open an existing presentation. Let's work through a new presentation together. Figure 15-1. Starting up Impress.
Quick Tip
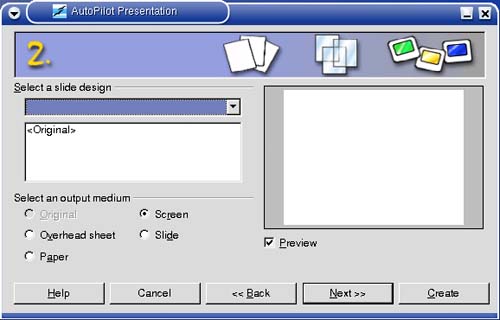
The AutoPilot allows you to select from existing presentations, as well as templates. For the moment, I'm going to stick with the very basics. Leave Empty presentation selected, and click Next. Step 2 (Figure 15-2) gives us the opportunity to select a slide design. Because we have none at this moment, it is safe to click Next, but pause first and have a look at the options for output medium. By default, Impress creates presentations designed for the screen (or a projector connected to your PC). Figure 15-2. Impress defaults to creating presentations designed for the screen.
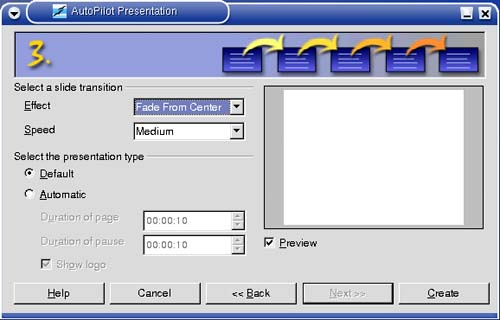
Step 3 (Figure 15-3) lets you define the default means for slide transition. You've all seen these presentations; as someone shows a presentation, slides dissolve to show the next one or fly in from the left or drop like a trap door closing. At this stage of the game, pick one of these effects from the drop-down box labeled Effect, then choose the Speed of that transition. On the right-hand side, there is a preview window that will show you what the effect looks like when you select it. Figure 15-3. Selecting slide transition effects.
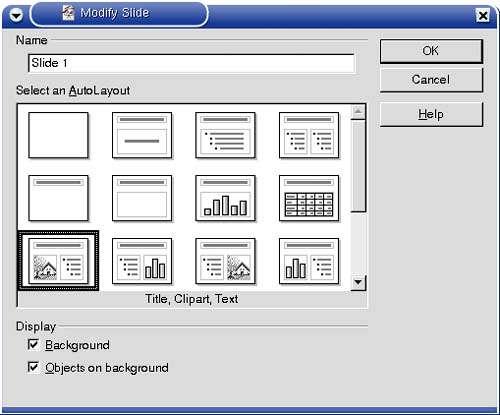
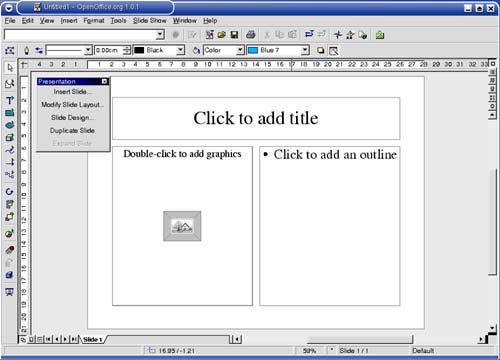
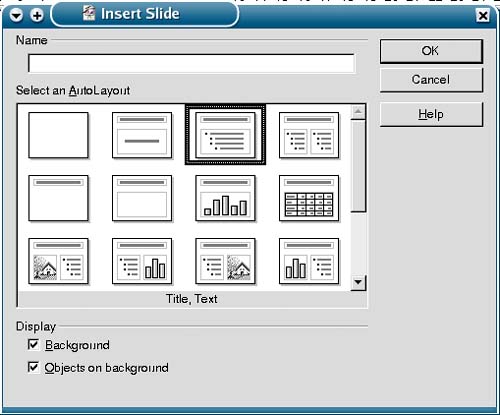
Directly below the slide transition selection, you will select the presentation type. Your choices are Default and Automatic. By default, transition from slide to slide is done by pressing a key, whether it be <Enter> or the spacebar (you can define this). Presentations can also run without any intervention from the person giving the presentation. By selecting Automatic, you can define the amount of time between slides or even between presentations. Accept the default setting here and click Create to start building your presentation. We now have everything we need to start working on our presentation. A Modify Slide dialog box will appear (Figure 15-4) with a number of potential slide layouts having small preview images. From here, you can decide on the appearance of the slide, the number of columns, title locations, and so on. If you pause over one of the images with your mouse cursor, a tooltip till appear, telling you a little about the layout format. There's also space for the slide's title. By default, the title is Slide, followed by the slide's number in sequence. If you don't like this naming convention, you can easily override it by changing it in the Name field. Figure 15-4. Selecting your slide layout.
Follow along with me: Choose the Title, Clipart, Text layout and click OK to continue. Now that we are truly on our way, you'll notice that the editing window has a startling resemblance to that of both Writer and Calc (discussed in the last two chapters). The menu bar sits just below the title bar, and the function bar is directly below. You'll notice that the object bar has a number of different options unique to working in the Impress environment. On the left-hand side of the page, the main toolbar provides quick access to objects, drawing functions, 3D effects, and so on (Figure 15-5). Figure 15-5. Starting with a slide template.
You can also click the last button in the list to start your slide show. There won't be much to see at this point, but you can click it at any time to see how your presentation is coming along. Another way to start the show is to click Slide Show on the menu bar and select the first option. To start editing your slide, click (or double-click for images) the section you want to change. Make your changes by typing into that area. For the title, you might enter Introducing Linux! When you are happy with your changes, just click outside of the frame area. Over on the right, in the frame that says Click to add an outline, insert these bulleted points.
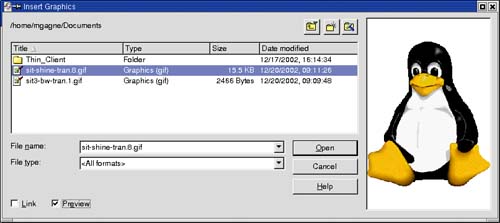
As you might have noticed, this outline serves as talking points that mirror the first chapter of this book. Now, over on the left-hand side, double-click on the frame (as instructed on the default slide) and insert a graphic. The Insert Graphics dialog will appear (Figure 15-6), allowing you to navigate your folders and look for the perfect image. Figure 15-6. Inserting a graphic into the presentation.
You can use any image you like here. For my image, I used Konqueror to surf over to Larry Ewing's Web site (www.isc.tamu.edu/~lewing/linux/), where I picked up my Tux graphic from the source (I'll tell you more about Tux at the end of this chapter). You may choose another image if you prefer. When you have your image selected, click Open, and it will replace the default text in the left-hand frame. Quick Tip
That's it. Your first slide is done. You might want to pause here and save your work before you move on. (Masterpieces must be protected.) Click File on the menu bar, select Save As, then enter a file name for your presentation. I used Linux_Intro as my title. Now click Save, and we'll continue building this presentation. Inserting SlidesYou might have already noticed the floating menu labeled Presentation on the page. From here, you can easily add another slide. If you choose this road, the slide selection dialog you used earlier (Figure 15-4) will reappear. If you are just as happy to continue with the same slide design, I can show you a really fast way to add slides. Look at the tabs down at the bottom of the screen. For each slide, there will be one tab. Simply click to the right of the last tab (in the blank, gray area), and another blank slide (with corresponding tab) will automagically appear. For the time being, click Insert Slide from the floating menu, and select the one called Title, Text (Figure 15-7). Figure 15-7. Our second slide.
We'll switch from two text frames to just one. Click OK, and a tab will appear, showing you Slide 2. Because we had five points (after our introductory slide), let's do a quick add of the next four slides by just clicking the gray area next to Slide 2. You should now have tabs labeled Slide 1 through Slide 6. Okay, click on the tab for Slide 2, then click the top frame where it says Click to add title. Enter the first bullet point from Slide 1. Then repeat the process for the next four slides, inserting the appropriate bullet point as the title. Quick Tip
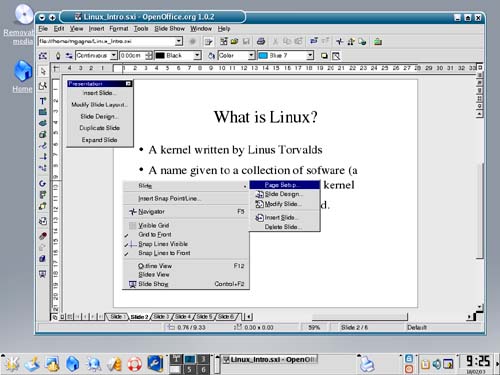
As to what to enter in the text area of each slide, that I will leave to either your imagination or your memory of Chapter 1. When you have finished entering all the information you want, save your work. I'm going to show you how to dress up those plain white slides. Adding ColorRight-click on your slide (not on the text), and select Slide from the pop-up menu. Now click on Page Setup (Figure 15-8). Figure 15-8. Modifying the page (slide) setup.
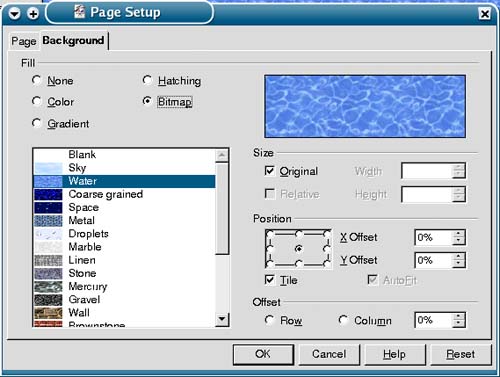
What you will see is a two-tabbed window (one says Page and the other Background). Click on the Background tab. Notice the five radio buttons (Figure 15-9). Each provides an option for background selection, whether it be plain white, colors, gradients, hatching, or bitmaps. Click on each to see the choices that they offer. Figure 15-9. Impress background selection.
For example, you might choose the Linear blue/white gradient (a very business-looking background) or perhaps the Water bitmap. The choice is yours. When you click OK, you'll be asked whether you want this background setting to be for all slides. For now, click Yes. All right. You've done a lot of work, so save it. It's time to see the fruits of your labors. Click Slide Show on the menu bar and select Slide show. You can also use the <Ctrl+F2> keyboard shortcut. The slides will transition with a touch of the spacebar. Printing Your PresentationAs with the other OpenOffice.org applications, click File on the menu bar and select Print from the menu (you can also click the small printer icon in the function bar). The standard OpenOffice.org print dialog will appear from which you can select your printer of choice. |
EAN: 2147483647
Pages: 181
- Article 225 Outside Branch Circuits and Feeders
- Article 328 Medium-Voltage Cable Type MV
- Article 330 Metal-Clad Cable Type MC
- Example No. D6 Maximum Demand for Range Loads
- Example No. D10 Feeder Ampacity Determination for Adjustable-Speed Drive Control [See 215.2, 430.24, 620.13, 620.14, 620.61, Tables 430.22(E), and 620.14]