Adding Drawings and Images
Some of the best ideas were first jotted down as sketches on a napkin, and everyone knows that a picture is worth a thousand words. You can use OneNote to capture your idea as a sketch or diagram and to collect meaningful images in your notes.
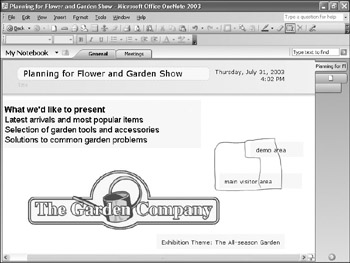
In this exercise, you will add The Garden Company s logo, which will be used in promotion materials, to your notes. You will also sketch the layout of The Garden Company s booth in the exhibition hall at the flower and garden show.
USE the Gardenco graphic in the practice file folder for this topic. This practice file is located in the ![]() My Documents\Microsoft Press\Office 2003 SBS\Notes folder and can also be accessed by clicking Start/All Programs/Microsoft Press/Microsoft Office System 2003 Step by Step .
My Documents\Microsoft Press\Office 2003 SBS\Notes folder and can also be accessed by clicking Start/All Programs/Microsoft Press/Microsoft Office System 2003 Step by Step .
BE SURE TO start your computer, but don t start OneNote before beginning this exercise.
-
Click the Start button, point to All Programs , point to Microsoft Office , and then click Microsoft OneNote 2003 .
OneNote opens, showing the Meetings section because that section was active when you closed OneNote.
Tip You can also open Microsoft OneNote from the system tray on the taskbar. Right-click the OneNote icon, and click Open OneNote on the shortcut menu.
-
Click the General section tab, and click the blank area below the text on the page.
-
On the Insert menu, click Picture .
The Insert Picture dialog box appears.
-
Browse to the
 My Documents\Microsoft Press\Office 2003 SBS\Notes folder, click Gardenco.jpg , and click Insert .
 OneNote inserts the image into your notes.
Tip You can also insert images from other documents or programs by copying and pasting them. Simply select and copy the image in the other program, and then paste it into your OneNote notebook.
-
On the Standard toolbar, click the Pen button, and move your mouse pointer over the note page.
Your mouse pointer becomes a small colored dot.
-
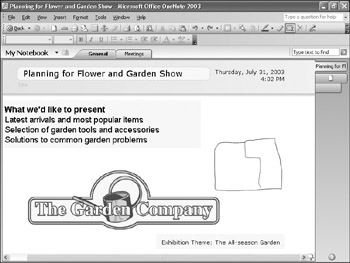
In any blank area of the note page, drag the shape of a square with mouse pointer.
Don t worry about making your lines straight ”this is a rough sketch!
-
Click the down arrow to the right of the Pen button, and click another color .
-
Position the mouse pointer over one edge of the square you just drew, and drag the pointer to divide the square into two sections. The sections can be any size or shape you d like ”this will represent the layout for your exhibition booth.
Tip If you make a mistake while drawing, click the Eraser button on the Standard toolbar, and then click the portion of the drawing you want to erase.
-
On the Standard toolbar, click the Selection Tool button.
-
Click in the larger portion of your exhibition booth drawing, and type main visitor area .
-
Click the smaller portion of the booth, and type demo area .
CLOSE OneNote.
| |
You can use your mouse or a stylus on a Tablet PC to add handwritten text and free-form drawings to pages in your virtual notebook. These notes are known as ink . If you use OneNote on a Tablet PC, you can keep your handwritten notes as ink or convert them to standard text.
To take handwritten notes, simply write the letters on the OneNote page with your pointing device. On a Tablet PC, OneNote recognizes your handwriting as text so that even if you don t convert the ink to text, you can search your handwritten notes.
| Tip | For the best results with handwriting recognition on a Tablet PC, create lined paper by tapping Rules Lines on the View menu, and then write between the lines. To verify that OneNote is recognizing your handwriting as text, tap Handwriting Feedback on the View menu. |
| |
EAN: 2147483647
Pages: 350