Entering Information in a Table
In the previous exercise, you created the structure for three tables on three separate pages of The Garden Company s Web site. Now you need to fill the tables with information to make them useful. You enter information in FrontPage tables the same way you enter it in Word tables.
In this exercise you will fill three existing tables with information. For The Garden Company s Web site, you ll place the same information in each table, but you would probably fill your own tables with different types of information.
USE the GardenCo Web site in the practice file folder for this topic. This practice file is located in the ![]() My Documents\Microsoft Press\Office 2003 SBS\ListsTables\TableText folder and can also be accessedby clicking Start/All Programs/Microsoft Press/Microsoft Office System 2003 Step By Step .
My Documents\Microsoft Press\Office 2003 SBS\ListsTables\TableText folder and can also be accessedby clicking Start/All Programs/Microsoft Press/Microsoft Office System 2003 Step By Step .
OPEN the GardenCo Web site.
-
In the Folder List , click the
 serv01.htm file to select it, and then hold down the[CONTROL] key, and click serv02.htm and serv03.htm so that all three files are selected.
 -
Press [ENTER] to open the three files in the Page view editing window.
-
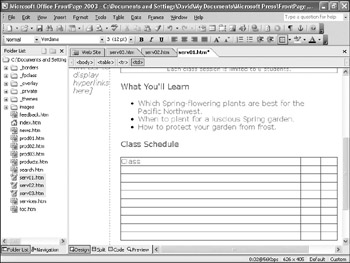
On the Spring Splendor page, scroll down so you can see the entire table.
-
Position the insertion point in the first cell of the table, and then type Class .
Tip If the Tables toolbar opens when you position the insertion point inside a table, you can drag it out of the way by its title bar, or you can close it by clicking the Close button at the right end of its title bar.
As you type, the table column widths adjust automatically to reflect the relationship between the contents of each column.
-
Press the [TAB] key to move the insertion point to the second cell, and then type Date .
The table column widths adjust automatically as you type each word.
-
Press [TAB] to move the insertion point to the third cell, and then type Time to complete the table s header row.
-
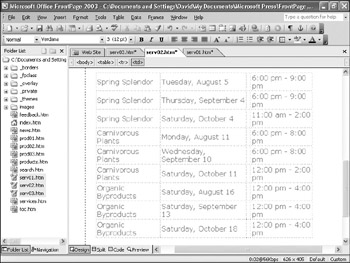
Enter the following information in the three columns of the table, under the respective headings:
Class
Date
Time
Spring Splendor
Tuesday, August 5
6:00 pm ”9:00 pm
Spring Splendor
Thursday, September 4
6:00 pm ”9:00 pm
Spring Splendor
Saturday, October 4
11:00 am ”2:00 pm
Carnivorous Plants
Monday, August 11
6:00 pm ”8:00 pm
Carnivorous Plants
Wednesday, September 10
6:00 pm ”8:00 pm
Carnivorous Plants
Saturday, October 11
12:00 pm ”2:00 pm
Organic Byproducts
Saturday, August 16
12:00 pm ”4:00 pm
Organic Byproducts
Saturday, September 13
12:00 pm ”4:00 pm
Organic Byproducts
Saturday, October 18
12:00 pm ”4:00 pm
Tip If you don t feel like typing, you can copy and paste this information from the ClassList document stored in the practice file folder for this topic.
-
At the top of the Page view editing window, click the
serv03.htm page tab to switch to that file. -
On the Organic Byproducts page, fill the hand-drawn table with the same header row and the same three columns of information.
Note that the column widths do not adjust as you enter information into this table because you specified when creating it that the columns should be distributed evenly.
-
At the top of the Page view editing window, click the
serv02.htm page tab to switch to that file. -
The table on the Carnivorous Plants page has only nine rows, so this table will not have a header. Fill in the first two columns with the class and date information, and then fill in the fourth column with the time information.
-
On the File menu, click Save All to save the open files.
CLOSE the GardenCo Web site.
EAN: 2147483647
Pages: 350
- Structures, Processes and Relational Mechanisms for IT Governance
- Integration Strategies and Tactics for Information Technology Governance
- A View on Knowledge Management: Utilizing a Balanced Scorecard Methodology for Analyzing Knowledge Metrics
- Governance in IT Outsourcing Partnerships
- Governance Structures for IT in the Health Care Industry