Printing Charts
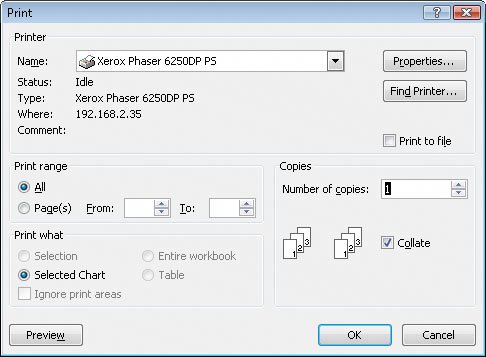
| Charts, which are graphic representations of your Excel 2007 data, enable you to communicate lots of information with a picture. Depending on your data and the type of chart you make, you can show trends across time, indicate the revenue share for various departments in a company for a month, or project future sales using trend line analysis. After you create a chart, you can print it to include in a report or use in a presentation. If you embed a chart in a worksheet, however, the chart will probably obscure some of your data unless you move the chart to a second page in the worksheet. That's one way to handle printing a chart or the underlying worksheet, but there are other ways that don't involve changing the layout of your worksheets. To print a chart, click the chart, click the Microsoft Office Button, point to Print, and then click Print to display the Print dialog box. In the Print What section, the Selected Chart option button is the only one available. If you click anywhere on the worksheet outside the chart, the Print What section appears with the Active Sheet(s) option button selected, meaning that the chart and underlying worksheet are printed as they appear on the screen. In this exercise, you will print a chart.
USE the Corporate Revenue workbook in the practice file folder for this topic. This practice file is located in the My Documents\Microsoft Press\Excel SBS\Printing folder. OPEN the Corporate Revenue workbook.
CLOSE the Corporate Revenue workbook. CLOSE Excel 2007. |
EAN: 2147483647
Pages: 143