Selective Filtering
| In the previous example we saw how we can use layer masks to paint inor paint outone version of an image over another version of the same image. We can use this method to paint in the effects of any filter, allowing us to apply our filters selectively and at any time change how much of the filtering effect we choose to reveal. Here are just three examples chosen from hundreds of possibilities. In each case the approach is the same. Feel free to use your own images here.
Figure 4.33. Selective filtering: Sharpening. The original image (example A), the effects of the sharpening painted in around the eyes, mouth, and hair (example B). The image layers (example C).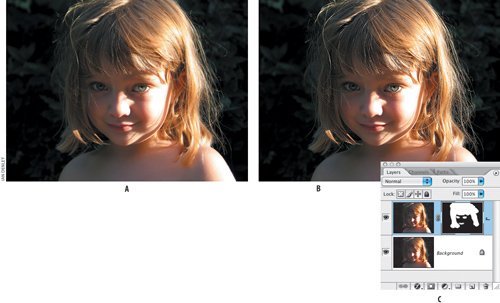 Figure 4.34. Selective filtering: Dust & Scratches. The original image (example A), the effects of the sharpening painted in the background areas where there is little detail. Major creases and defects in areas of detail would need to be addressed with the Patch tool and Healing Brush (example B). The image layers (example C).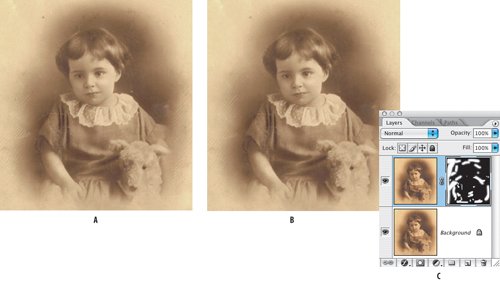 Figure 4.35. Selective filtering: Graphic Pen. The original image (example A), the effects of the graphic pen painted out with a gradient on the layer mask revealing the image to the right (example B). Note, the graphic pen layer is set to Overlay blend mode and the opacity reduced to 50% in the image's layers (example C).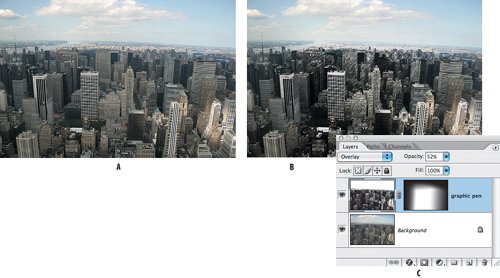 |
EAN: 2147483647
Pages: 93