Container Controls
You saw two container controls, GroupBox and Panel, in the previous chapter. These controls simply group controls together. In this chapter you will look at two more powerful controls: TabControl and Splitter.
Container controls are controls whose primary purpose is to group other controls together. These controls by themselves don't provide much value to the user. Where they shine is that they provide a much better use of Win Form real estate (except the GroupBox control, which really only has the purpose of visually and physically grouping controls together). You saw the improved use of real estate with the Panel control, in that it allowed more controls to be placed in a smaller area of the screen by implementing scroll bars. In this section you'll see how the TabControl and Splitter controls improve on this paradigm.
TabControl
After the complexity of the previous two view controls, it's nice to cover a powerful but easy-to-implement control. You can think of the TabControl control as several forms or, more accurately, TabPages layered on top of each other. The actual TabPage displayed is determined by which TabPage's tab is selected. It's a neat tool to conserve desktop real estate and group common but stand-alone functionality together.
Several properties are associated with the TabControl control, but in most cases you will simply configure the control, assign the appropriate controls to each tab panel, and then forget about it. The internal default functionally of the TabControl is usually good enough that you will not have to interfere with how it works.
The following are some TabControl properties that you might actually work with:
-
Alignment is a TagAlignment enum that represents which side (Top, Left, Right, or Bottom) of the control the tabs of the TabPages will be displayed. The default is Top.
-
Appearance is a TabAppearance enum that represents the appearance of the control's tabs. Possible appearances are Buttons, FlatButtons, and Normal. The default is the standard tab appearance of Normal.
-
HotTrack is a Boolean that represents whether the tab changes color when the mouse passes over it. The default is false, which means that the tab's color will not change when passed over.
-
ImageList is a collection of bitmaps, icons, and metafiles that will be used to display the images on the tab control. If the Image list is null, which is the default, no images are displayed on the control.
-
Multiline is a Boolean that represents whether the tabs can be displayed on multiple lines. The default is false, which forces all tabs to be placed on one line.
-
SelectedTab is a TabPage that represents the currently selected tab. If no page is selected, null is returned.
-
ShowToolTips is a Boolean that represents whether ToolTips are displayed when the mouse passes over the control's tabs. The default is false, meaning no ToolTips are displayed.
-
TabCount is an Int32 that represents the number of tabs found on the control.
-
TabPages is a TabPageCollection that represents all the TabPages that make up the control.
You work with a TabPage class in almost the exact same way you do a Form class, as it has many of the same properties. Really the only difference between a Form and a TabPage is that the TabPage provides a few properties to configure how the actual tab of the TabPage is displayed. Here are those properties:
-
ImageIndex is a zero-based Int32 index to the TabControl::ImageList associated with the current TabPage that represents the position of the image for the tab.
-
Text is a String that represents the text found on the tab.
-
ToolTip is a String that represents the text found in the ToolTip for the tab.
Listing 10-3 is a simple two-page TabControl that displays each tab along the left side of the Form, and has HotTrack and ShowToolTips set on. The tab pages themselves have a different color background and each has a different label displayed within it. I could have used any control(s) I wanted within each tab page, but I didn't want to cloud the issue of building the TabControl.
Listing 10-3: A Simple TabControl
namespace TabControl1 { using namespace System; using namespace System::ComponentModel; using namespace System::Collections; using namespace System::Windows::Forms; using namespace System::Data; using namespace System::Drawing; public _gc class Form1 : public System::Windows::Forms::Form { public: Form1(void) //... protected: void Dispose(Boolean disposing) //... private: System::Windows::Forms::TabControl * tabControl1; private: System::Windows::Forms::TabPage * tabPage1; private: System::Windows::Forms::TabPage * tabPage2; private: System::Windows::Forms::Label * label1; private: System::Windows::Forms::Label * label2; private: System::ComponentModel::Container * components; void InitializeComponent(void) { this->tabControl1 = new System::Windows::Forms::TabControl(); this->tabPage1 = new System::Windows::Forms::TabPage(); this->label1 = new System::Windows::Forms::Label(); this->tabPage2 = new System::Windows::Forms::TabPage(); this->label2 = new System::Windows::Forms::Label(); this->tabControl1->SuspendLayout(); this->tabPage1->SuspendLayout(); this->tabPage2->SuspendLayout(); this->SuspendLayout(); // // tabControl1 // this->tabControl1->Alignment = System::Windows::Forms::TabAlignment::Left; this->tabControl1->Controls->Add(this->tabPage1); this->tabControl1->Controls->Add(this->tabPage2); this->tabControl1->Dock = System::Windows::Forms::DockStyle::Fill; this->tabControl1->HotTrack = true; this->tabControl1->Location = System::Drawing::Point(0, 0); this->tabControl1->Multiline = true; this->tabControl1->Name = S"tabControl1"; this->tabControl1->SelectedIndex = 0; this->tabControl1->ShowToolTips = true; this->tabControl1->Size = System::Drawing::Size(250, 150); this->tabControl1->TabIndex = 0; // // tabPage1 // this->tabPage1->Controls->Add(this->label1); this->tabPage1->Location = System::Drawing::Point(25, 4); this->tabPage1->Name = S"tabPage1"; this->tabPage1->Size = System::Drawing::Size(221, 142); this->tabPage1->TabIndex = 0; this->tabPage1->Text = S"Tab One"; this->tabPage1->ToolTipText = S"This is tab one"; // // label1 // this->label1->Location = System::Drawing::Point(60, 60); this->label1->Name = S"label1"; this->label1->TabIndex = 0; this->label1->Text = S"This is tab one"; // // tabPage2 // this->tabPage2->Controls->Add(this->label2); this->tabPage2->Location = System::Drawing::Point(25, 4); this->tabPage2->Name = S"tabPage2"; this->tabPage2->Size = System::Drawing::Size(221, 142); this->tabPage2->TabIndex = 1; this->tabPage2->Text = S"Tab Two"; this->tabPage2->ToolTipText = S"This is tab two"; // // label2 // this->label2->Location = System::Drawing::Point(60, 60); this->label2->Name = S"label2"; this->label2->TabIndex = 0; this->label2->Text = S"This is tab two"; // // Form1 // this->AutoScaleBaseSize = System::Drawing::Size(6, 15); this->ClientSize = System::Drawing::Size(250, 150); this->Controls->Add(this->tabControl1); this->Name = S"Form1"; this->Text = S"Simple Tab Control"; this->tabControl1->ResumeLayout(false); this->tabPage1->ResumeLayout(false); this->tabPage2->ResumeLayout(false); this->ResumeLayout(false); } }; } The best part about TabControls is that you don't have to know anything about them because Visual Studio .NET's design GUI tool can handle everything for you. The only real issue about TabControls is that there is no TabPage control in the Toolbox view to drag to the TabControl. Instead, to add a TabPage, you need to add it to the TabPages collection property within the TabControl's Properties view.
I think the generated code is pretty self-explanatory. You add the TabPage to the TabControl, add the Label to a TabPage, and finally add the TabControl to the Form.
Figure 10-3 shows what TabControl.exe looks like when you execute it. Unfortunately, you can't see it action in this still image.
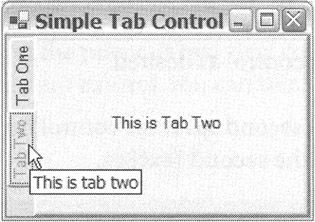
Figure 10-3: A simple TabControl
Splitter
The Splitter is a simple little control that takes two docked controls and allows you to resize them at runtime. You used it in Visual Studio .NET when you adjusted the size of Solution Explorer. It is that little area between the editing area and Solution Explorer that changes the cursor into what Windows calls a VSplit or HSplit cursor, depending on if you split vertically or horizontally.
The Splitter control is one of the few controls where I tell you to use only the design tool for building the control. The reason is that it is far easier to create the control using the tool than by hand. Also, there are no common events that you might likely use.
It is so much easier to build the Splitter with the design tool that I will walk you through the process with Visual Studio .NET. Then, I will just provide the code for those of you who want to try to puzzle your way through building the Splitter by hand.
In the example I use TextBox controls when it comes to what the Splitter splits. Though, this is not a restricting factor. You can use any control. Remember, things like the Panels, ListViews, TreeViews, and TabControls are all controls.
Here is an example of the steps required to add a Splitter, both vertically and horizontally, to your Win Form:
-
Drag and drop a TextBox control from the Toolbox view to the design form and make it multiline.
-
In the Properties view of the TextBox, set the Dock property to Left.
-
Size the TextBox control as desired.
-
Drag and drop a Splitter control from the Toolbox view to the right side of the design form. The Splitter will dock to the left by default, so you do not need to do anything further to the Splitter control.
-
Drag and drop a second TextBox control from the Toolbox view to the right side of the design form and make it multiline.
-
In the Properties view of the TextBox, set the Dock property to Top.
-
Size the TextBox control as desired.
-
Drag and drop a second Splitter control from the Toolbox view to the right and below the second TextBox.
-
In the Properties view of the Splitter, set the Dock property to Top. This will reorient the Splitter to be horizontal below the second TextBox.
-
Drag and drop a third TextBox control from the Toolbox view to the right and below the Splitter and make it multiline.
-
In the Properties view of this TextBox, set the Dock property to Full. This will cause the third TextBox to fill the remaining area of the form.
Listing 10-4 shows the code generated when you follow the preceding steps. More than likely, the locations and sizes of the controls will differ, but that is just because you will size the TextBoxes differently than I did.
Listing 10-4: The Splitter Control
namespace Splitter1 { using namespace System; using namespace System::ComponentModel; using namespace System::Collections; using namespace System::Windows::Forms; using namespace System::Data; using namespace System::Drawing; public _gc class Form1 : public System::Windows::Forms::Form { public: Form1(void) //... protected: void Dispose(Boolean disposing) //... private: System::Windows::Forms::TextBox * textBox1; private: System::Windows::Forms::Splitter * splitter1; private: System::Windows::Forms::TextBox * textBox2; private: System::Windows::Forms::Splitter * splitter2; private: System::Windows::Forms::TextBox * textBox3; private: System::ComponentModel::Container * components; void InitializeComponent(void) { this->textBox1 = new System::Windows::Forms::TextBox(); this->splitter1 = new System::Windows::Forms::Splitter(); this->textBox2 = new System::Windows::Forms::TextBox(); this->splitter2 = new System::Windows::Forms::Splitter(); this->textBox3 = new System::Windows::Forms::TextBox(); this->SuspendLayout(); // // textBox1 // this->textBox1->Dock = System::Windows::Forms::DockStyle::Left; this->textBox1->Location = System::Drawing::Point(0, 0); this->textBox1->Multiline = true; this->textBox1->Name = S"textBox1"; this->textBox1->Size = System::Drawing::Size(120, 300); this->textBox1->TabIndex = 0; this->textBox1->Text = S"textBox1"; // // splitter1 // this->splitter1->Location = System::Drawing::Point(120, 0); this->splitter1->Name = S"splitter1"; this->splitter1->Size = System::Drawing::Size(3, 300); this->splitter1->TabIndex = 1; this->splitter1->TabStop = false; // // textBox2 // this->textBox2->Dock = System::Windows::Forms::DockStyle::Top; this->textBox2->Location = System::Drawing::Point(123, 0); this->textBox2->Multiline = true; this->textBox2->Name = S"textBox2"; this->textBox2->Size = System::Drawing::Size(177, 144); this->textBox2->TabIndex = 2; this->textBox2->Text = S"textBox2"; // // splitter2 // this->splitter2->Dock = System::Windows::Forms::DockStyle::Top; this->splitter2->Location = System::Drawing::Point(123, 144); this->splitter2->Name = S"splitter2"; this->splitter2->Size = System::Drawing::Size(177, 3); this->splitter2->TabIndex = 3; this->splitter2->TabStop = false; // // textBox3 // this->textBox3->Dock = System::Windows::Forms::DockStyle::Fill; this->textBox3->Location = System::Drawing::Point(123, 147); this->textBox3->Multiline = true; this->textBox3->Name = S"textBox3"; this->textBox3->Size = System::Drawing::Size(177, 153); this->textBox3->TabIndex = 4; this->textBox3->Text = S"textBox3"; // // Form1 // this->AutoScaleBaseSize = System::Drawing::Size(6, 15); this->ClientSize = System::Drawing::Size(300, 300); this->Controls->Add(this->textBox3); this->Controls->Add(this->splitter2); this->Controls->Add(this->textBox2); this->Controls->Add(this->splitter1); this->Controls->Add(this->textBox1); this->Name = S"Form1"; this->Text = S"Splitters"; this->ResumeLayout(false); } }; } Keep these two things in mind when you work with Splitters:
-
The order in which you add the controls is important.
-
Docking the controls is the key to successfully getting Splitters to work.
| Caution | I did say any control can be split using the Splitter. Although this is true, working with the Button control doesn't seem to work properly within the design tool. |
Figure 10-4 shows what Splitter.exe looks like when you execute it.
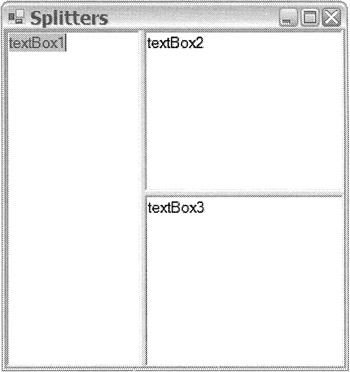
Figure 10-4: A simple Splitter control
EAN: 2147483647
Pages: 169