The Visual Basic .NET Debugging Windows
Directives
6.1 Do not place multiple statements on a single line.
Visual Basic .NET is a robust language whose roots run deep. Many of its current features originate from early forms of Basic such as BASICA and GW-BASIC. While many of these "features" have survived a long time, it's time for some of them to die. One of these features is the ability to use the colon (:) to place multiple statements on a single line.
In the old days of Basic, code was often written on a screen that supported only about 80 characters (across) by 24 lines (down). Frequently, this meant that programmers had to pack as much information as possible into the tiny screen space. Some languages even restricted the number of characters or lines in a program. Whatever the reasons, many programmers adopted the technique of placing multiple statements on a single line. The truly cruel developers didn't just stop at placing two statements on a line, but would often include three or four! What's the harm, you say? Take a look at this procedure:
Dim intXLeg As Integer Dim intYLeg As Integer Dim strCircle As strCircle ' Retrieve the lengths of the legs of the rectangle. intXLeg = Math.Abs(m_rectBound.Right - m_rectBound.Left) : intYLeg = _ Math.Abs(m_rectBound.Bottom - m_rectBound.Top) If (intXLeg = 0) Or (intYLeg = 0) Then Exit Sub With strCircle .Aspect = Math.Abs(intYLeg / intXLeg) : .xCenter = m_rectBound.Left + _ (m_rectBound.Right - m_rectBound.Left) / 2 : .yCenter = _ m_rectBound.Top + (m_rectBound.Bottom - m_rectBound.Top) / 2 ' Calculate the radius based on the longer leg of the rectangle. If intXLeg > intYLeg Then .Radius = intXLeg / 2 Else .Radius = intYLeg / 2 : End If End With
This procedure is inherently complicated. It takes a rectangle and determines, based on the rectangle's coordinates, whether it bounds a valid circle. If so, the specific circle information is stored in the variable strCircle. When multiple statements appear on the same line separated by a colon, it becomes difficult to determine where one statement ends and another begins; complexity is added for no valid reason. Notice the final End If in the procedure. It's tacked onto the same line as the Else clause's code statement. Why? Because it saves vertical space. Not a very good reason in this example, and not a good reason in any other situation. Look at the same code sample with each statement having its own line:
Dim intXLeg As Integer Dim intYLeg As Integer Dim strCircle As strCircle ' Retrieve the lengths of the legs of the rectangle. intXLeg = Math.Abs(m_rectBound.Right - m_rectBound.Left) intYLeg = Math.Abs(m_rectBound.Bottom - m_rectBound.Top) If (intXLeg = 0) Or (intYLeg = 0) Then Exit Sub With strCircle .Aspect = Math.Abs(intYLeg / intXLeg) .xCenter = m_rectBound.Left + _ (m_rectBound.Right - m_rectBound.Left) / 2 .yCenter = m_rectBound.Top + _ (m_rectBound.Bottom - m_rectBound.Top) / 2 ' Calculate the radius based on the longer leg of the rectangle. If intXLeg > intYLeg Then .Radius = intXLeg / 2 Else .Radius = intYLeg / 2 End If End With
The code is still complex, but it is not nearly as difficult to read. When you let each statement assert itself and give each all the space it requires, you write what I call territorial statements. Territorial statements stake their ground and don't give an inch. They don't share a line with any other statement, and they consume as many lines as they need.
6.2 Use the line continuation character.
While many programmers create territorially weak statements by making statements share lines, even more developers create territorially weak statements by not giving them enough lines. One reason for this is that past versions of Visual Basic didn't always support the use of the line continuation character (_) to break long statements into smaller fragments on multiple lines. Many programmers did not adopt the line continuation character when it showed up, and they're still writing mile-long statements that wear out your mouse as you scroll through the statement. If you're still writing these supertanker lines of code, here's a chance to introduce a small change into your programming style that will make your code much easier to read and maintain.
Using the line continuation character is simple. You simply select an appropriate spot in a statement and place the line continuation character in that location, preceded by a space. The line continuation character denotes that the next line of code is part of the current code statement. The benefits of using this character are evident when you use it to break very long SQL statements into multiple lines, as shown here:
strSQL = "SELECT tblAssemblyDetail.*, tblInventory.Description, " & _ "tblInventory.Serials FROM tblInventory RIGHT JOIN " & _ "tblAssemblyDetail ON tblInventory.ItemID = " & _ "tblAssemblyDetail.ItemID WHERE ((tblAssemblyDetail." & _ "Assembly) = """ & Me.ItemID & """) ORDER BY " & _ "tblAssemblyDetail.LineNumber;"
Without the use of the line continuation character, all you'd see in a typical code window is the text that appears on the first line shown here. Thanks to the use of the line continuation character, all six lines displayed in this example actually compose a single code statement; it's a very territorial statement indeed.
When you deal with statements that contain large strings, if you don't enclose the string on each line with quotes, Visual Basic interprets the line continuation character as part of the string and you get a compile error. For instance, the following statement incorrectly uses the line continuation character:
strMessage = "The clouds moved swiftly over the valley, churning _ and rumbling as they threatened the villagers."
This statement simply won't compile. To properly place the statement on multiple lines, you have to concatenate pieces of the string (by using the ampersand), like this:
strMessage = "The clouds moved swiftly over the valley, churning " & _ "and rumbling as they threatened the villagers."
Important
Because the line continuation character denotes a continuation, you can't place end-of-line comments after it.
Practical Applications
6.2.1 Do not exceed 90 characters on a line.
In MS-DOS, you typically had columns of about 80 characters to work with that was it. In Visual Basic .NET, the number of visible characters on a line is determined by the font size and monitor resolution of the developer's machine. Strictly limiting the number of characters on a line to 80 is not necessarily appropriate, nor is writing statements that can be viewed in their entirety only on monitors set to a resolution of 1280 x 1024.
Note
If you're developing on a machine at a resolution of 800 x 600 or less, consider buying a larger monitor and increasing your resolution. Your productivity will increase at a resolution of 1024 x 768 if you have a large enough monitor. A 17-inch monitor is perfect for 1024 x 768 for many developers, although you might consider a 19-inch monitor if you have vision problems.
At 800 x 600, with a code window sized to pretty much fill the screen horizontally, you can fit about 90 characters on a line. At 1024 x 768 under the same circumstances, you can fit quite a bit more, but you shouldn't. Generally, it's best to work with a code window sized smaller than the screen so that you still have access to windows such as the Properties window and, more important, the Solution Explorer window. Add the fact that many people are still using 800 x 600, and you've got a strong case for using about 90 characters as a line length. Depending on the optimum locations to split a statement, you might go slightly over 90 characters or way under 90 characters. It's OK to fall short of 90 characters by 10 or even 20 characters if it makes sense, but you should try to avoid exceeding 90 characters. It would be nice if Visual Basic .NET had an option to place a light gray vertical line in the code window at a specified column so that you could easily see when you approach the maximum length for a statement. Perhaps in a future release
Note
This practical application doesn't include correct/incorrect examples.
6.2.2 Do not right-align multiple-line statements; always split a statement after a space.
It isn't necessary and it's generally not a good idea to break statements so that each successive code line aligns with the right edge of the first line. When you break statements in this fashion, the breaks usually come in inferior locations. In addition, it becomes almost impossible to keep such rigid formatting when you modify a statement. When you break a statement into multiple lines, first find the general location where it would be best to break the statement. Then try to break the statement between reserved words or keywords. If you must break the statement in the middle of a string, try to place the break between words and after a space. By consistently breaking strings after spaces, you reduce the possibility of introducing problems when you modify the string.
Note
You cannot break a statement in some places, such as the middle of a reserved word. If you attempt to split the statement in such a place, you'll receive a syntax error.
Take a look at the statements below. Notice that an effort was made to line up the right sides of the lines. Although it looks pretty, this style is not practical and is prone to error. Notice that the words serial and designated are split. If you make any modifications to the text of this statement, you have to be careful to not leave orphaned letters or sentence fragments. Also, if you make changes and want to preserve the uniformity of the right side, you probably have to reformat some or all of the lines.
Incorrect:
strMessage = "Serial number " & strSerialNumber & "for item """ & _ strItemID & """ is in location " & rstSerials![Location] & _ "." & vbCrLf & "If you continue, the location of this s" & _ "erial number will be changed to the location designate" & _ "d in the transfer."
Correct:
strMessage = "Serial number " & strSerialNumber & "for item """ & _ strItemID & """ is in location " & _ rstSerials![Location] & "." & vbCrLf & "If you " & _ "continue, the location of this serial number will " & _ "be changed to the location designated in the transfer."
If you make a spelling or syntax error in the text of a string, the worst that will probably happen is that you'll be embarrassed when the user sees the text displayed. If you accidentally corrupt the text of a SQL statement, your code might actually fail. Therefore, when you break up long SQL statements (a common task in database applications), you should maintain clear break points for ease of reading and maintenance. This is where the rule of always splitting after spaces gives you the most benefit, but splitting before keywords such as FROM or WHERE is even better. Consider the following code statement:
Statement with an error:
strSQL = "SELECT tblAccounts.*, tblCustomAccount.* FROM" & _ "(tblAccounts INNER JOIN tblAssignedAccGroups ON tblAccounts." & _ "AccountNumber = tblAssignedAccGroups.AccountNumber) " & _ "LEFT JOIN tblCustomAccount ON tblAccounts.AccountNumber = " & _ "tblCustomAccount.AccountNumber WHERE (((" & _ "tblAssignedAccGroups.Group) = """ & _ frmGroups.SelectedGroup & """));" Notice that there is no space at the end of the string at the end of the first line. When concatenated with the second line, the text " FROM(tblAccounts " is created a definite syntax error, but not necessarily an obvious one to spot. There should be a space after the word FROM. Also note how the text on each line starts with a character and not a space. This consistency helps you spot errors and makes it easier to insert new code.
6.2.3 Break between expressions in a statement that performs complicated expression evaluations.
Breaking statements between expressions doesn't just make your code easier to digest (because the entire statement is visible); it can actually make the expression easier for the reader to understand. Consider the following If statement:
If blnMoving And recStart.X = Int(X / intMag) And recStart.Y = _ Int(Y / intMag) ThenEnd If
This statement is split at an acceptable location, which allows the reader to view the entire statement without scrolling, but the statement doesn't make clear exactly what it is evaluating. A more logical place to break the line is between two conditions, as shown below. Note the variation as well. You can place the Boolean operators at the end of each line, but I believe that placing them at the beginning of each line improves clarity. Choose the style that you are most comfortable with and use it consistently.
Correct:
If blnMoving And recStart.X = Int(X / intMag) _ And recStart.Y = Int(Y / intMag) Then
Perhaps even better:
If blnMoving _ And recStart.X = Int(X / intMag) _ And recStart.Y = Int(Y / intMag) Then
Variation:
If blnMoving And _ recStart.X = Int(X / intMag) And _ recStart.Y = Int(Y / intMag) Then
6.3 Indent continuation lines.
There is no hard-and-fast rule for the number of characters to indent continuation lines; you must make a judgment based on the first line of the statement. Here are some general guidelines:
-
When you set a variable to a value, make all continuation lines start at the same indentation as the value portion of the first line.
-
When you split a long procedure heading, indent all continuation lines two tab stops (generally six characters).
-
When you call a procedure, indent continuation lines to the start of the first argument.
-
When you set a variable or property equal to the result of an expression, break the statement just after the equal sign to ensure that as much as possible of the expression remains on one line.
-
When you split a long If statement, indent continuation lines two tab stops (six characters).
Formatting is visual, so think of these indentation guidelines visually. By comparing good and bad indentation in the following practical applications, you'll gain a better understanding of these indentation guidelines.
Note
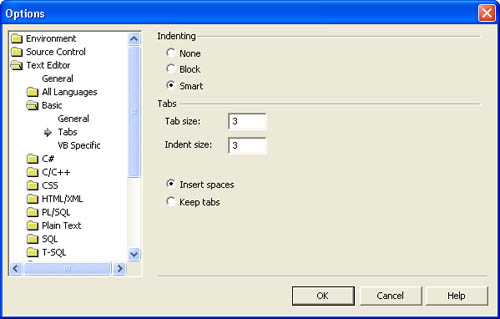
To control the indented location of the continuation lines, you have to set your Visual Studio .NET options to insert spaces instead of tabs. To do this, choose Options from the Tools menu, click Text Editor, click Basic, and then click the Tabs option. You'll then be shown a page with the options to Insert spaces or Keep tabs; choose Insert spaces.
Practical Applications
6.3.1 When you set a variable to a value, make all continuation lines start at the same indentation as the value portion of the first line.
If you are setting the variable to the result of a complicated expression, it might make more sense to break a line between subexpressions.
Incorrect:
strSQL = "SELECT tblAssemblyDetail.*, tblInventory.Description, " & _ "tblInventory.Serials FROM tblInventory RIGHT JOIN " & _ "tblAssemblyDetail ON tblInventory.ItemID = " & _ "tblAssemblyDetail.ItemID WHERE ((tblAssemblyDetail.Assembly) = " & _ "'Package A') ORDER BY tblAssemblyDetail.LineNumber;"
Also incorrect:
strSQL = "SELECT tblAssemblyDetail.*, tblInventory.Description, " & _ "tblInventory.Serials FROM tblInventory RIGHT JOIN " & _ "tblAssemblyDetail ON tblInventory.ItemID = tblAssemblyDetail." & _ "ItemID WHERE ((tblAssemblyDetail.Assembly) = 'Package A') " & _ "ORDER BY tblAssemblyDetail.LineNumber;"
Correct:
strSQL = "SELECT tblAssemblyDetail.*, tblInventory.Description, " & _ "tblInventory.Serials FROM tblInventory RIGHT JOIN " & _ "tblAssemblyDetail ON tblInventory.ItemID = " & _ "tblAssemblyDetail.ItemID WHERE ((tblAssemblyDetail." & _ Assembly) = 'Package A') ORDER BY " & _ "tblAssemblyDetail.LineNumber;"
Best; notice that breaks occur before keywords:
strSQL = "SELECT tblAssemblyDetail.*, tblInventory.Description, " & _ "tblInventory.Serials " & _ "FROM tblInventory RIGHT JOIN " & _ "tblAssemblyDetail ON tblInventory.ItemID = " & _ "tblAssemblyDetail.ItemID " & _ "WHERE ((tblAssemblyDetail.Assembly) = 'Package A') " & _ "ORDER BY tblAssemblyDetail.LineNumber;"
6.3.2 When you split a long procedure heading, indent all continuation lines two tab stops (generally six characters).
Alternatively, you can indent all lines after the first line to the start of the first parameter. Either style is acceptable. Choose the one you're most comfortable with and use it consistently.
Incorrect:
Public Sub CreateNewNote(accountNumber As Long, _ noteDate As String, startTime As String, note As String, _ contactNumber As Long, repNumber As Long) ' Code starts here...
Also incorrect:
Public Sub CreateNewNote(accountNumber As Long, _ noteDate As String, startTime As String, note As String, _ contactNumber As Long, repNumber As Long) ' Code starts here...
Correct:
Public Sub CreateNewNote(accountNumber As Long, _ noteDate As String, startTime As String, note As String, _ contactNumber As Long, repNumber As Long) ' Code starts here...
Alternate:
Public Sub CreateNewNote(accountNumber As Long, _ noteDate As String, startTime As String, _ note As String, contactNumber _ As Long, repNumber As Long) ' Code starts here...
6.3.3 When you call a procedure, indent all continuation lines to the start of the first argument.
The name of the procedure being called will clearly stand out from the arguments being passed to it. When you split a statement that calls a very long procedure name that accepts many arguments, it might be impractical to indent to the first argument. In this case, indent two tab stops.
Incorrect:
Call CreateNewNote (rstAccount![AccountNumber], DateTime.Now(), _ strNote, lngContactNumber, rstAccount![RepNumber]) Also incorrect:
Call CreateNewNote (rstAccount![AccountNumber], DateTime.Now(), _ strNote, lngContactNumber, rstAccount![RepNumber]) Correct:
Call CreateNewNote (rstAccount![AccountNumber], DateTime.Now(), _ strNote, lngContactNumber, rstAccount![RepNumber]) 6.3.4 When you set a variable or property equal to the result of an expression, break the statement just after the equal sign to ensure that as much of the expression as possible remains on one line.
If the statement consists of many expressions, it might be better to break the statement between expressions, as discussed earlier.
Incorrect:
grdDetail.Columns("CanBuild").Text = CStr(lngQuantityLocation / _ Clng(grdDetail.Columns("Needed").Text)) Correct:
grdDetail.Columns("CanBuild").Text = _ CStr(lngQuantityLocation / CLng(grdDetail.Columns("Needed").Text)) 6.3.5 When you split a long If statement, indent continuation lines two tab stops (six characters).
Statements within the If construct are indented a single tab stop, so using two tab stops for the continuation lines offers visual clarity. Notice the use of a blank line after the If statement to separate the subordinate lines from the actual block of statements within the If End If construct.
Incorrect:
If (lngCanBuild < lngMaxCanBuild) Or _ (lngMaxCanBuild < 0) Then lngMaxCanBuild = lngCanBuild End If
Also incorrect:
If (lngCanBuild < lngMaxCanBuild) Or _ (lngMaxCanBuild < 0) Then lngMaxCanBuild = lngCanBuild End If
Correct:
If (lngCanBuild < lngMaxCanBuild) Or _ (lngMaxCanBuild < 0) Then lngMaxCanBuild = lngCanBuild End If
Splitting long statements to fit on multiple lines is an easy way to make your code easier to read and maintain. When a long statement appears on multiple lines, you can see the entire statement without any scrolling. When a statement is left on a single line, like a long freight train whose locomotive and caboose you can't see at the same time, making changes to the line is overly difficult; you can't see the full statement, nor can you see the previous or the next statement.
6.4 Use indentation to show organizational structure.
If you want to make a complicated procedure more difficult to comprehend, don't indent anything. Conversely, to make a complex procedure easier to understand, indent appropriately. Indentation gives the reader a visual representation of the organization of statements that perform unified tasks, much like a flowchart is a visual representation of a series of events. Indentation of code closely mimics the behavior of indentation in an outline or a table of contents because elements are placed into an ordered hierarchy.
While you might reject certain programming standards for reasons such as the number of developers working on a project and the size of the program, correct indentation is always required. Visual Basic has always made it easy to indent code using predefined tab stops. These tab stops show the organizational structure of a procedure by visually outlining subordinate statements and the nesting of loops and decision blocks. Although Visual Basic lets you set your tab stops to any number of characters, the accepted standard is three characters. If you use fewer than three characters, visual definition is reduced. Using more than three wastes too much space, especially in complicated code with many nested constructs.
Note
Visual Basic .NET includes a new feature that automatically indents your code for you. You might view this feature as either a great time-saver or a time-waster, depending on how you write code. In general, the autoindentation feature works very well, and I encourage you to use it. If you prefer to control your own destiny, turn the feature off and consider manually applying the techniques discussed in this section.
You define the number of characters in a tab stop, as well as turning on and off the autoindenting feature, by using the Visual Basic .NET Options dialog box. To view this dialog box, choose Options from the Tools menu. To edit the tab settings, open the Text Editor folder and then the Basic folder, and click Tabs as shown in Figure 6-1. Note that when Smart indenting is chosen, Visual Basic .NET automatically applies indenting for you.
Figure 6-1. Use the Options dialog box to control indenting behavior.
Generally, the outer level of code (that is, the leftmost code, which is the highest in the hierarchy) should be indented one tab stop from the left side of the code window. This allows the heading of the procedure and its termination statement (such as End Sub or End Function) to clearly define the skeleton of the procedure, as shown here:
Private Function NoZeroLengthString(ByVal strText As Object) As Object ' Purpose : Convert a zero-length string to a Null. ' Accepts : strText - the text that might or might not be a ' zero-length string. ' Returns : If strText is a zero-length string, returns Null. ' Otherwise, returns the starting string. ' Determine whether the received string is a ' zero-length string. If CStr(strText) = "" Then Return System.DBNull.Value Else Return strText End If End Function
Each successive nested construct should be indented a single tab stop beyond the preceding level. An end-of-construct statement such as End If, Loop, or Next should be at the same indentation level as its beginning-of-construct statement, as shown here:
For intIndex = 0 To Me.Controls.Count - 1 ' Check the name of each control in the collection. If Me.Controls(intIndex).Name = strSearchName Then m_blnControlFound = True Exit Sub End If Next intIndex
Below is a list of situations in which you should indent. This list is not all-inclusive, but it catalogs most of the situations in which indentation is necessary. As important as it is to know when and how to indent, it's equally important to understand why you should indent at these locations so that you can make judgment calls in other circumstances. I'll illustrate these reasons in the following practical applications.
You should indent
-
After an If statement when an End If is used
-
After an Else statement
-
After a Select Case statement
-
After a Case statement
-
After a Do statement
-
Successive lines of a statement that has been split with the line continuation character
-
After a With statement
Practical Applications
6.4.1 Indent after an If statement when an End If is used.
The body of an If End If block is perhaps the most common place for indentation. Because the body statements are subordinate to the If statement itself, they are indented. All end-of-construct statements such as End If appear at the same level of indentation as the statement that begins the construct.
Incorrect:
If txtLocation.Text.Substring(0, 4) = "Fax:" Then MAPIMess.RecipAddress = "FAX:" & txtRecipient.Text & "@" & _ strFaxNumber End If
Correct:
If txtLocation.Text.Substring(0, 4) = "Fax:" Then MAPIMess.RecipAddress = "FAX:" & txtRecipient.Text & "@" & _ strFaxNumber End If
6.4.2 Indent after an Else statement.
Because the Else statement has the same level of importance as the If and End If statements, it has the same level in the hierarchy and therefore the same level of indentation. The following code shows the statements that are subordinate to the Else statement, just as the statements following the If statement are subordinate to the If statement itself.
Incorrect:
If InStr(1, txtLocation.Text, "@") Then MAPIMess.RecipAddress = "SMTP:" & txtLocation.Text Else MAPIMess.RecipAddress = "MS:" & strServer & "/" & txtLocation.Text End If
Correct:
If InStr(1, txtLocation.Text, "@") Then MAPIMess.RecipAddress = "SMTP:" & txtLocation.Text Else MAPIMess.RecipAddress = "MS:" & strServer & "/" & txtLocation.Text End If
6.4.3 Indent after a Select Case statement.
A Select Case construct has a beginning-of-construct statement and an end-of-construct statement. When two statements are used to begin and end a construct, the code block between the two statements should be indented.
Incorrect:
Select Case objTool.Name Case Is = "Save" Case Is = "Exit" End Select
Correct:
Select Case objTool.Name Case Is = "Save" Case Is = "Exit" End Select
6.4.4 Indent after a Case statement.
It's not enough to indent the Case statements themselves in a Select Case construct. Whereas the Case statements are subordinate to the Select Case statement, the statements that form the body of a Case statement are subordinate to the Case statement itself and therefore should be indented.
Incorrect:
Select Case objTool.Name Case Is = "Save" Call SaveDocument Case Is = "Exit" Me.Close() End Select
Correct:
Select Case objTool.Name Case Is = "Save" Call SaveDocument Case Is = "Exit" Me.Close() End Select
6.4.5 Indent after a Do statement.
The Do Loop structure has both a beginning-of-construct and an end-of-construct statement, so its body of statements must be indented. Correctly indenting the body of statements within a loop construct clearly shows the reader the flow of execution produced by the loop.
Incorrect:
Do While Not rstSales.EOF Call AddItemToList(rstSales![Category]) rstSales.MoveNext Loop
Correct:
Do While Not rstSales.EOF Call AddItemToList(rstSales![Category]) rstSales.MoveNext Loop
6.4.6 Indent successive lines of a statement that has been split with the line continuation character.
No single rule applies to the indentation of continuation lines. The amount of indentation is determined by the statement itself, as I described earlier in this chapter.
Incorrect:
strSQL = "SELECT tblAssemblyDetail.*, tblInventory.Description, " & _ "tblInventory.Serials FROM tblInventory RIGHT JOIN " & _ "tblAssemblyDetail ON tblInventory.ItemID = " & _ "tblAssemblyDetail.ItemID WHERE ((tblAssemblyDetail.Assembly) = " & _ "'Package A') ORDER BY tblAssemblyDetail.LineNumber;"
Also incorrect:
strSQL = "SELECT tblAssemblyDetail.*, tblInventory.Description, " & _ "tblInventory.Serials FROM tblInventory RIGHT JOIN " & _ "tblAssemblyDetail ON tblInventory.ItemID = tblAssemblyDetail." & _ "ItemID WHERE ((tblAssemblyDetail.Assembly) = 'Package A') " & _ "ORDER BY tblAssemblyDetail.LineNumber;"
Correct:
strSQL = "SELECT tblAssemblyDetail.*, tblInventory.Description, " & _ "tblInventory.Serials FROM tblInventory RIGHT JOIN " & _ "tblAssemblyDetail ON tblInventory.ItemID = " & _ "tblAssemblyDetail.ItemID WHERE ((tblAssemblyDetail." & _ "Assembly) = 'Package A') ORDER BY " & _ "tblAssemblyDetail.LineNumber;"
Best:
strSQL = "SELECT tblAssemblyDetail.*, tblInventory.Description, " & _ "tblInventory.Serials " & _ "FROM tblInventory RIGHT JOIN tblAssemblyDetail ON " & _ "tblInventory.ItemID = tblAssemblyDetail.ItemID " & _ "WHERE ((tblAssemblyDetail.Assembly) = 'Package A') " & _ "ORDER BY tblAssemblyDetail.LineNumber;"
6.4.7 Indent after a With statement.
With statements reduce the amount of code necessary to access multiple members of an object. Using With blocks to access many members of an object improves readability and can increase the speed of the application. All statements between With and End With are indented a single tab stop from the level of indentation of the beginning With statement.
Incorrect:
With objSorter .Clear .AddItem "Ascending" .AddItem "Descending" .Sort End With
Correct:
With objSorter .Clear .AddItem "Ascending" .AddItem "Descending" .Sort End With
6.4.8 Indent code that is subordinate to a line label.
Visual Basic .NET doesn't allow you to indent labels in fact, it always shifts them to the extreme left in the code window. This works to your advantage because the labels within the procedure will stand out because they're flush left in the code window (as shown in the following code). Treat code under each label as top-level code by indenting a single tab stop from the start of the procedure definition (which happens to be two tab stops in from the label itself), and indent subordinate statements according to the other practical applications in this section.
Note
This practical application doesn't include correct/incorrect examples.
Note
Chapter 9, "Controlling Code Flow," discusses keeping GoTo statements to a bare minimum. If you use structured exception handling in place of the outdated On Error GoTo approach, which I discuss in Chapter 10, "Exception Handling," you'll rarely, if ever, need to use a line label. In fact, the following example illustrates indentation for labels, but this procedure would be better written using a Try Finally block and the new Return statement.
Private Function NoZeroLengthString(ByVal strText As Object) _ As Object ' Purpose : Convert a zero-length string to a Null. ' Accepts : strText - the text that might or might not be a ' zero-length string. ' Returns : If strText is a zero-length string, returns ' Null. Otherwise, returns the starting string. ' Determine whether the received string is a ' zero-length string. If CStr(strText) = "" Then NoZeroLengthString = System.DBNull.Value Else NoZeroLengthString = strText End If PROC_EXIT: ' Perform clean-up code here... End Function
More Information
The indentation of code comments has its own set of directives and is discussed in Chapter 7.
6.5 Indent code within the Declarations section of a module to show subordination.
Code written in the Declarations section of a module is treated differently from procedure code. Code within a Declarations section is considered to be at the same level in the hierarchy as procedure definitions. Consequently, such code is indented one tab stop from the left side of the code window. However, the indenting of code to show subordination is still applicable. The most notable circumstances are the declarations of enumerations and structures. The statements that make up the body of these declarations should be indented a single tab stop from the beginning and ending statements, as shown in the following practical applications.
Practical Applications
6.5.1 Indent the bodies of all structure declarations.
Structure declarations are similar in formation to procedures. Just as the body of a procedure is indented a single tab stop, so is the body of a structure declaration.
Incorrect:
Public Structure RECT Dim Left As Long Dim Top As Long Dim Right As Long Dim Bottom As Long End Structure
Correct:
Public Structure RECT Dim Left As Long Dim Top As Long Dim Right As Long Dim Bottom As Long End Structure
6.5.2 Indent the bodies of all enumeration declarations.
Enumeration declarations are similar to structure declarations and are formatted in the same way. The body of an enumeration declaration is indented a single tab stop.
Incorrect:
Public Enum AVIFormat FileCopy = 0 FileDelete = 1 FileDeleteToRecycle = 2 FileMove = 3 End Enum
Correct:
Public Enum AVIFormat FileCopy = 0 FileDelete = 1 FileDeleteToRecycle = 2 FileMove = 3 End Enum
6.6 Use white space to group related statements.
White space isn't evil. In earlier days of programming, you had to make your code physically as small as possible. This generally meant eliminating all but the absolutely necessary white space. Those days are gone, and strategically placed blank lines make code much easier to follow and should be used appropriately.
Constructing procedures is not unlike writing a document. When you write a document, you group related sentences into paragraphs. If a sentence doesn't make sense within a paragraph, it's moved to a different paragraph or placed in a bulleted or numbered list. Code within a procedure is similar in that related statements generally appear in groups. Frequently, a code statement stands somewhat autonomously between two groups or other autonomous statements. Using blank lines to separate groups of related statements and autonomous statements makes the code easier to read and to analyze.
Many programmers use blank lines sporadically, placing them in somewhat random locations. Blank lines should clearly exhibit their purpose by appearing in logical locations.
In general, you should insert a blank line
-
Before and after each If Then construct (specifically, before the comment in front of the If statement)
-
Before and after each Select Case construct
-
Before and after each loop
-
After declaring a block of variables
-
Between groups of statements that perform unified tasks
Tip
You should insert two blank lines between procedures.
I'll discuss each of these situations in detail in the following practical applications.
Practical Applications
6.6.1 Insert a blank line before and after each If Then construct (specifically, before the comment in front of the If statement).
The If Then construct signifies that a decision is being made that affects the flow of execution. This decision is very much an independent thought even though it might be related to the processes surrounding it. When you debug code, you often scan the code for If statements to determine where the flow of execution changed unexpectedly. If you don't use blank lines before an If statement, it's not as apparent to the reader that a decision is being made.
Incorrect:
Private Sub ReplaceDoubleQuotes() Dim intLocation As Integer ' If the user hasn't entered any text, get out. If txtInput.Text.Length = 0 Then Exit Sub ' Determine whether a double quote (") appears in the string. intLocation = InStr(1, txtInput.Text, ControlChars.Quote) ' If intLocation > 0 there is a double quote. Replace with ' two single quotes. If intLocation > 0 Then txtInput.Text = txtInput.Text.Substring(0, intLocation - 1) & _ "''" & txtInput.Text.Substring(intLocation) End If End Sub
Correct:
Private Sub ReplaceDoubleQuotes() Dim intLocation As Integer ' If the user hasn't entered any text, get out. If txtInput.Text.Length = 0 Then Exit Sub ' Determine whether a double quote (") appears in the string. intLocation = InStr(1, txtInput.Text, ControlChars.Quote) ' If intLocation > 0 there is a double quote. Replace with ' two single quotes. If intLocation > 0 Then txtInput.Text = txtInput.Text.Substring(0, intLocation - 1) & _ "''" & txtInput.Text.Substring(intLocation) End If End Sub
6.6.2 Insert a blank line before and after each Select Case construct.
Like the If statement discussed above, Select Case statements adjust the flow of execution. Blank lines help isolate the decision and make the code more readable. To further increase clarity, place a blank line before every Case statement except the first one.
Incorrect:
Private Sub ToolbarItemSelected(ByVal intIndex As Integer) Const c_cmdOK As Integer = 0 Const c_cmdCancel As Integer = 1 ' Determine which button was clicked. Select Case intIndex Case Is = c_cmdOK Call SaveDocument() Me.Close() Case Is = c_cmdCancel Me.Close() End Select End Sub
Correct:
Private Sub ToolbarItemSelected(ByVal intIndex As Integer) Const c_cmdOK As Integer = 0 Const c_cmdCancel As Integer = 1 ' Determine which button was clicked. Select Case intIndex Case Is = c_cmdOK Call SaveDocument() Me.Close() Case Is = c_cmdCancel Me.Close() End Select End Sub
6.6.3 Insert a blank line before and after each loop.
Loops can be difficult to understand. When you debug a procedure that has one or more loops, it's imperative that the loops be easy to spot in code. Placing a blank line in front of and after each looping construct clearly distinguishes the loop from surrounding code.
Incorrect:
Public Function UnformatPhoneNumber(ByVal phoneNumber As String) _ As String ' Purpose : Strip all non-numeric values from a phone number ' and return the result. Dim intCounter As Integer Dim strUnformatted As String ' If no phone number is passed in, get out. If phoneNumber.Length = 0 Then Return "" ' Remove all non-numeric characters from the phone number. For intCounter = 1 To phoneNumber.Length If IsNumeric(Mid(phoneNumber, intCounter, 1)) Then ' Add this to the unformatted string strUnformatted = strUnformatted & _ Mid(phoneNumber, intCounter, 1) End If Next intCounter Return strUnformatted End Function
Correct:
Public Function UnformatPhoneNumber(ByVal phoneNumber As String) _ As String ' Purpose : Strip all non-numeric values from a phone number ' and return the result. Dim intCounter As Integer Dim strUnformatted As String ' If no phone number is passed in, get out. If phoneNumber.Length = 0 Then Return "" ' Remove all non-numeric characters from the phone number. For intCounter = 1 To phoneNumber.Length ' Look for numeric characters. If IsNumeric(Mid(phoneNumber, intCounter, 1)) Then ' Add this to the unformatted string strUnformatted = strUnformatted & _ Mid(phoneNumber, intCounter, 1) End If Next intCounter Return strUnformatted End Function
6.6.4 Insert a blank line after declaring a block of variables.
If many variables are declared in a procedure or a module, consider using a blank line to separate each group of variables that are declared as the same data type.
Incorrect:
Private Sub SampleProcedure() Dim strLabelFile As String Dim strSQL As String Dim strOutput As String Dim strHeader As String Dim intFieldIndex As Integer Dim intFileNumber As Integer Dim lngAccountsDumped As Long End Sub
Correct:
Private Sub SampleProcedure() Dim strLabelFile As String Dim strSQL As String Dim strOutput As String Dim strHeader As String Dim intFieldIndex As Integer Dim intFileNumber As Integer Dim lngAccountsDumped As Long End Sub
Also correct:
Private Sub SampleProcedure() Dim strLabelFile As String Dim strSQL As String Dim strOutput As String Dim strHeader As String Dim intFieldIndex As Integer Dim intFileNumber As Integer Dim lngAccountsDumped As Long End Sub
6.6.5 Insert a blank line between groups of statements that perform unified tasks.
Good code should consist of logically sequenced processes or groups of related statements. These sections should be immediately visible to the reader.
Incorrect:
Private Function DeleteTask(ByVal lngTaskNumber As Long, _ ByVal blnGetConfirmmation As Boolean, _ Optional ByVal _ blnPromptToCreateJournalEntry _ As Boolean = True) As Boolean ' Purpose : Delete a task. ' Accepts : lngTaskNumber - Task identifier to delete. ' blnGetConfirmmation whether to get ' confirmation from the user. ' blnPromptToCreateJournalEntry - whether to ' create a journal entry for the deletion. Dim objTask As Task ' Get confirmation if required. If blnGetConfirmmation Then If MessageBox.Show("Delete the selected task?", _ "Confirm Delete", _ MessageBoxButtons.YesNo, _ MessageBoxIcon.Question) = _ DialogResult.No Then Return False End If End If ' Create a new task object. objTask = New Task() ' Attempt to find the specified task. If objTask.RetrieveTask(lngTaskNumber) Then ' The task has been found; delete it. Return objTask.DeleteTask(blnPromptToCreateJournalEntry) End If End Function
Correct:
Private Function DeleteTask(ByVal lngTaskNumber As Long, _ ByVal blnGetConfirmmation As Boolean, _ Optional ByVal _ blnPromptToCreateJournalEntry _ As Boolean = True) As Boolean ' Purpose : Delete a task. ' Accepts : lngTaskNumber - Task identifier to delete. ' blnGetConfirmmation whether or not to get ' confirmation from the user. ' blnPromptToCreateJournalEntry - whether or not to ' create a journal entry for the deletion. Dim objTask As Task ' Get confirmation if required. If blnGetConfirmmation Then If MessageBox.Show("Delete the selected task?", _ "Confirm Delete", _ MessageBoxButtons.YesNo, _ MessageBoxIcon.Question) = _ DialogResult.No Then Return False End If End If ' Create a new task object. objTask = New Task() ' Attempt to find the specified task. If objTask.RetrieveTask(lngTaskNumber) Then ' The task has been found; delete it. Return objTask.DeleteTask(blnPromptToCreateJournalEntry) End If End Function
6.6.6 Insert two blank lines between procedures.
Visual Basic .NET displays all procedures in a single module, much like you'd view paragraphs in a Microsoft Word document. To make code easier to read, always insert two blank lines between procedures just like you would put space between two paragraphs.
Blank lines are sometimes considered a minor detail because their appearance does not directly affect the behavior of compiled code. When Visual Basic compiles a project, the compiler strips all unnecessary white space, so Visual Basic couldn't care less whether you use white space in your procedures. But white space isn't for Visual Basic's benefit it's for your benefit and for the benefit of those who have to review and maintain your code.
Note
This practical application doesn't include correct/incorrect examples.
6.7 Create collapsible code regions to create more manageable code.
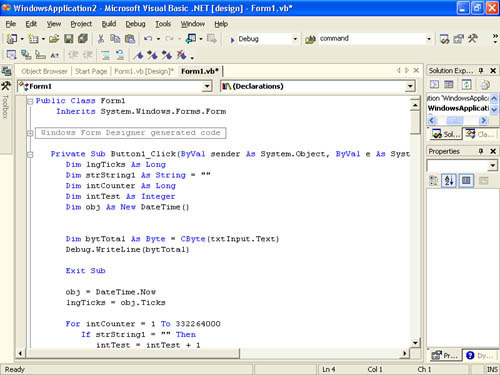
Visual Basic .NET includes a handy new feature that allows you to define regions of code that can be collapsed and expanded within the code editor. You've probably already experienced collapsible code if you've dug into a form class and explored the Windows Form Designer generated code, which appears collapsed by default. (See Figure 6-2.) When you click the plus sign (+) next to collapsed code, it expands so that you can view and edit it.
Figure 6-2. Visual Basic .NET automatically creates some collapsible code regions.
To define your own collapsible code, you create regions by using the #Region and #End Region compiler directives. You cannot create regions within a procedure regions must encapsulate entire procedures. When you define a region, you name it like this:
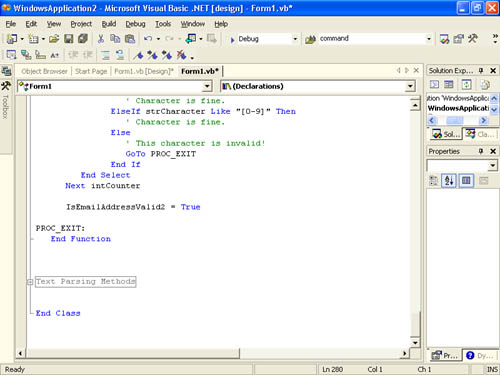
#Region "Text Parsing Methods" When the region is collapsed, the text provided in the region name appears in a rectangle next to a plus sign. In Figure 6-3, you can see a custom-defined region. Figure 6-4 shows you what the same module looks like with the region collapsed.
Figure 6-3. Use the #Region directive to create your own collapsible code.
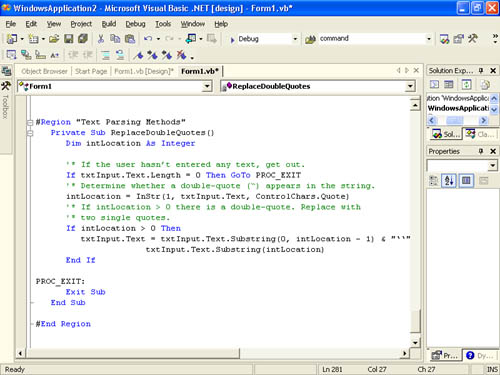
Figure 6-4. Collapsible code can simplify complex or large modules.
You should create custom regions to group related procedures. For example, you might choose to create a region to hold all routines related to painting on a form, or you might choose to create a region containing procedures that need to be tested. There are a variety of ways to use regions, so feel free to be creative with them. Just remember, the ultimate goal of defining regions is to create more readable code.
EAN: 2147483647
Pages: 84