Fax Administration
Windows XP Professional provides a complete fax management system. It includes the ability to create, send, receive, monitor, view, print, and archive faxes. It also provides a fax cover page editor. Windows XP treats fax devices like print devices. Both print devices and fax devices are configured and managed from the Printers and Faxes folder. However, Windows XP handles faxes in much the same way that Outlook Express manages e-mail. The Windows Fax Console, which is the main Fax user interface, looks and operates a lot like Outlook Express.
Windows XP Professional's Fax application consists of a collection of different components, including:
-
The Fax Console. The primary Fax application interface, which provides access to stored faxes and other fax tools
-
The Fax Configuration Wizard. Configures Fax application settings
-
The Send Fax Wizard. Assists the creation and delivery of new faxes
-
The Fax Monitor. Monitors the status of incoming and outgoing faxes
-
The Fax Cover Page Wizard. Creates and modifies custom fax cover pages
Windows XP Fax provides the ability to send faxes in a number of different ways, including:
-
Using the Fax Console
-
From any Windows application that can submit print jobs
-
From a graphics scanner
Unless a previous version of Windows was upgraded to Windows XP Professional that already had a fax application installed, the Windows XP Professional Fax application is not installed by default. In order to install and use the Fax application, the following resources are required:
-
A dial-up fax modem
-
A connection to a telephone line
| Note | For information on how to install a dial-up modem, refer to "Installing a Modem" in Chapter 15, Supporting Mobile Users. |
The Fax application automatically detects any dial-up fax modem and configures itself to work with the modem so that it can send faxes if such a device is already present when the application is installed. However, the administrator must manually configure the Fax application in order to allow it to receive faxes.
| Note | If more than one fax device is installed on the computer, the Fax application should detect them all; however, it can only be configured to use one local fax device. |
Installing and Administering the Fax Application
In order to use the Windows XP Professional Fax application, you must first install it. In order to install it, the administrator must have access to the Windows XP Professional CD. The following procedure outlines the steps involved in installing the Fax application.
-
Click on Start/Control Panel and then click on Add or Remove Programs. The Add or Remove Programs dialog appears.
-
Click on the Select Add/Remove Windows Components icon. The Windows Components Wizard appears.
-
Select Fax Services from the list of component software. Click on Next.
-
Insert the Windows XP CD when prompted.
-
Click on Finish.
-
Close the Add Remove Programs dialog by clicking on Close.
| Note | The Fax application can also be installed by clicking on the Set up faxing link in the Printer Tasks section on the left-hand side of the Printer and Faxes dialog. |
Working with the Fax Console
The Fax Console, shown in Figure 5.2, is the main interface for working with faxes. To open it, click on Start/All Programs/Accessories/Communications/Fax and then Fax Console.
In order to use the Fax Console, it must first be configured. The first time that the Fax Console is accessed, the Fax Configuration Wizard is started. The following procedure outlines the steps involved in configuring the fax console.
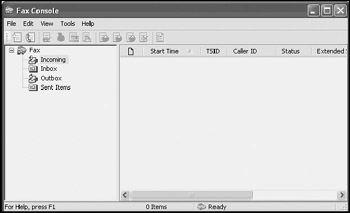
Figure 5.2: The Fax Console is the primary interface for working with faxes
-
Click on Next when prompted by the Fax Configuration Wizard.
-
The wizard asks for information about the person setting up the Fax application, including location and contact information, as shown in Figure 5.3. Supply the requested information and click on Next.
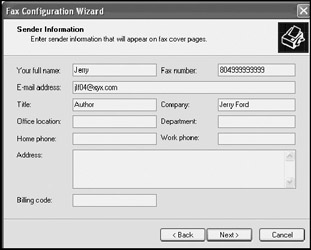
Figure 5.3: The Fax Configuration Wizard collects sender information -
The next page displayed by the wizard requires selection of the fax device that will be used by the Fax application, as shown in Figure 5.4. If more than one fax device is installed on the computer, select the one that should be used from the Please select the fax device drop-down list. The Fax application is configured to send faxes by default. To allow it to receive faxes, select Enable Receive. This will then enable the following options:
-
Manual answer
-
Automatically answer after __ rings
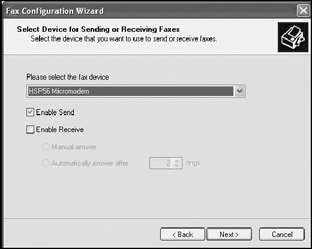
Figure 5.4: Configuring whether the fax device can send or receive faxesIf necessary, select and configure the appropriate option and click on Next.
-
-
The wizard next asks for a TSID (Transmitting Subscriber Identification), as shown in Figure 5.5. This number normally consists of the fax number and a name. Enter a TSID and click on Next.
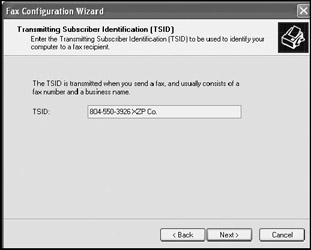
Figure 5.5: The TSID usually identifies the fax device owner and fax numberNote The TSID is often displayed on the receiving fax device and provides a means of determining who is sending the fax while it is being received.
-
Next, the wizard asks for a CSID (Called Subscriber Identification). Like the TSID, the CSID normally consists of a fax number and a name. Enter a CSID and click on Next.
-
The wizard next asks for information about how to handle incoming faxes, as shown in Figure 5.6. Select the Print in option to specify a printer and automatically print the incoming fax. Select the Store a copy in a folder option to save the fax in a specified folder. Select an option and click on Next.
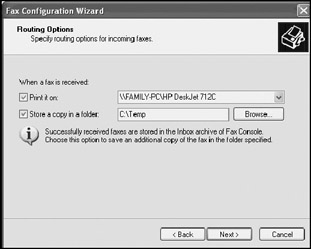
Figure 5.6: Tell the Fax Configuration Wizard what to do when an incoming fax is received -
The wizard displays a summary of all the information that it has collected. Verify that everything is correct and click on Finish.
The Fax Console appears as soon as the Fax Configuration Wizard closes. The left-hand side of the Fax Console displays a list of folders that are used to manage faxes. This list includes the following folders.
-
Incoming. Holds an incoming fax as it is being received
-
Inbox. Holds all faxes received faxes
-
Outbox. Holds faxes that are waiting to be sent
-
Sent items. Holds copies of all sent faxes
-
Working with Individual Faxes
The right-hand side of the Fax Console displays a list of the faxes stored in a particular folder. Double-click on a fax entry to view it using the Windows Picture and Fax Viewer, as demonstrated in Figure 5.7.
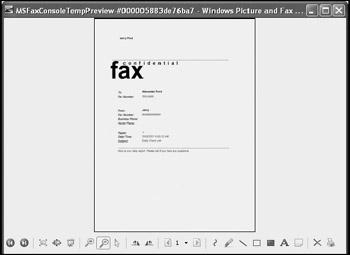
Figure 5.7: The Windows Picture and Fax Viewer is used to display faxes
Right-click on any individual fax to manage it. Available options include:
-
View. Displays the fax using the Windows Picture and Fax Viewer
-
Delete. Removes the fax from the folder
-
Save As. Saves a copy of the fax as a .TIF file
-
Mail To. Sends a copy of the fax as an e-mail attachment
-
Print. Prints the fax
-
Pause. Pauses an incoming or outgoing fax
-
Resume. Resumes a paused incoming or outgoing fax
-
Restart. Restarts a failed fax transmission
-
Properties. Displays fax document properties
Sending a Fax
The Windows XP Fax application allows faxes to be sent in a number of different ways, including:
-
Using the Fax Console
-
From a Windows application
-
Directly from a scanning program
The Fax Console allows for the transmission of single page faxes in which the fax cover sheet is also used to deliver the fax message. The following procedure outlines the steps involved in sending a fax using the Fax Console.
-
Click on Start/All Programs/Accessories/Communications/Fax and then Select Fax Console. The Fax Console opens.
-
Click on the Send a fax option on the File menu. The Send Fax Wizard starts.
-
Click on Next.
-
The Recipient Information screen is displayed, as shown in Figure 5.8. Type the name and fax number of the fax recipient and click on Add.
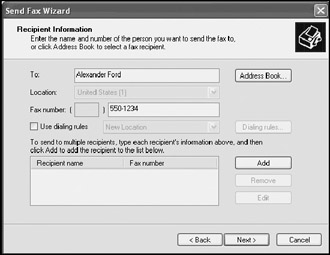
Figure 5.8: Specify the names and fax number of the individuals who are to receive the faxRepeat this step to add as many recipients as necessary and then click on Next.
-
The Preparing the Cover Page screen is displayed next, as shown in Figure 5.9. Select the type of cover page to be used from the Cover page template drop-down list and then type a subject in the Subject line field. Type the fax message in the Note field and click on Next.
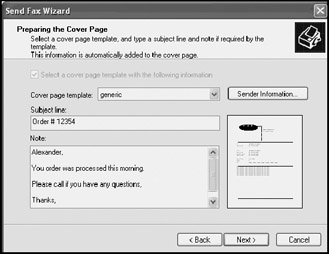
Figure 5.9: Type the subject and message that are to be sent on the fax -
The Schedule page appears, as shown in Figure 5.10, providing the opportunity to specify when the fax should be sent and what its priority is. The default options are to send the fax now or to deliver it using normal priority. Make the appropriate selections and click on Next.
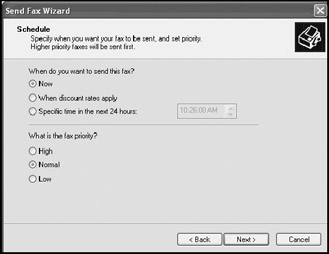
Figure 5.10: Specify the delivery schedule and priority of the faxThe Send Fax Wizard displays a summary of the information that it has collected. Verify that this information is correct and click on Finish.
Faxes can also be sent directly from any Windows application that can submit a print job. When this option is used, the Send Fax Wizard is used to collect recipient information and to build a cover page that is added to the front of the document produced by the Windows application. For example, the following procedure outlines how to send a fax using the WordPad application supplied with Windows XP Professional.
-
Click on Start/All Programs/Accessories and then select WordPad. WordPad opens.
-
Type the message text that is to be sent.
-
Click on File and then select the Print option. The Print dialog appears.
-
Select the icon representing the computer's fax device and click on Print.
-
The Send Fax Wizard appears. Follow the instructions presented to finish sending the fax.
Faxes can also be sent directly from most scanning device applications, as outlined in the following procedure.
-
Power on the scanner and allow it to warm up.
-
Start the scanning application that controls the scanning device.
-
Use the application to scan a document.
-
Use the scanning program's image preview option to display the scanned image.
-
Press Ctrl+P to print the image.
-
Select the icon representing the computer's fax device and click on Print.
-
The Send Fax Wizard appears. Follow the instructions presented to finish sending the fax.
Receiving a Fax
To be able to automatically receive faxes, the Fax application must be configured to do so. This can be done using the Fax Configuration Wizard. Once configured, Windows XP will automatically answer all incoming calls and receive fax transmissions. Another option for receiving faxes is to disable automatic receipt and manually manage the receipt of incoming faxes, as outlined in the following procedure.
| Note | If the phone line being used by the Windows XP fax service is also shared by another device such as an answering machine a conflict may arise between the fax service and the device. Either set the answering machine to wait an additional number of rings before answering or move it or the fax service to another phone line. |
-
Click on Start/All Programs/Accessories/Communications/Fax and then select Fax Console. The Fax Console opens.
-
When the telephone rings, click on the Receive a fax now option on the File menu. The Fax monitor dialog appears.
-
The Fax application begins receiving the incoming fax and the status of the transmission is displayed.
Modifying Sender Information
Sender information is configured the first time that the Fax Configuration Wizard is run. The Fax Configuration Wizard can be rerun at any time by selecting the Configure Fax option located under the Tools menu. It will be used by default on every fax that is sent. However, the Send Fax Wizard allows for the temporary or permanent changing of sender information. Sender information can also be changed from the Fax Console by clicking on Tools and then selecting sender information. This opens the Sender Information dialog as shown in Figure 5.11.
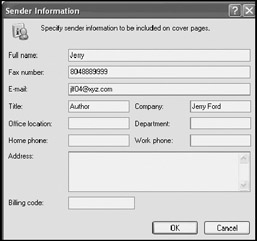
Figure 5.11: Modifying sender information
Creating Custom Fax Cover Pages
The Windows XP Fax application supplies four default cover page templates that can be selected from the Send Fax Wizard. The Cover page templates are:
-
confdent
-
fyi
-
generic
-
urgent
Using the Fax Application's Personal Cover Page Editor, new custom cover pages can be created. New cover pages can be created from scratch, or any of the four templates can be used as a basis for creating new cover pages. The following procedure outlines the steps involved in starting the Personal Cover Page Editor and creating a new fax cover page.
-
Click on Start/All Programs/Accessories/Communications/Fax and then Select Fax Console. The Fax Console opens.
-
Click on Tools and select the Personal Cover Pages option. The Personal Cover Pages dialog appears as shown in Figure 5.12.
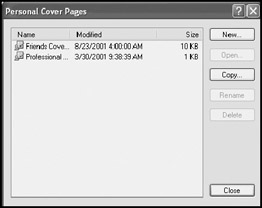
Figure 5.12: The Personal Cover Pages dialog displays a list of the user's personal cover pages -
To create a new cover page from scratch, click on New. The first time the Fax Cover Page Editor is started, a Cover Page Editor Tips dialog appears. Clear the Show Tips at startup option to prevent this from happening in the future. The Fax Cover Page Editor opens, as shown in Figure 5.13. Create a new coverage page, click on File, select Save, and type the name for the new cover page. Click on File and select Exit to close the Fax Cover Page Editor.
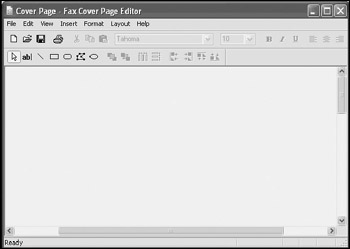
Figure 5.13: Creating custom fax cover pages -
To create a new cover page by using one of the templates supplied with the Fax application, click on Copy. The Copy cover page to list of personal cover pages dialog appears, displaying a list of available cover pages to choose from. Select one of the templates and click on Open. This places a copy of the template into the user's personal folder and allows it to be renamed, deleted, and modified. To modify it, double-click on it. This opens the Fax Cover Page Editor. Make any desired changes and then click on File, select Save, and type the name for the new cover page. Click on File and select Exit to close the Fax Cover Page Editor.
-
Click on Close to exit the Personal Cover Pages dialog.
Any cover pages created using the Fax Cover Page Editor are stored by default in the user's Personal Cover pages folder, which is located inside the user's Fax folder in the user's My Documents folder, as shown in Figure 5.14.
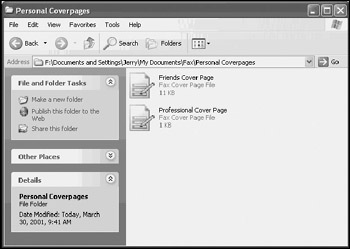
Figure 5.14: Viewing a user's personal cover pages
| Note | You can also open the Fax Cover Page Editor by clicking on Start/Accessories/ Communications/Fax and then selecting Fax Cover Page Editor. |
Monitoring Fax Resources
The Windows XP Fax application provides two tools that provide status information about the fax device and any incoming or outgoing faxes.To view the status of the currently configured fax device, select the Fax Printers Status option on the Fax Console's Tools menu. This displays the Fax Printers Status dialog, as shown in Figure 5.15.

Figure 5.15: Checking the status of fax devices
The status of incoming and outgoing faxes can be monitored using the Fax Monitor, as shown in Figure 5.16.

Figure 5.16: Checking the status of incoming and outgoing faxes
The Fax Monitor provides a graphic view of current transmission status as well as detailed history information about previous fax operations. Using the information provided here, administrators can often determine the reason for failed fax transmissions. For example, a "no dial tone" message would indicate that there is a problem with the fax device's telephone line, while a "fax was cancelled" message might indicate that a user had inadvertently cancelled his or her own fax.
EAN: 2147483647
Pages: 358