Printing Contacts
| Even though you're using Outlook heavily for all of your personal information management needs, there likely will be times you need to take Outlook information with you when you're away from your desk. Outlook offers a variety of different print styles for your contact items. You can print a list to put in your PDA, print to a file and send to a colleague, or print detailed contact information a page at a time. Selecting a Print StyleOutlook offers five different print styles for the Contacts folder, depending on which type of view you're currently using. You can select from the following print styles:
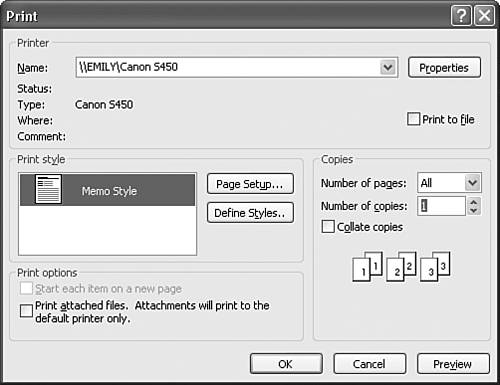
Each style can be customized to print on different paper types. You can print on plain paper, Avery labels, Day Timer paper, or Franklin Planner paper. You can also define a custom paper size to meet your needs. To choose and customize a print style, select File, Print to display the Print dialog box (see Figure 10.22). Figure 10.22. You can choose your print style and customize it from the Print dialog box.
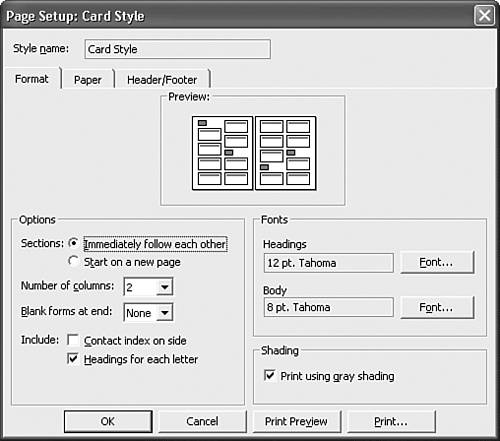
Choose your print style from the Print dialog box. Each print style has a rough graphic approximation of its format. When you have selected a print style, you can click Page Setup to customize your chosen print style. Figure 10.23 shows the Format tab of the Page Setup dialog box for the Card style. Figure 10.23. In the Page Setup: Card Style dialog box, you can configure whether each address group will print on a separate page.
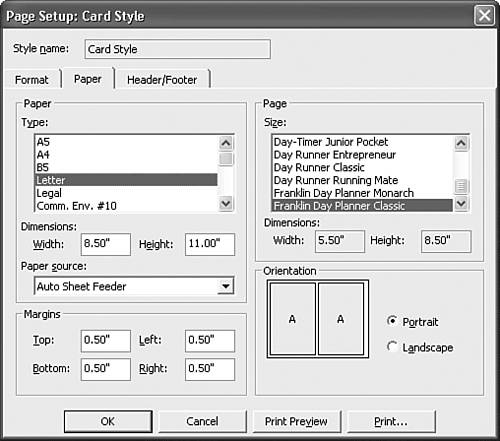
The Card style prints all or selected contact items grouped by first letter of the File As field. Use the Options section to choose whether each section will start on a new page, or will immediately follow the previous section. You can configure the number of columns, whether to display blank contact forms at the end of the printout, and choose to display a heading for each letter or an index on the side of the page. You can also configure the font used for the headings and for the contact items. To select the paper for your print, click the Paper tab, shown in Figure 10.24. Figure 10.24. Select the paper size and style to use for your print.
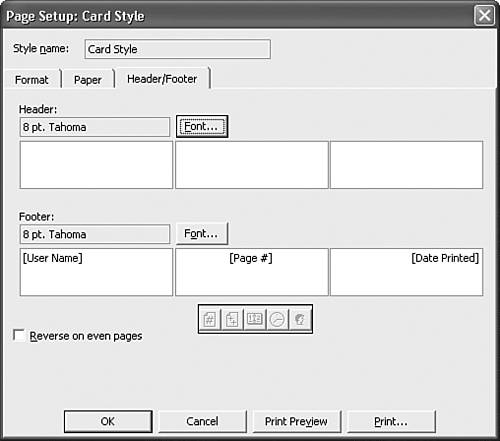
You can select from a variety of paper types, including Avery labels and Day Timer loose-leaf paper. For each type of paper, you can configure margins and print orientation. If none of the default paper styles meet your needs, select Custom style. With this style, you can control all aspects of the paper layout. Included in the Custom paper type are a number of other Day Timer paper sizes as well as Franklin Planner paper types. Use the Header/Footer tab, shown in Figure 10.25, to configure a header or footer. You can configure the font for both the header and the footer as well as insert default items such as page number, total pages, date and time printed, and username. When you've fully customized your print style, click Print Preview to see whether your customizations are satisfactory. Figure 10.26 shows a card view on Franklin Classic paper with a custom header and footer. Figure 10.25. Use this tab to configure a custom header or footer.
Figure 10.26. A typical card view on Franklin Classic paper with a custom header and footer.
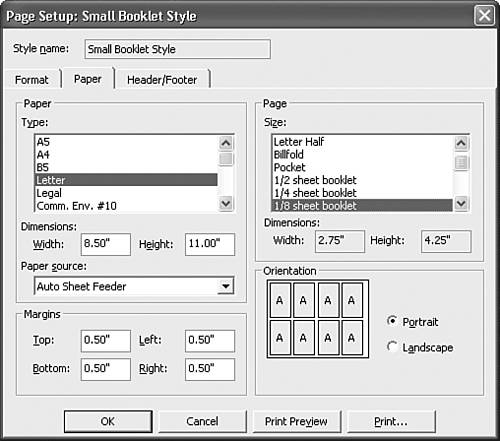
The Small Booklet style and the Medium Booklet style are just customized variations of the Card style. Many of the settings are identical; the exceptions are the paper size and orientation options. Figure 10.27 shows the Paper tab for the Small Booklet style. You can choose from a variety of booklet styles. Each has a different orientation option. Figure 10.27. The Small Booklet style has different paper size and orientation options.
The Phone Directory style prints all of your contacts in a list with only the name and phone numbers of the contacts displayed. Contacts are grouped by the first letter of their last name. The Format tab of the Phone Directory style doesn't have many options. You can choose to include headings for each letter and specify whether you want an index printed on the side of the paper. You can also choose the number of columns to display on the page. Figure 10.28 shows a typical Print Preview of the Phone Directory style. Figure 10.28. The Phone Directory style looks much like a phone book.
If you're using a Table view (or any view other than Address Cards or Detailed Address Cards) of your Contacts folder, you'll have only two available print styles to choose from: Table style and Memo style. Table style prints the selected contacts just as they appear on the screen. There's a column for each field displayed on the screen. You can configure the paper size and orientation and set up a custom header and footer, but those are the only options you can configure for a Table style. TIP If you select Print from the File menu and don't see Memo style in your Print dialog, you probably didn't select a contact. Memo style is allowed only when a contact is currently selected. Memo style prints each contact on its own page. This is the only style that prints any and all notes associated with the contact. Figure 10.29 shows a preview of a contact printed in Memo style. Figure 10.29. Print Preview of a Memo style.
Defining New Print StylesThe previous section explained how you could customize a print style to meet your needs. However, each time you customize a print style, you lose any previous customizations. You can create new customized print styles for just this purpose. Creating your own print style preserves the existing default style and enables you to save your customized print style for use at any time. To create a new print style, select File, Page Setup, Define Print Styles to display Figure 10.30. Figure 10.30. You can define your own print styles or edit an existing style.
To define a new print style, select an existing print style and click Copy to display the Page Setup dialog box. You can change the name of the print style and make any changes to the Format, Paper, and Header/Footer tabs. Click OK to save your new print style and return to the Define Print Styles dialog box. If you want to edit your custom print style at a later time, return to the Define Print Styles box and click the Edit button. You can also use this dialog box to delete any user-created print styles. You cannot delete any of Outlook's default print styles, but you can reset them to their original settings by clicking the Reset button. |
EAN: 2147483647
Pages: 426