Duplicating Contact Items
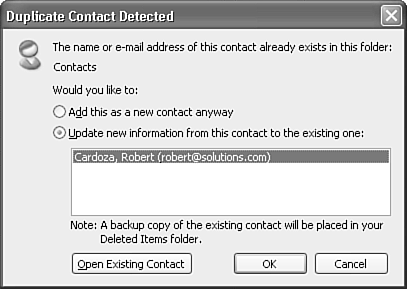
| If you try to enter a contact with the same name as an existing contact, Outlook warns you that you're creating a duplicate contact record with the Duplicate Contact Detected dialog box shown in Figure 9.24. Figure 9.24. Outlook warns you that you're trying to create a duplicate contact record.
You can choose one of two actions. Choose either Add This as a New Contact anyway (which adds the contact as its own contact record) or Update New Information from This Contact to the Existing One. If you aren't sure whether the existing contact contains the information you need, click the Open Existing Contact button to view the existing contact. If you choose to update the existing contact with the new information, a backup copy of the existing contact is placed in your Deleted Items folder in case you overwrite information you need. CAUTION Be careful when choosing to update an existing contact with new information. Any information that's different between the new contact and the old contact is updated to the information in the new contact. Specific information from the old contact will be lost. Be sure that you know the information from the new contact is the correct information. If you're unsure, add the duplicated contact record as a new contact and then compare the two. When you've copied all the updated information into one contact, you can delete the other contact. If you haven't emptied your Deleted Items folder, you can, however, recover the original contact record. In certain situations, you might find that you need to enter multiple contacts with similar information. You can use one of the following methods to create similar contact items. Creating Contacts for Members of an OrganizationIf you have multiple contacts to enter for a specific organization, use the following steps:
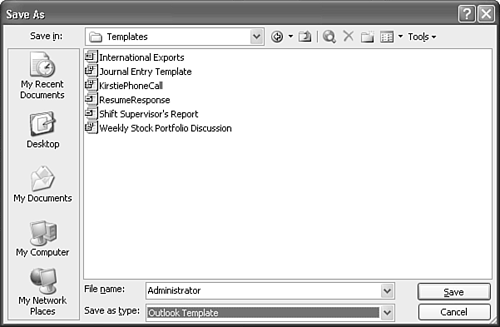
You can repeat these steps for all other members of the organization. If you need to enter information for multiple members of the same department, you can use the preceding steps or simply copy and paste new contact items to transfer more than just the company name, address, Web site address, and business telephone number. To copy a contact item, either select the item in the Contacts folder and select Edit, Copy, or hold down the Ctrl key and drag the contact to the Contacts bar on the Navigation Pane. Outlook will notify you that you're about to create a duplicate contact item. Choose to add the item as a new contact. This saves the item as a new duplicated contact record in your folder. Double-click the duplicate contact to open it and change any necessary information. Then save and close the new contact. This method enables you to copy fields such as notes, alternative telephone numbers, department, office, manager, and assistant values. Creating Contacts for Family MembersIn every contact record, there's a field for spouse and children. However, you cannot enter specific information such as mobile phone number or email address for the spouse. NOTE The Children field can be found on the All Fields page of the contact item. In the case of a family with two children, you might want to create a contact record for the father, mother, son, and daughter. Much of the information for the family members will be the same (address and main telephone number), but some of the information will differ (mobile telephone number and email address). To quickly enter a contact for each family member, create a contact for one family member and then use one of the previously described methods to create additional contact records for each remaining family member. Creating Similar Contact Items Using a TemplateIf you have a large number of contacts to enter with a large amount of duplicate information, the easiest method is to create a template. A template can be helpful to enter contacts within your own organization. TIP I use templates to quickly create contacts for members of my own organization. Even though I use Exchange Server, I want all members of my organization to have their own contact record so that I can carry their information on my PDA. I can open my template, enter a name, telephone extension, email address, and department, and quickly save the new contact record with a minimum of typing. To create a template for entering contact information, open a new contact item. Fill in any information common to all items you plan to create using the template. Select File, Save As to open the Save As dialog box (see Figure 9.25). Figure 9.25. Save your contact item as an Outlook template.
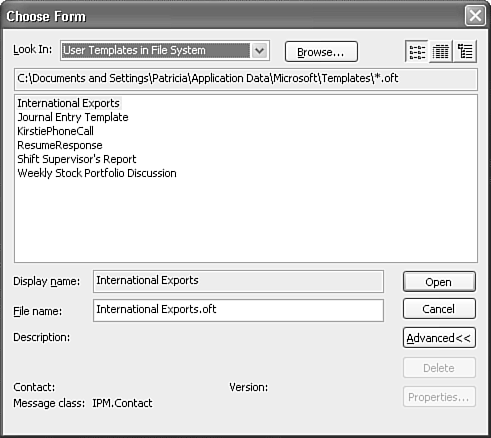
Use the Save As Type drop-down and select Outlook Template. The default save location will change to your Templates folder. This folder is usually found at C:\Documents and Settings\UserName\Application Data\Microsoft\Templates. Enter a name for your template and click Save. When you want to create a new item from an existing template, select File, New, Choose Form to open the Choose Form dialog box (see Figure 9.26). Select User Templates in File System from the Look In drop-down to display a list of all Outlook templates you've created. Figure 9.26. Select User Templates in File System to display all of your Outlook templates.
Select the proper template and click Open. A new contact record is created with all of your previously entered information filled in. Enter any additional information and click Save and Close. |
EAN: 2147483647
Pages: 426


