Deploying a Serviced Component
You can deploy a serviced component (also known as a COM+ application) written with .NET to Windows 2000 or Windows XP computers or to Windows Server 2003 servers that have the Framework installed. There are many ways to do this—from something as simple as copying the application to the server, to something as complex as generating a Windows Installer project. In this section, you will look at the ways to deploy a serviced component and their strengths and weaknesses.
Deploying Serviced Components by Using Dynamic Registration
You might be developing or prototyping a serviced component. The simplest way to deploy a serviced component is to copy the application to the required location and run it. The first time a client tries to use an unregistered serviced component, the Common Language Runtime will check whether it is registered. If not, it will dynamically register the assembly and type library of the component in the Registry. It will also add information to the COM+ catalog based on the values of various attributes contained in the System.EnterpriseServices namespace, as listed in Table 10.2.
| Attribute | Description |
|---|---|
| ApplicationAccessControlAttribute | Configures security at the library or server-application level in the COM+ application containing this assembly |
| ApplicationActivationAttribute | Tells COM+ service whether this component runs in the creators process (library application) or whether it runs in a new process (server application) |
| ApplicationIDAttribute | Specifies the GUID that identifies this application |
| ApplicationNameAttribute | Sets the name of the COM+ application used when the application is installed into the COM+ catalog |
| ApplicationQueuingAttribute | Marks this assembly as supporting queued (support messaging) or gives the assembly the ability to read from the queue |
| AutoCompleteAttribute | Sets a method to automatically commit the transaction if there is no error and to automatically roll back if an error is encountered |
| ComponentAccessControlAttribute | Configures security checks at the component level in the COM+ application |
| ConstructionEnabledAttribute | Marks the assembly as supporting the object construction string set in the Component Services tool |
| DescriptionAttribute | Sets the description of the COM+ application, component, interface, or method |
| JustInTimeActivationAttribute | Tells the COM+ services to create the component as needed and to destroy the component when it is no longer useful |
| LoadBalancingSupportedAttribute | Marks the application as supporting component load balancing if the COM+ container supports it |
| MustRunInClientContextAttribute | Makes the assembly marked with this attribute be created in the calling assembly’s container |
| ObjectPoolingAttribute | Marks this object as being able to support object pooling, which is the opposite of just-in-time activation |
| SecurityRoleAttribute | Specifies a security role for an application (assembly) or component (class) |
| TransactionAttribute | Sets the transaction type for the object by using the TransactionOption enumeration |
The Common Language Runtime will register each version of a component only once if it is not registered. Although this is the simplest way to deploy a serviced component, it will usually not be your first choice for deploying an application into production. You cannot use dynamic registration in certain situations. For example:
-
You can’t use dynamic registration if you need to test COM+ registration, because it does not raise an error message if your component violates COM+ settings. The component just does not activate. You need to manually register the component by using the Component Services tool to see the error message.
-
This method will not install the component in the global assembly cache if it needs to be a shared component.
-
The user of the application must be a member of the local Administrators group (by default or a member of the Administrators role of the COM+ system application) to write into the COM+ catalog. This will preclude most users and web or ASP.NET applications because they generally run as accounts that are not members of the local Administrators group.
-
Not all COM+ configuration properties are available as attributes of the System.EnterpriseServices namespace. For example, you cannot set up role membership or tell a serviced component to run as a service by using attributes.
In Exercise 10.4, you will deploy a serviced component by using dynamic registration.
| Note | This exercise assumes that you are logged in as a local administrator or are a member of the Administrators role of the COM+ system application and you are running Windows 2000 or Windows XP. |
Exercise 10.4: Deploying a Serviced Component by Using Dynamic Registration
-
Create a new Visual Basic project by choosing File Ø New Ø Project. Select the Class Library template.
-
Name the project DynReg and click the OK button.
-
Add a reference to the System.EnterpriseServices assembly by right-clicking Reference and choosing Add Reference.
-
Replace the code for Class1 with the following code to the class:
Imports System.EnterpriseServices <Assembly: ApplicationName("Exercise10_4App")> <Assembly: ApplicationActivation(ActivationOption.Server)> <Assembly: Description("A simple serviced component" & _ "created to test the various install options")> Namespace ComPlusStuff Public Interface IHelloMessage Function Message() As String End Interface <Transaction(TransactionOption.Required)> _ Public Class Exercise10_4 Inherits ServicedComponent Implements IHelloMessage 'The message makes more sense in conjunction with exercise 10.11 Public Function Message() As String Implements IHelloMessage.Message Return "Well isn't somebody on an ego trip!" End Function End Class End NamespaceThis code creates an application name for the component, sets it to be a library application, and sets the component to require a transaction.
-
Add a new project to the solution by right-clicking the solution and choosing Add Ø New Project.
-
Choose a Windows application and call the project TestDynReg and click the OK button.
-
Add a reference to the DynReg project.
-
Set the TestDynReg project as the startup project by right-clicking TestEx10_4 and choosing Set As Startup Project.
-
Drag a button to the Windows form of the TestDynReg project.
-
Double-click the button and add the following code to the Button1 event handler:
Dim obj As New ComPlusStuff.DynReg()
-
Use the Strong-Named (sn.exe) utility at the Visual Studio .NET command prompt to generate a key pair file as follows:
sn -k c:\keyfile.snk
Note The Strong-Named utility is covered in detail later in this chapter.
-
Add the following attribute to the AssemblyInfo.vb file:
<Assembly: AssemblyKeyFile("c:\keyfile.snk")> -
Build the solution. This should install the component in the COM+ catalog. Verify this by choosing Start Ø Settings Ø Control Panel Ø Administrative Tools Ø Component Services.
-
Navigate to the DynRegApp application, right-click it, and choose Properties.
-
Click the Transactions tab. Verify that the component requires a transaction and verify the settings for library type on the Activation tab.
-
Use the Component Services tool to delete the COM+ application by right-clicking the application name and choosing Delete.
-
Save this project because you will be using it in the exercises 10.5 - 10.7 for COM+.
Using the Services Registration Utility and the RegistrationHelper Class
You can get around some of the limitations of dynamic registration by using the .NET Framework Services Registration utility (regsvcs.exe) command-line utility or the RegistrationHelper class. These tools can be run by someone with local administration privileges to configure the COM+ catalog and to register the component and type library in the Registry. They also provide better error messages than simply not activating the component—which makes testing and debugging easier for you, the developer of the component.
The regsvcs.exe utility will register the serviced component in the Registry as if you ran regasm.exe. It will then generate a COM type library as if you ran tlbexp.exe on the assembly. Finally, it will use the APIs in the System.Reflection namespace to look at the metadata and set the appropriate attribute settings for the application in the COM+ catalog.
You use regsvcs.exe by issuing the following at a Visual Studio .NET command prompt:
regsvcs yourAssembly.dll
There are additional options you can issue to the regsvcs utility to define, for example, the COM+ application name or type library to use. Table 10.3 lists the command-line switches for the regsvcs utility:
| Switch | Description |
|---|---|
| /appname:name | Specifies the name of the serviced component. This option is used in conjunction with /c, /exapp, or /fc options. |
| /c | Creates the application specified by the /appname switch or by the name of the assembly set with the AssemblyName attribute (usually in the AssemblyInfo.vb file) and will generate an error if it already exists. |
| /componly | Configures the components only and ignores the configuration on methods or interfaces. |
| /exapp | Specifies that the application name is an existing application in the COM+ catalog. |
| /extlb | Uses an existing type library. |
| /fc | Finds or creates the application. This is the default option. |
| /help | Displays the Help screen listing these options. |
| /noreconfig | Tells the installer not to reconfigure the application. |
| /nologo | Tells regsvcs.exe not to display the full name, version, and copyright information, but to still print errors to the console. |
| /parname:IdOrName | Specifies the name or ID of the target partition in a serviced component (Windows XP and Windows Server 2003 only). |
| /reconfig | Reconfigures an existing application. This is a default setting. |
| /tlb:tlbname | Sets the name of the type library file to use for the install. |
| /u | Uninstalls the application specified in the /appname switch. |
| /quiet | Suppresses the output of the logo and success information. |
| /? | Displays the Help screen listing these options. |
The RegistrationHelper class in the System.EnterpriseServices namespace provides the same functionality as the regsvcs.exe utility through a programmatic interface. This means that you can create your own install application or extend the administration tool of your application to support installing components. All you need to do is create an instance of the RegistrationHelper class and call the InstallAssembly method to install the assembly as a COM+ application or UninstallAssembly to uninstall the assembly.
The InstallAssembly method takes four parameters:
-
The path to the assembly.
-
The application name. (By default, the value of the AssemblyName attribute will be used.)
-
The type library for the assembly specified in the path.
-
An InstallationFlags enumeration option to indicate whether you want to create a new application or update an existing application.
The following code is an example of using the RegistrationHelper class:
Dim AppName As String = Nothing Dim TypeLib As String = Nothing Dim rh As New RegistrationHelper() Try rh.InstallAssembly("C:\MyAppDir\MyComponent.dll", _ AppName, TypeLib, _ InstallationFlags.CreateTargetApplication) Catch Ex As Exception Console.WriteLine("Registration failed!"); End TryTypeLib) In Exercise 10.5, you will use the regsvcs utility to install and uninstall a serviced component and then use the RegistrationHelper class to create code that will install and uninstall the same serviced component.
Exercise 10.5: Using regsvcs.exe and the RegistrationHelper Class
Using the regsvcs Utility:
-
Open a Visual Studio .NET command prompt by clicking Start.
-
Type the following at the command prompt to register the assembly you created in Exercise 10.4 with regsvcs.exe:
regsvcs "c:\Document and Settings\My Documents\~CA your_user_name\Visual Studio Projects\bin\~CA debug\DynReg.dll"
-
Verify that the application was installed by navigating to the Component Services tool in the Administrative Tools folder of Control Panel (or any other way you are more familiar with).
-
Expand the following nodes to get to your application: Component Services, Computers, My Computer, COM+ Applications.
-
Look for the COM+ application named DynRegApp and right-click it and choose properties from the pop-up menu.
-
Verify that the application contains the settings specified by the attributes added to the assembly.
-
Uninstall the application by using the following command:
regsvcs /u "c:\Document and Settings\My Documents\~CA your_user_name\Visual Studio Projects\bin\~CA debug\DynReg.dll"
Using the RegistrationHelper Class:
-
Open Visual Studio .NET and create a new Visual Basic .NET console application.
-
9. Set a reference to the System.EnterpriseServices.dll file.
-
Add the following Imports statement to the top of the source code (above the Module statement):
Imports System.EnterpriseServices
-
Add the following code to the Sub Main() procedure of the console application:
Dim AppName As String = Nothing Dim TypeLib As String = Nothing Dim rh As New RegistrationHelper() Try rh.InstallAssembly("c:\Document and Settings\" & _ "My Documents\your_user_name\Visual Studio" & _ " Projects\bin\debug\DynReg.dll ", _ AppName, TypeLib, _ InstallationFlags.CreateTargetApplication) Catch Ex As Exception Console.WriteLine("Registration failed!") End Try Console.WriteLine("Registration succeeded for " & TypeLib) -
Build the solution.
-
Run the application and verify that the COM+ application was created with the Component Services tool.
-
Leave the DynRegApp COM+ application installed for the next exercise.
Using the Component Services Tool to Export a Service Component to an MSI file
The most flexible and complete way to deploy a COM+ application is by using the Windows Installer. You can package all the application’s files, COM+ catalog attributes, and COM registration information in a single MSI file. This file can then be deployed on CD, from a network share, through Active Directory, or (if you wrap it as a CAB file) via Internet Explorer. All you need to do is double-click the MSI file or setup.exe if a bootstrapper was generated.
Fortunately, you do not need to create your own Windows Install setup project to generate the MSI file. All you need to do is use the Component Services tool in Computer Management or under the Administrative Tools Start menu option (Figure 10.15). This tool will package all of the necessary settings and files into an MSI for deployment; it will even provide the CAB file that is needed to deploy the component via Internet Explorer.
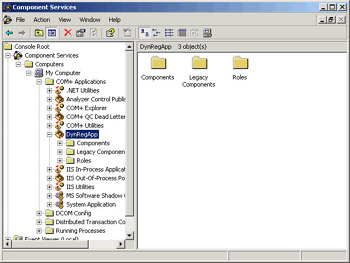
Figure 10.15: Component Services Tool
| Note | The Component Services tool will create only a Windows Installer file for the COM+ application. If you have other DLLs that this application is dependent upon, you will need to add them to the Windows Installer file with the Windows Installer authoring tool. |
You will need to install and configure your serviced component first either manually or through one of the methods already described. You then will use the Component Services tool to export the COM+ application. The COM+ Application Export Wizard will start. You want to make sure that you choose Sever Application on the Application Export Information page’s Export As option, as shown in Figure 10.16.

Figure 10.16: The Application Export Information page
This will generate an MSI file in the location specified that will install the assemblies and type libraries associated with the COM+ application, register them, and configure the COM+ application based on the current settings. This means that you can use the Component Services tool to set additional attributes on your COM+ application that cannot be set with the EnterpriseServices namespace’s attributes.
In Exercise 10.6, you will use the Component Services tool to generate an MSI file and test it for the COM+ component you created in Exercise 10.4.
Exercise 10.6: Creating a Windows Installer File with the Component Services Tool
-
Open the Component Services tool in the Administrative Tools folder of Control Panel.
-
Expand the following nodes to get to your application: Component Services, Computers, My Computer, COM+ Applications.
-
Right-click DynRegApp and choose Export from the pop-up menu to launch the COM+ Application Export Wizard.
-
Click the Next button to move past the first screen of the COM+ Application Export Wizard.
-
Type the following to create the folder and name of the MSI file that should be created:
c:\complusinstall\ExportDynRegApp.msi
-
Make sure that the Server Application check box is selected to create an install file for the complete COM+ application and not just a proxy.
-
Select the Export User Identities With Roles check box to export to the MSI file all Windows accounts and groups that are mapped to roles. This would be useful if you are installing the component to multiple computers in the same domain, as in a component load balancing situation.
-
Click the Next button to generate the MSI and CAB files to perform the install. The CAB file is provided so you can install the application by using Internet Explorer.
-
Click the Finish button to complete the export process.
-
Navigate to the C:\complusinstall folder to view the MSI and CAB files.
-
Double-click the MSI file to start the install.
Deploying COM+ Proxies
Up to now, you have looked at deploying only the COM+ application. Typically, client computers will not have the full COM+ application installed locally or might not even possess the COM+ services in the case of Windows 9x, ME, or NT but still might need to interact with a COM+ application. In these cases, you will want to deploy a COM+ proxy.
COM+ proxies are wrappers that mimic the interface of the COM+ component locally, but contain only the code necessary to make a call to the COM+ application in another process, or more likely on another computer. You can use the Component Services tool to create a Windows Installer file for the proxy in a similar fashion to how you created a package for the COM+ application in Exercise 10.6. The only change is that you select the Application Proxy option on the Application Export Information page. This will then generate an MSI file that installs the proxy only.
By default, the application proxy will point to the server that you exported the COM+ application’s proxy from. This could be problematic because this might be a development or staging server. Fortunately, you can change the name by setting the Application Proxy RSN (Remote Server Name) option before exporting the MSI file. That way, the proxy will point to the desired server (instead of the developer’s laptop) when installed. This can be accomplished by performing the following steps:
-
Right-click the computer container in the Component Services tool for the computer from which you are exporting applications.
-
Choose Properties from the pop-up menu.
-
Click the Options tab in the Properties dialog box.
-
Type the name of the remote COM+ server computer you want the proxies to use in the Application Proxy RSN box, and then click the OK button.
Another more flexible option would be to use the Windows Installer utility (msiexec.exe) and set the REMOTESERVERNAME property override as follows:
Msiexec -I REMOTESERVERNAME=MyNewServer MyProxy.msi
The application proxy will need to be installed in each calling application’s private directory unless you register it as a shared assembly (this can be accomplished by installing the assembly in the GAC, which is discussed later in this chapter, in the section “Deploying to the GAC”).
In Exercise 10.7, you will export a proxy.
Exercise 10.7: Exporting a Proxy
-
Open the Component Services tool in the Administrative Tools folder of Control Panel.
-
Expand the following nodes to get to your application: Component Services, Computers, My Computer, COM+ Applications.
-
Right-click DynRegApp and choose Export from the pop-up menu to launch the COM+ Application Export Wizard.
-
Click the Next button to move past the first screen of the COM+ Application Export Wizard.
-
Type the following to create the folder and name of the MSI file that should be created:
C:\complusinstall\ProxyDynRegApp.msi
-
Make sure that the Application Proxy RSN check box is selected to create an install file for the complete COM+ application and not just a proxy.
-
Check the Export User Identities With Roles to export to the MSI file all Windows accounts and groups that are mapped to roles. This would be useful if you are installing the component to multiple computers in the same domain, as in a component load balancing situation.
-
Click the Next button to generate the MSI and CAB files to perform the install. The CAB file is provided so you can install the application by using Internet Explorer.
-
Click the Finish button to complete the export process.
-
Navigate to the C:\complusinstall folder to view the MSI and CAB file.
-
You then just need to double-click the MSI file to start the install.
| Note | If the component’s class identifier (CLSID), type library identifier (TypeLibId), or interface identifier (IID) change after you export the application and install the proxy on the client machines, you must export the application proxy again and install it on the client machines. |
EAN: 2147483647
Pages: 153
- Challenging the Unpredictable: Changeable Order Management Systems
- ERP System Acquisition: A Process Model and Results From an Austrian Survey
- The Second Wave ERP Market: An Australian Viewpoint
- Data Mining for Business Process Reengineering
- Relevance and Micro-Relevance for the Professional as Determinants of IT-Diffusion and IT-Use in Healthcare