Building Anchor Links
|
| < Day Day Up > |
|
Anchor links are used to move to a specific point in a page. The point may be in the current page or any other page. The target point is first set up with a Named Anchor — an empty set of tags that add a reference name to a specific point. To set up the named anchor, place your cursor at the desired spot and choose Insert ® Named Anchor, or click the Anchor icon in the Insert bar's Common toolset.
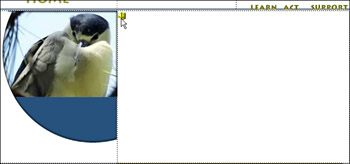
To see a named anchor, you must have Invisibles enabled. Click the View Options menu in the Document bar and choose Visual Aids ® Invisibles. An anchor icon displays in Design view, as shown in Figure 35-7.

Figure 35-7: The Named Anchor icon
To link to the named anchor, select the text or image that serves as the link, drag the Point to File icon to the named anchor icon, and release it. This is fairly easy when both items are in the current page. If your named anchor is above or below the visible area of the page, drag the Point to File icon to the top or bottom edge of the document and wait for scrolling to begin and release the anchor. The Link field displays a hash mark and the anchor's name.
To link to a named anchor in another page, it may be faster to append a page link: With the text or image selected, drag the Point to File icon to the correct page in the Site panel and release it. When done, go to the Link field for the current link and type a hash mark plus the name of your anchor after the current page link, as shown in Figure 35-8.

Figure 35-8: A link to a named anchor in a different page places the hash mark and name of anchor after the page link's path.
|
| < Day Day Up > |
|
EAN: 2147483647
Pages: 491