Building Image Links
|
| < Day Day Up > |
|
To make a link from an image, select the image and browse or point to the target file. Images cannot access Link History, nor do they build it. Image links appear outlined in blue rather than underlined unless the border attribute for the image is set to zero. Dreamweaver automatically sets the zero value for images used as links.
| Cross-Reference | More complex uses of images as links are covered in Chapter 41. |
Creating an image map
Generally, only one href may be added per image. When designing graphics to be used for a site, a layout is sliced into separate images that are exported from Fireworks. Sometimes it isn't practical or convenient to create separate images for each button or link needed, and an image map is used instead.
An image map uses one or more sets of coordinates called hotspots that are measured from the upper-left edge of the image. The coordinates are defined in <area> tags, and you can assign an href and/or other attributes. The <area> tags are listed between the opening and closing <map></map> tags. You make references to the specific map inside the <img> tag.
Map-drawing tools
You draw image map coordinates with the map tools located in the Property inspector. To access the tools, you must first select an image. Image maps require a reference name to the map, which determines which map coordinates are applied for the image.
| On the CD-ROM | Save the Habitat Alert34 folder from the chapter34_exercise folder to your hard drive. Define a new site. Hint: If you already have another Habitat Alert site defined, then choose the Edit Site option in the Site panel of the Site Definition drop-down menu and change the path to the Local Root folder. |
Habitat Alert site Let's build an image map using the Mission Statement page from the Habitat Alert site.
-
Open
 mission_statement.htm from the find folder.
 -
Select the graphic navmap.gif using the pointer tool.
-
Name your map in the field supplied in the bottom-left corner of the Property inspector, as shown in Figure 35-5.

Figure 35-5: Name your map and build hotspots with the map drawing tools. -
Use the rectangular drawing tool (blue rectangle below the Map name) to create a rectangle over the HOME button text. This map's shapes are easily created as rectangles. Other maps may require use of the ellipse or polygon tool to draw hotspots.
-
With the home hotspot selected, notice the change in the Property inspector. Leave the placeholder null link in the Link field and the target field blank. In the Alt Text field, type Click to close this window and return to the home page.
-
Draw a rectangle hotspot for each section, adding the Alt text from Table 35-1. Figure 35-6 shows the map.
Table 35-1: Image Map Settings Text
Alt Text
HOME
Click to close this window and return to the home page.
LEARN
Click to close this window and Learn More.
ACT
Click to close this window and Act Now!
SUPPORT
Click to close this window and Support Habitat Alert.
FIND
Click to close this window and Find More Resources.
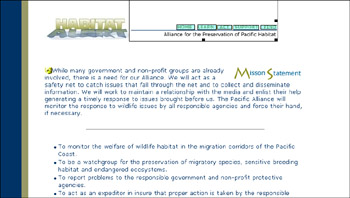
Figure 35-6: The hotspots added to make the image map and the Alt text added as well
The Polygon tool
The Polygon tool is a bit trickier than the rectangular or elliptical hotspot tools. The polygon tool works like a pen tool in drawing programs in a connect-the-dots fashion. Use it to create irregular hotspots. First, click to create a starting point. Move to the next logical point and click again. Don't try to put too many points in your hotspot because they generally are not necessary. The idea is to add enough points to roughly outline the desired shape.
As you begin to return to the starting point, a see-through bluish fill appears inside the hotspot you are drawing. Occasionally, the fill appears to be outside the shape, but this is only temporary; don't let it influence your outline as it will correct itself when you continue to close your finished hotspot. Take the outline all the way back to the starting point to finish the hotspot.
| Note | To start a new polygon shape with the tool, deselect the current shape by switching to the Pointer tool and clicking the image outside of any hotspot shape. Then reselect the Polygon tool and begin your new polygon hotspot. |
To adjust the points of your polygon hotspots, use the Pointer tool to select a point and move it. To adjust the location of any hotspot, use the Pointer tool to select the hotspot shape and drag the hotspot to a new location. Select a hotspot with the Pointer tool to update its link, target, or alt text.
Fireworks MX You can build an image map in Fireworks, too, for use in pages exported from that program and opened in Dreamweaver MX. Or, crop it to the map slice, and export it using the new Quick Export feature in Fireworks. See Chapter 23 for more detail.
|
| < Day Day Up > |
|
EAN: 2147483647
Pages: 491