| The scripts we provided in the previous sections give you the opportunity to automate the deployment process. However, to truly automate the deployment process, you need to be able to schedule running those scripts on some timed basis. We'll provide you with a brief explanation of using the Task Scheduler to help you with this process. The Task Scheduler is a utility that ships with Windows 2000/2003. It allows you to schedule jobs to run on the server without human intervention. In the case of our deployment, we want to be able to schedule the export and import scripts to run without our having to start them every time; in reality, you may end up combining the two scripts into one to provide more seamless deployment. Here is a list of instructions for scheduling our export task. Open the task schedule by choosing Start > Programs > Accessories > System Tools > Scheduled Tasks. If the option is not listed, it may not have been installed on your server. You can install the utility through the Windows installation routine. In Figure 21-9, you'll see the Task Scheduler interface. Double-click the Add Scheduled Task icon to start the Scheduled Task Wizard. Figure 21-9. The Task Scheduler 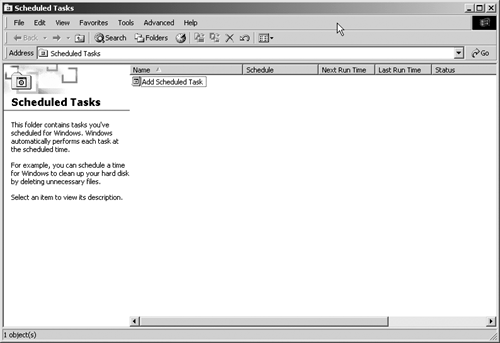
When the wizard appears, click Next. Click the Browse button when prompted for the application to run. Browse to the directory where your VBS files are stored, and select the VBS file you wish to run (Figure 21-10). Click Open when you've made your selection. Figure 21-10. Select your VBS file 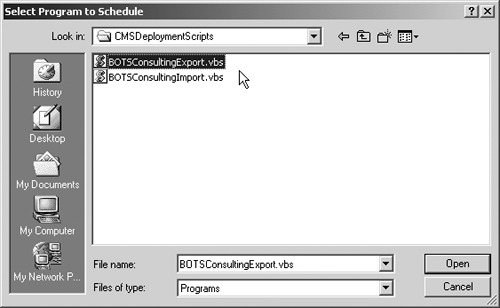
Type a name for your task. The default is the name of the file you've selected. Select the reoccurrence. In our case, we've chosen to run the script daily (Figure 21-11). However, you should choose the period that makes sense for you and click Next. Figure 21-11. Name your task and provide the timing 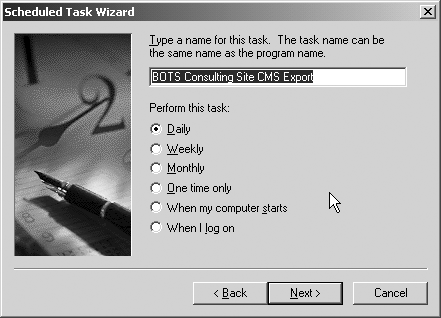
Since we've chosen Daily, we're asked to provide the time and start date of this daily task (Figure 21-12). Once you've made your selection, click Next. Figure 21-12. Choosing the time of day and the start date 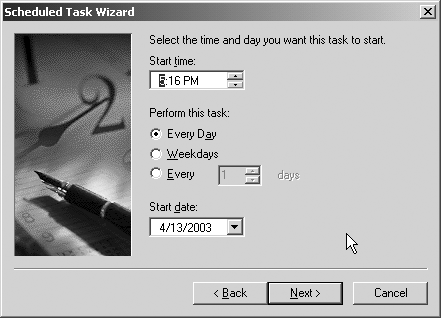
Now, choose the credentials under which your job will run (Figure 21-13). If you're using AuthenticateAsUser in your script, you only need to provide credentials for a user with authority to run jobs on your server. If you used AuthenticateAsCurrent User, you'll have to provide the credentials of a user who is either a channel manager or an administrator. Figure 21-13. Entering credentials for the scheduled job 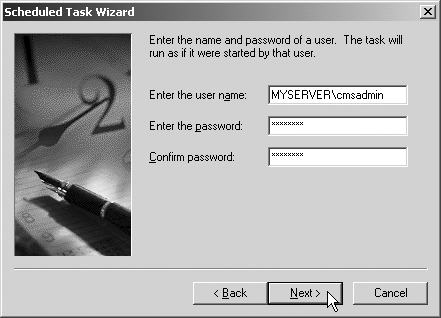
Finally, you'll be prompted to finish the configuration (Figure 21-14). Just click Finish. Figure 21-14. The final confirmation prompt before adding the job 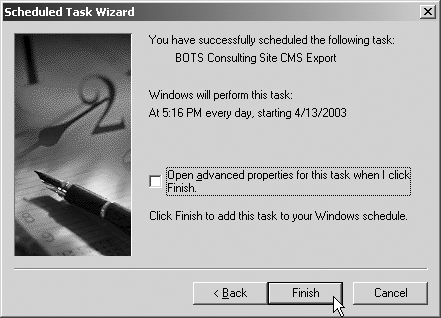
After your job has been scheduled, it will show up in the list of scheduled jobs, shown in Figure 21-15. Figure 21-15. Our task has been added to the scheduled jobs on the server. 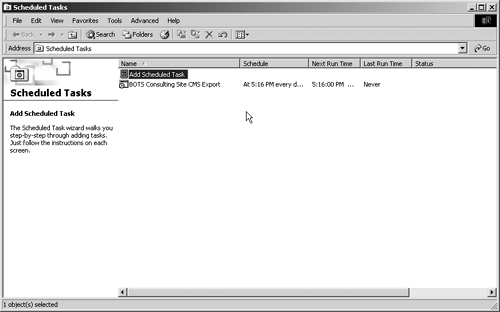
|


