| Each time you start working on a new production you should also start a new Liquid Edition Project. Think of a Project as being similar to an office ring binderit allows you to place all the relevant documents in one place. This has several advantages, not the least of which is that you can export an entire Project to an archive or transfer it to another editing station without too much fuss. This simple operation alone can become overly complex if you have not given a unique Project name to each of the productions you are working on. With this in mind, try to get into the habit of creating a new Project for each production you are working on The process of creating a Project only involves a few mouse clicks and is a sound investment for your future NLE sanity.  Tips Tips
Creating a new Project is also a good idea if you want to retain the default Liquid Edition settings. Every time you alter an element of the interface, Autosave will save it. Effectively, this means the default settings will be lost forever unless you make a backup copy or always work with a new Project name. The only other way of restoring the default setting is to reinstall the software, something you should be keen to avoid. Liquid Edition saves your work every 1/30 of a second, which means once a Project has been created, it will continue to be updated every moment the application is open. This is yet one more reason to create a new Project for every production you are working on.
To create a new Project 1. | Select File > New > Project (Figure 1.23).
Figure 1.23. Creating a new Project via the drop-down menu. 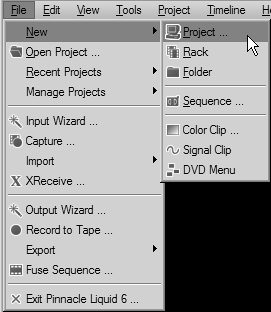
| 2. | Browse to a directory in which you would like to store your Projects, give the Project an original name, and click OK (Figure 1.24).
Figure 1.24. Picking a unique Project name and a Save location outside the Pinnacle directory. 
For details on the last option, Template, refer to the template section later in this chapter.
|
 Tip Tip
By default, Liquid Edition saves its Project files to the Pinnacle root folder, the place where Liquid Edition is installed. If you need to reinstall the software or install a service pack, then this Project data may be deleted. Therefore, it is best to use a folder on another hard drive to store your own project files.
Classic Interface Users of the Classic interface can access all of the Project menus by clicking the Start button and selecting Project > Open/Create Project (Figure 1.25). This brings up a slightly different file browser. To create a new Project, you need to click the New button (Figure 1.26). Figure 1.25. Creating or opening a new Project using the Classic interface. 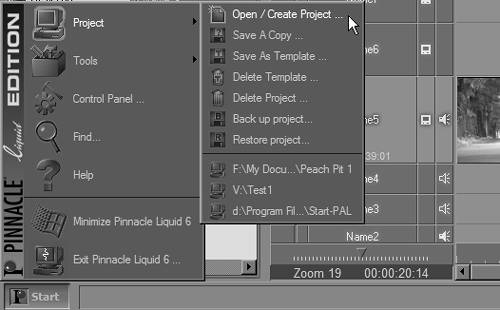
Figure 1.26. The slightly different file browser with the additional New button. 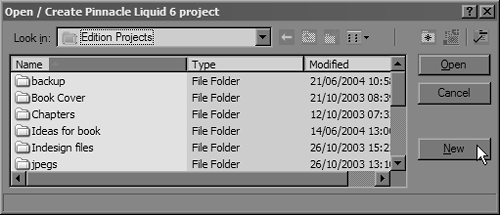
All other actions are identical to those described in this chapter. |
To save a Project 1. | Select File > Manage Projects > Save a Copy (Figure 1.27).
Figure 1.27. Saving a copy of the current Project. 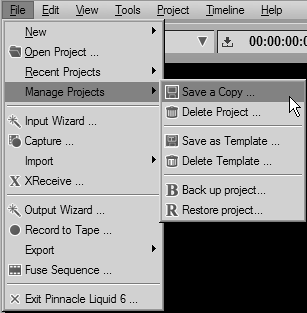
| 2. | Browse to the directory where you want to store your Projects, give the Project an original name, and click Save (Figure 1.28).
Figure 1.28. Save the Project to a safe location outside the Pinnacle folder. 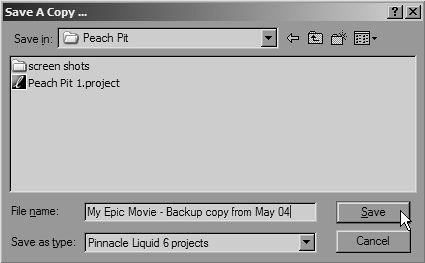
|
 Tip Tip
To switch to a different Project 1. | Select File > Recent Projects, and then click whichever Project you want to return to (Figure 1.29).
Figure 1.29. All recent Projects will be displayed here. 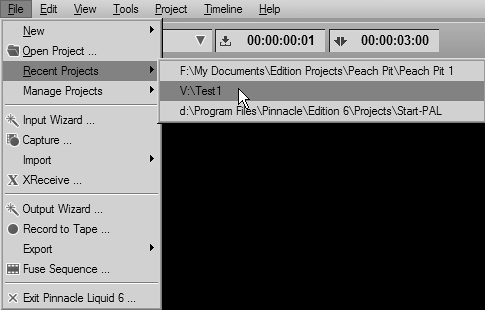
You will make this choice from a list of recent Projects; if you have picked original names for all of your Projects, the one you want will be easy to find.
| 2. | Click the name of the Project you want to switch to, but be aware, there is no "are you sure prompt" here.
The Project is loaded into Liquid Edition as soon as you make that click.
|
Switching between Projects in the Project Browser It's also possible to access media clips stored in another Project while still remaining in the current Project. To do this, simply right-click the All tab in the Project Browser to bring up Figure 1.30. Figure 1.30. Swapping between recent Projects in the Project Browser. 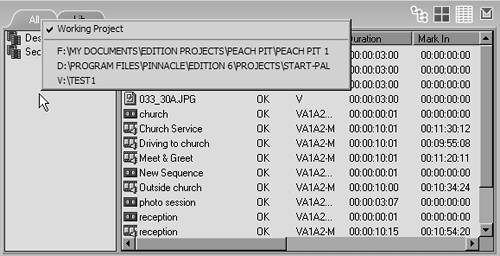
You can now display any of the recent Projects and copy media clips to the current Project using the standard copy/paste commands (Ctrl+C/Ctrl+V). You can also use clips on the Timeline while they are stored in another Project, but this can make organizing your Project somewhat difficult. |

 Tips
Tips


