| So much for the theory. As you can see from the descriptions, Dynamic Timewarp is a lot more brain intensive than its cousin, the relatively cuddly and friendly Linear Timewarp. And of course it doesn't help when the Dynamic version also utilizes linear terminology. To try and get you comfortable with this theory with as little pain as possible, you can download a clip from the book's Web site (www.peachpit.com/liquid6vqp) called Boy Jumping, import it into Liquid Edition, and use it to follow along in this next section. In the tasks that follow, a sequence is created that shows a boy jumping at normal speed until his hat flips off in the wind. At this point I want to slow down to 25% until the hat hits the floor, then speed back up to normal speed. This creates the classic "slow-suspend" effect during an event, something that is often seen in TV commercials. It's all made possible by using keyframes to control the speed andmore importantlythe interpolation of that speed between the keyframes. To create a slowdown/speed-up effect 1. | Add the Dynamic Timewarp as described in the "To add a Dynamic Timewarp filter" task earlier in this chapter.
| 2. | Open the editor by right-clicking the bottom purple spotted line and selecting Edit dynamic TimeWarp.
| 3. | Once the editor is open, click the Fit Keyframe Viewers button  to see both the mark-in and mark-out points of your clip inside the graph and to highlight the opening keyframe. to see both the mark-in and mark-out points of your clip inside the graph and to highlight the opening keyframe.
|
To anchor the speed - Navigate to the start of the clip, click the Go to Mark-In button
 , and then add a keyframe by clicking the Set Keyframe button , and then add a keyframe by clicking the Set Keyframe button  (Figure 9.79). (Figure 9.79).
Figure 9.79. Creating a start point using Set Keyframe. 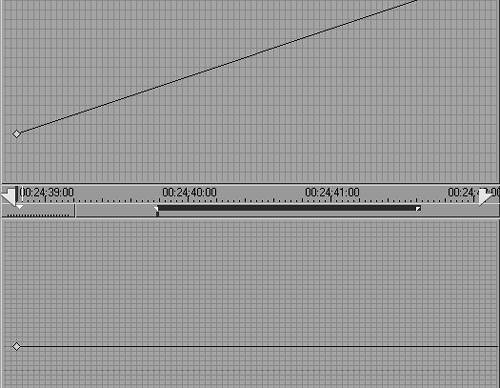
To add a speed change 1. | Scrub to the point just before you want the speed to change; in this example, just before the boy's cap lifts off his head.
Now that you have found the correct position on the Timeline, you want to slow down to a quarter of normal speed.
| 2. | To adjust the speed, double-click the Speed value box, enter a value, and either click the Set Keyframe button or press Enter on the keyboard to apply this change.
| 3. | As you can see in Figure 9.80, in this example version, you should enter 0.25, the decimal equivalent of 25 percent or 1/4.
Figure 9.80. Slowing the speed down to 25 percent of normal by creating a new keyframe using direct number entry. 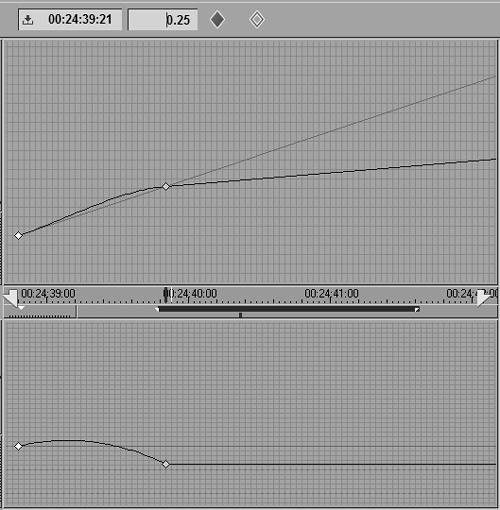
In the lower graph, notice that the blue line passes over the red line before it dips down toward the keyframe that was last added (Figure 9.81). This means the clip increases speed before it decreases.
Figure 9.81. The result is a parabolic climb in speed before the reduction occurs… 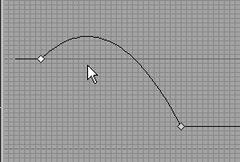
This isn't what you want. You want it to play at normal speed and then dip down immediately to slow motion. To achieve this, you need to add a linear segment between the two keyframes.
|
To add a linear segment 1. | Select the keyframe before the one that holds the speed change (in this case the opening keyframe), and then press the Linear Segment button  (Figure 9.82). (Figure 9.82).
Figure 9.82. … but it's turned into a Linear Time adjustment by using the Linearize Segment tool. 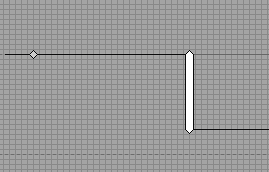
Now the clip does exactly what you want. It plays at normal speedindicated by the blue line in the bottom graph following the red linethen it dips suddenly down to 25 percent of normal speed.
At this point, you should exit the editor to check the results before moving on.
| 2. | To exit the editor, click the running man button in the top right of the interface.
After you render it, the clip plays fine except it now ends too early. This is another difficult area to understand, but put simply, when the Dynamic Timewarp slows something down, it adds frames to the clip to create something from nothing. But unlike the Linear Timewarp, Dynamic Timewarp doesn't alter the overall length of the original clip.
|
To correct a shortened clip - Trim the clip on the Timeline, dragging the handle outward until the Master Viewer displays the correct last frame for this media clip (Figure 9.83). Allow the clip to render again.
Figure 9.83. Adjusting the length of a clip to compensate for the additional frames. 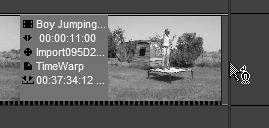
Okay, that worked fine. If you are using the downloaded example, the boy's cap flips off and the clip ends where we want it to. But the boy now moves in slow motion until the end of the clip. What we want to see is the clip return again to normal speed once the cap hits the floor.
To return the speed to normal 1. | Open the editor as described earlier in this chapter and click the Fit Keyframe Viewers button to realign the graph. If you are using the downloaded example, scrub through until you reach the point where the cap touches the ground. Enter "1" in the speed box and press Enter.
Now you have another problem. The bottom graph in the last parabolic curvebetween the slowdown keyframe and the normal speed keyframetouches the green line, indicating a speed of zeroa freeze-frame, in other words (Figure 9.84).
Figure 9.84. The green line indicates zero speed or stop. If the line hits this, the clip pauses. If the line goes beneath this, it moves into reverse. 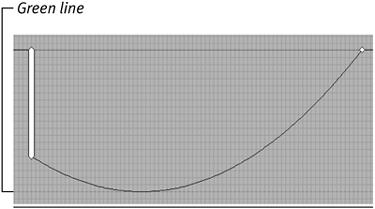
This isn't what you want. You need the clip to return to normal speed when the cap lands, for this example.
| 2. | Remove the parameter curve between the two keyframes by selecting the keyframe to the left of the one you added last and click the Linear Segment button  (Figure 9.85). (Figure 9.85).
Figure 9.85. The curve is removed using the Linear Segment button. 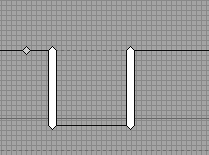
Okay! Now if you exit the editor and allow it to render in this example, the cap falls in slow motion, but the boy jumps after it at normal speed.
One Step at a Time Try not to get too advanced too quickly when moving through the exercise. Make a small adjustment, then exit the editor to see what you've created. Add keyframes one at a time to see the collaborative effect. Dynamic Timewarp is best learned in small steps; if you go too far to fast, you may just end up confused. To build the slowdown/speed-up effect exercise, I added one keyframe at a time, starting from the left and moving to the right. I had a clear idea of what I wanted before I even opened the editor, and I rendered each keyframe to make sure I got exactly what I wanted. If you follow this approach, you'll get excellent results from the Dynamic Timewarp and your video production will stand out from the crowd. |
However, because you've effectively increased the speedyou adjusted the clip from .25 to 1.0the opposite problem to the one you experienced when you decreased the speed occurs. The clip now shows a few more frames at the end than you want. This is because when speeding up a clip, Liquid Edition subtracts framesin this case, the frames it added during the slow motionbut again, Dynamic Timewarp doesn't alter the physical length of the clip.
| 3. | To solve this problem, trim the clip again, this time taking the mark-out point down the Timeline until the Master Viewer displays the correct frame for this clip's mark-out point.
When trimming a clip down the Timeline, you may notice that it doesn't need to be rendered. This is as good an example as any of how intelligent the Liquid Edition render engine can be.
|
 Tips Tips
Audio is not supported by the Dynamic Timewarp filter. However, if the speed returns to 1.0 at any point during the clip, audio returns. Outside of that, audio is lost. If you want to take the Dynamic Timewarp example further, try adding a keyframe to speed the boy up as he jumps after his cap. Remember to take it a step at a time and always allow to render after each change. Insert a marker at the end of the clip before you add the Dynamic Timewarp filter. That way you can always locate the end point during the Timewarp edit process.
|


 Tips
Tips