| Trying to explain the Dynamic Timewarp on the flat medium of paper is a little tricky. It's difficult to get excited about a screenshot of a slow-motion sequence. To try and make this as clear as possible, I'll first explain the basics of how to add and edit keyframes, and then I'll offer you a real-world example of what you can try to do with your own clips. To edit a Dynamic Timewarp 1. | Before you begin editing, use the Go to Mark In button to place a keyframe at the start of the clip by clicking the Set Keyframe button (Figure 9.73).
Figure 9.73. Anchoring the start of the clip with a keyframe. 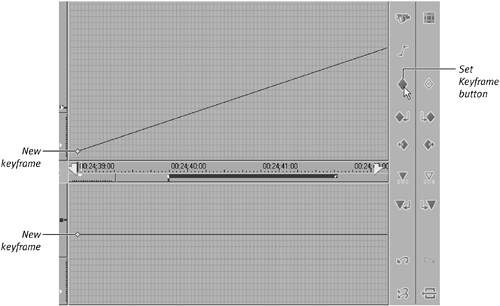
This creates a golden diamond in both of the graphs. This is your keyframe. When it is selected, it is gold; when it is deselected it is white.
| 2. | To alter the speed of a specific keyframe do one of the following:
- In the bottom graph, drag the golden keyframe up to speed it up or down to slow it down (Figure 9.74).
Figure 9.74. Dragging the keyframe down to reduce speed (0.15 or 15 percent of normal speed). 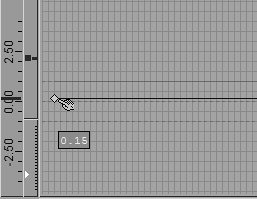
- Enter a speed value in the speed box at the top of the interface (Figure 9.75).
Figure 9.75. Entering the speed value directly. 
Adding more than one keyframe creates a series of parameter curves between the keyframes that exist to smooth out the change between the two points (Figure 9.76).
Figure 9.76. A typical dynamic curve. 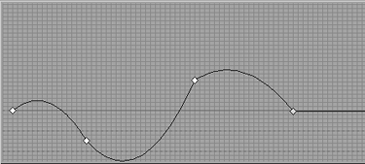
| 3. | Once you've finished altering your keyframes, exit the interface by clicking the running man  and allow the filter to render. and allow the filter to render.
|
 Tips Tips
The Dynamic Timewarp Editor doesn't automatically insert a keyframe at the beginning or end of your clip, but it does place a mark-in and mark-out point that indicates the length of the clip. To show the mark-in and mark-out points of your clip on the Timeline, click once on the Fit Keyframe Viewers button  . .
Adding a Linear Keyframe In the task above, "To edit a Dynamic Timewarp," you created a speed change (perhaps several) using the bottom graph. The parameter curve this creates may cause a problem if the curve dips down too low, causing the video to slow more than you intend. Worse still, if the curve dips below the green line at the bottom of the graph, the clip begins going backward, which is almost definitely not what you want. To solve this, you need to instruct the Dynamic Timewarp Editor to create a linear link between the keyframes, which then ignores this curve and creates a straight speed change. To add a linear keyframe 1. | Do one of the following:
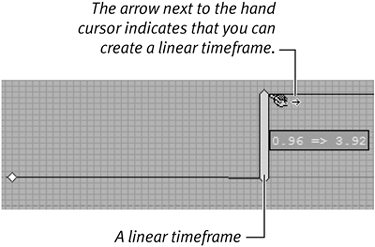
- Place the mouse cursor slightly to the left or the right of the keyframe in question so that a small plus sign (+) appears next to the hand icon. Then drag a straight line up or down; the straight line indicates this is a linear keyframe (Figure 9.77).
Figure 9.77. Creating a linear speed change using the mouse. 
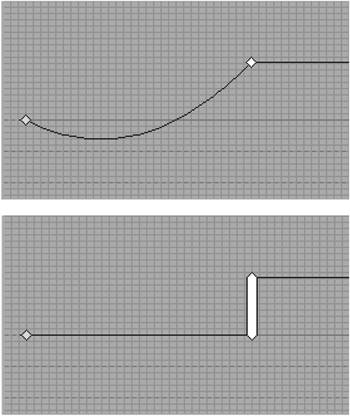
- A slightly easier method is to highlight the keyframe that occurs before the keyframe you want to linearize, and then click the Linear Adjustment button
 to automatically create a Linear Timewarp between these two keyframes (Figure 9.78). to automatically create a Linear Timewarp between these two keyframes (Figure 9.78).
Figure 9.78. Before and after. On the top, the speed change created a curve. On the bottom, the Linear Adjustment button turned it into a linear timeframe. 
| 2. | Once you have finished altering the parameters, exit the editor by clicking the running man  in the top-right corner of the interface. The filter has to render before you can see the result. in the top-right corner of the interface. The filter has to render before you can see the result.
|
|


 Tips
Tips