| As you can see from the previous tasks, actually adding a filter is relatively easy. The creative fun starts when you want to alter the wide range of parameters that come with each filter, hopefully with the aim of creating something unique. This is called editing with keyframes. Keyframes are explained in more depth in the "Keyframes" sidebar. The Filter Editor is similar in look and operation to the Transition Editor you looked at in Chapter 8. In fact, many of filters have similar names and similar parameters. To create your own custom-made filter, you need to open the editor and then scrub through the Source Viewer Timeline deciding where and when to alter the various parameters. To understand filters, you need to experiment with them; because of their many complex parameters, it's impossible to show everything in the pages of a book. You need to see every living variation on the screen; otherwise you'll never know what sort of highly original effects you can create just by tweaking one underused parameter. To open the Filter Editor With a filter present on a clip, do one of the following: - Double-click the Filter icon if it is visible (Figure 9.30).
Figure 9.30. Open a filter by clicking the Filter icon or… 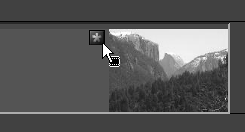
- Double-click the purple line running across the top of a clip and select a filter from the menu that appears (Figure 9.31).
Figure 9.31. …double-click the purple line at the top of the clip… 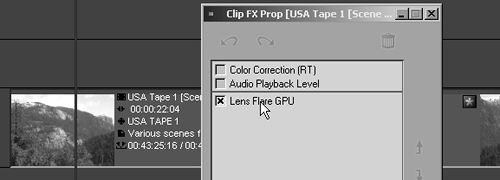
- Right-click the purple line running across the top of a clip and select Edit from the menu that appears (Figure 9.32).
Figure 9.32. ...or right-click the purple line and select Edit. 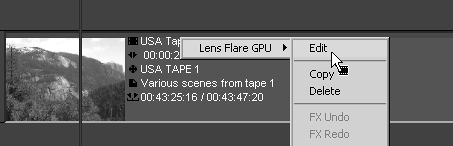
Any of these methods brings up the Filter Editor (Figure 9.33).
Figure 9.33. The RT Filter Editor interface. 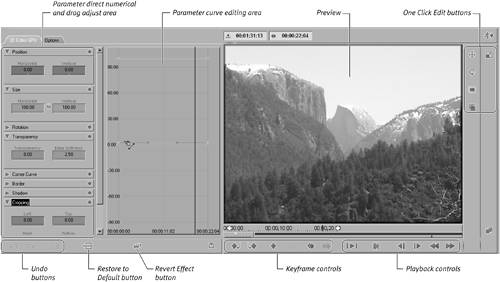
 Tips Tips
- If you open an editor for the first time and then close it again without making any adjustments, you cause it to be removed from the clip.
- Right-clicking a filter by accessing the FX Properties allows you to access the full range of editing options allowed for each filter, including Copy and Delete.
Keyframes When you adjust the parameters in the Filter Editor, a small gray diamond appears on the editor's Timeline (Figure 9.34). These diamond marks are keyframes and they are part of the magic behind the NLE system. Figure 9.34. Keyframes on the Timeline of the Filter Editor. 
A keyframe does pretty much what it says on the box: It creates a key point around which a certain action or event occurs. When you adjust any of the parameters inside the Filter Editor, you create a keyframe. If you look at Figure 9-34 again, you can see that multiple changes have been made creating multiple gray diamondskeyframeson the editor's Timeline. These control the way in which the filters behave when they're played back. Once you create these keyframes, you can manipulate, move, copy, or delete them at will; this is the true power of a keyframe editing system. Keyframes are also used in Liquid Edition to control audio levels and transitions. You can find details on this in Chapters 7 and 8. |
To edit a filter 1. | Open the Filters Editor using one of the methods detailed in the "To open the Filter Editor" task earlier in this chapter.
| 2. | Open the parameter you wish to alter by clicking once on the small triangle to the left of the name (Figure 9.35).
Figure 9.35. Opening a parameter area. 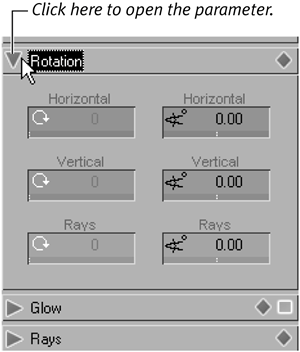
| 3. | If this is an RT filter, you see various colored boxes and you can alter the parameters in the following ways:
- Place the mouse cursor over any of the parameter boxes and wait for a double-headed cursor to appear (Figure 9.36). Hold down the mouse button and drag to the right to increase the value displayed. Drag back to the left to reduce the value displayed.
Figure 9.36. Work with the double-headed arrow… 
- Double-click inside the display area and enter the numerical value you need; then press Enter (Figure 9.37).
Figure 9.37. …or enter the number directly. 
- Click inside the parameter curve area on the line color that represents the parameter you wish to alter. Parameter lines and boxes always match up with coloring, but the line only appears if the parameter box is open, or if the parameter was previously adjusted (Figure 9.38).
Figure 9.38. You can add and manipulate keyframes inside the parameter curve area. 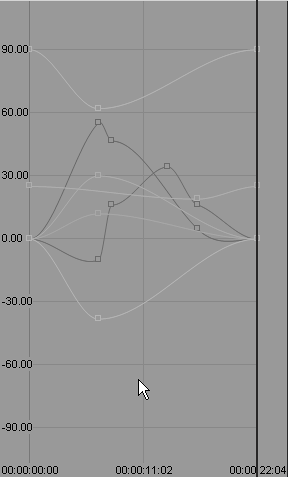
|
If you are using a Classic filter, you can adjust the parameters using sliders or by entering numbers directly into the boxes at the end of the slider controls (Figure 9.39). Figure 9.39. Classic editors used simpler sliders. 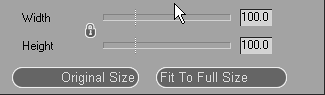
Tips RT filters can be played inside the editor to see how your keyframes have affected the final image. If it's a Classic filter, you can only scrub through the image. To play a Classic filter, you must first exit the editor and allow the filter to render. To return the Classic slider to the default value, click the small button that appears on the right side of the slider once a parameter has been altered (Figure 9.40). Figure 9.40. To reset a slider, click the small button next to the numbers. 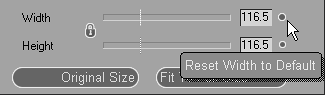
You can increase the size of any editor window by clicking the Maximum Inlay Size button  on the Liquid Edition toolbar. on the Liquid Edition toolbar.
Applying a Parameter If you need to apply any parameter to the whole length of a filterfor example, using Mirror to flip an imagethen drag the Keyframe symbol from the parameters label area into the preview screen of the editor. Those settings in the parameter box then apply to the whole filter (Figure 9.41). Figure 9.41. Applying a keyframe across the duration of a clip. 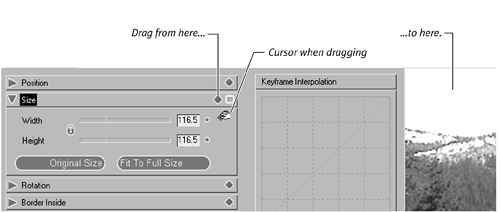
If you just want to apply these parameter settings to one specific keyframe that already exists on the Timeline, then drag the Keyframe symbol from the parameters label area onto that keyframe (Figure 9.42). Figure 9.42. Applying a keyframe to an individual keyframe. 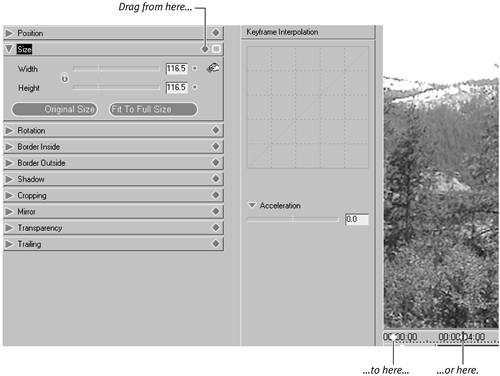
|
|