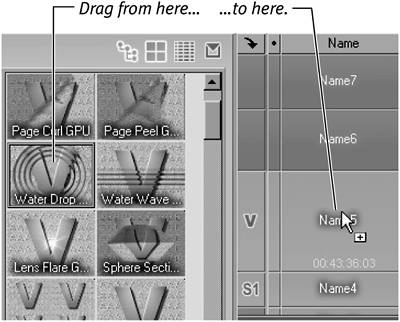
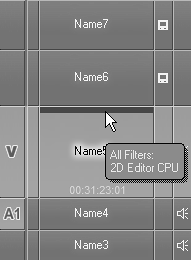
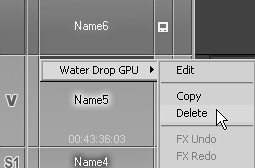
Adding a Filter to a Timeline Track


You may want to add a filter to an entire Trackthe Autocolor Corrector, for examplein order to make a change to all the clips on a particular Track in your project Timeline. This is a global change and you need to use it with care, but it can prove helpful if you have a lot of images on the same Track, and they all need to be cropped in a similar fashion.

To add a filter to a Timeline Track

1.

Select the filter you need by following the instructions in the "To apply a filter" task earlier in this chapter.

2.

Highlight the actual filter you want by clicking it, and apply it to the Timeline by dragging it into the Track name and releasing the mouse button (Figure 9.18).

Figure 9.18. Adding a filter to a Timeline Track.


A purple line appears indicating that the filter is successfully applied (Figure 9.19).

Figure 9.19. The purple line indicates a filter present on this Track.


3.

To remove this filter, right-click the purple line running along the top of the Timeline Track and select Delete from the menu (Figure 9.20).

Figure 9.20. Deleting the filter via a right-click menu.


Tip

  • Once again, to take full advantage of this technique, you need to edit this filter before it has any dramatic effect on your Timeline.


Pinnacle Liquid Edition 6 for Windows
ISBN: 0321269160
EAN: 2147483647
Year: 2003
Pages: 245
Authors: Paul Ekert

flylib.com © 2008-2017.
If you may any questions please contact us: flylib@qtcs.net