| The PC version of Dreamweaver 8 requires Windows 2000 or Windows XP SP2 (Service Pack 2). However, Windows XP Home Edition does not support the use of local Web servers, so you'll need to use Windows XP Pro if you want to install a Web server running Windows XP. If you are developing Web applications with Dreamweaver in a Windows environment, you can use either Microsoft IIS (Internet Information Services) or Apache for your local Web server. Because Dreamweaver 8 doesn't support Windows 98, Windows PWS (Personal Web Server) is not a local server option.  Tip Tip
Using IIS as a Web server Depending on how Windows was installed on your computer, IIS may already be installed. So the first thing you need to do is determine if it's up and running. To verify IIS installation status: 1. | From the Windows Start menu, choose Control Panel. (In Windows 2000, choose Start > Settings > Control Panel.)
| 2. | In the Control Panel window, choose Administrative Tools.
| 3. | In the Administrative Tools window, double-click the Internet Information Services Shortcut icon (Figure 1.1) to open the Internet Information Services window.
Figure 1.1. Double-click the Internet Information Services Shortcut icon to open the Internet Information Services window. 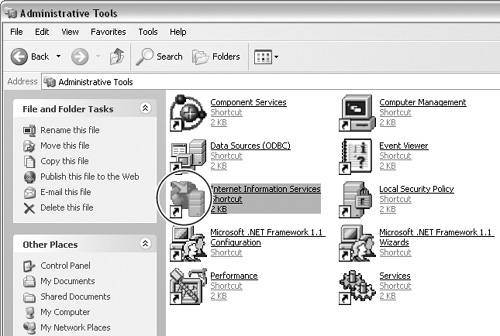
| 4. | In the Internet Information Services window, verify that the Internet Information Services icon is displayed on the left (Figure 1.2).
Figure 1.2. If you can see the Internet Information Services icon, then IIS is already installed. 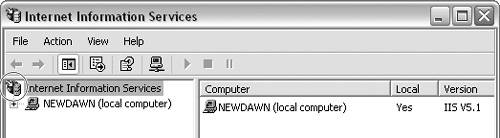
If the icon is present, IIS has already been installed on your computer. There will also be an icon immediately below the IIS icon next to the name of your local computer.
| 5. | Double-click the icon for your local computer to expand its contents, and then select the folder named Web Sites (Figure 1.3).
Figure 1.3. Once you can see the default Web site listed on the right, you can use the Start button to activate the IIS service. 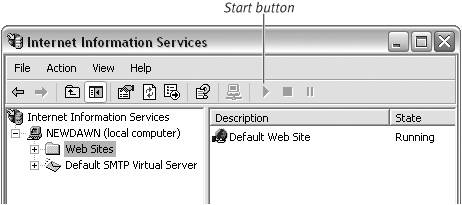
Default Web Site should be listed on the right pane.
| 6. | Check the status of the default Web site to make sure it's up and running by verifying that the word Running appears in the State column. If Stopped appears instead, click the Start button to restart it.
|
To install IIS: Note: You may need the Windows Operating System CD for this task. 1. | From the Windows Start menu, choose Control Panel.
| 2. | In the Control Panel window, choose Add or Remove Programs.
| 3. | In the Add or Remove Programs window, click the Add/Remove Windows Components icon on the left (Figure 1.4).
Figure 1.4. Click the Add/Remove Windows Components icon to open the Windows Components wizard. 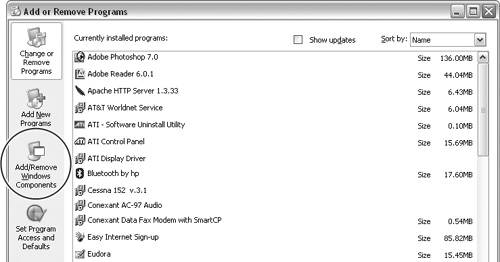
| 4. | In the Windows Components wizard that appears, select Internet Information Services (IIS) and click Next (Figure 1.5).
Figure 1.5. Select Internet Information Services (IIS) to add IIS on your Windows computer. 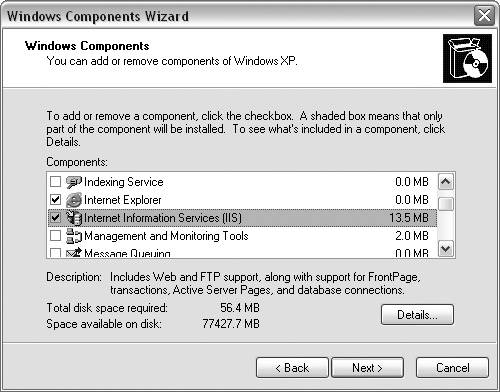
The wizard installs IIS and then displays a message saying that you have successfully worked through the Windows Components wizard (Figure 1.6).
Figure 1.6. A successful installation of IIS via the Windows Components wizard. 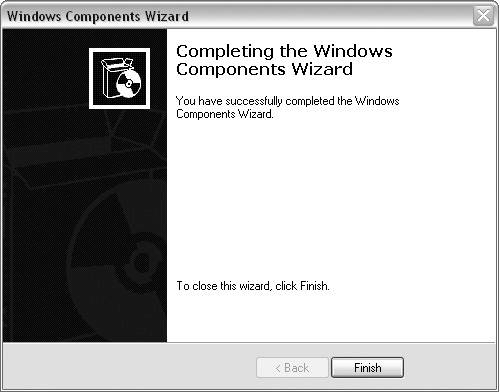
| 5. | Click the Finish button to complete the installation.
| 6. | Test your IIS installation by opening Microsoft Internet Explorer and typing http://localhost in the Address field. If IIS is correctly installed, two separate pages should open: Welcome to Windows XP Server Internet Services (http://localhost/localstart.asp), shown in Figure 1.7, and Microsoft Internet Information Services Documentation (http://localhost/iishelp/iis/misc/default.asp), shown in Figure 1.8.
Figure 1.7. The Welcome to IIS page confirms a successful installation of IIS. 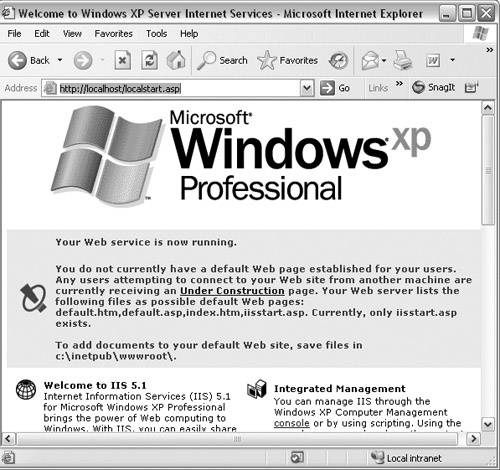
Figure 1.8. The IIS Documentation page. 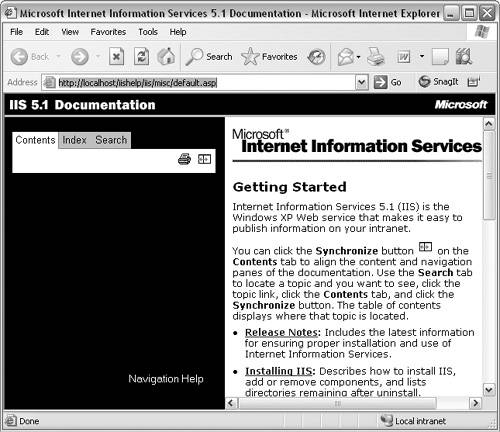
|
Tips If the IIS pages don't appear in Step 6, make sure that IIS is running by repeating the steps in the first task, "To verify IIS installation status." If you're using IIS with ASP, you don't need to do any additional configuration of IIS. If you're using IIS with ColdFusion, you need to configure IIS to work with ColdFusion. See the task "To configure IIS for use with ColdFusion," later in this chapter.
Using Apache as a Web server Apache Web server software is available for free download from the Apache Software Foundation (www.apache.org). You can install Apache 1.3.33 or the latest stable release of the Apache 2.0 Web server series. The Apache 2.0 series is newer and includes more features, but may be more difficult to install correctly. To install Apache: 1. | Open the Apache download page that lists Apache files for Windows, at www.apache.org/dist/httpd/binaries/win32.
| 2. | Click the file named apache_1.3.33-win32-x86-no_src.exe (Figure 1.9) to download the binary file for Apache 1.3.33, the long-standing stable release of the Apache Web server. The File Download window appears.
Figure 1.9. Select the apache_1.3.33-win32-x86-no_src.exe file from the Apache binary file downloads for Windows. 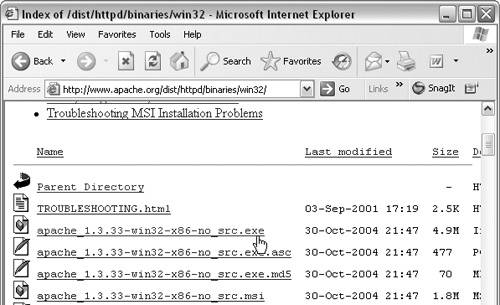
The binary code has already been compiled for you and is ready to install on your computer.
| 3. | Click Save to save the file to your hard drive.
| 4. | Once the file has completed downloading, double-click it to launch the Apache HTTP Server Installation wizard (Figure 1.10).
Figure 1.10. The Apache HTTP Server Installation wizard. 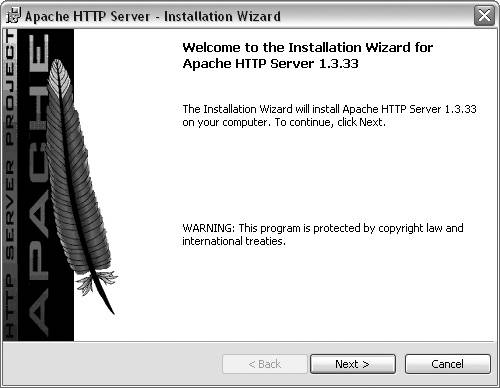
| 5. | The wizard will guide you through the steps for installing Apache on your computer. The steps are self-explanatory until you reach the Server Information pane.
| 6. | Enter a name in the Network Domain field (Figure 1.11).
Figure 1.11. You need to provide server information to complete your Apache installation. 
You don't have to enter an actual domain name in this field. You can enter anything you want, as long as it doesn't contain spaces or special characters.
| 7. | In the Server Name field, enter any name you choose that doesn't contain spaces or special characters.
| 8. | You can leave the Administrator's Email Address field blank or enter any working e-mail address.
| 9. | Leave the "Run as a service for all users"option selected. Click Next to continue working with the wizard.
| 10. | When you have completed the installation steps in the wizard, an Installation Wizard Completed message will display (Figure 1.12). Click Finish to complete your Apache installation.
Figure 1.12. A successful installation of Apache via the Apache Installation wizard. 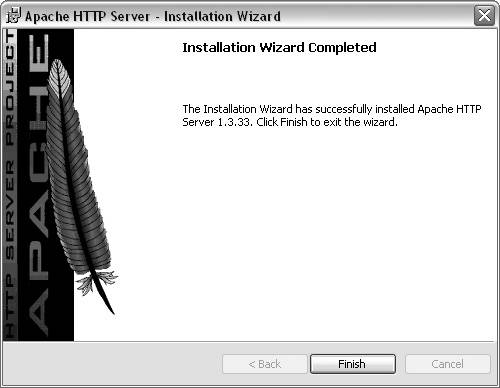
|
To configure Apache: 1. | From the Start menu, choose Control Panel > Administrative Tools.
| 2. | In the Administrative Tools window, double-click the Services Shortcut icon to open the Services window (Figure 1.13).
Figure 1.13. Double-click the Services Shortcut icon to open the Services window. 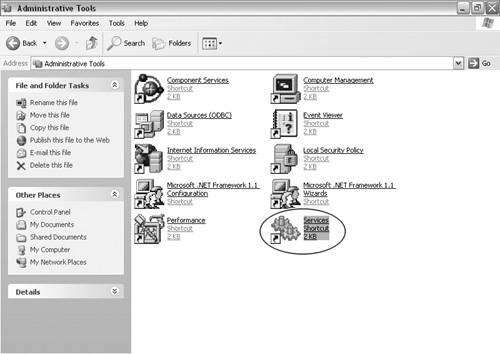
You have installed Apache as a service, but you may need to turn Apache on in the Services window.
| 3. | Check the status of the Apache service (Figure 1.14). If the Status field is blank, click the Start link on the left of the window to start the service.
Figure 1.14. Start the Apache service in the Services window. 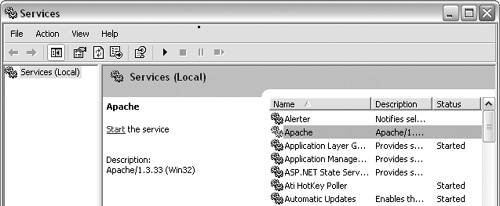
You can also stop the Apache service in the Services window. Once the service has started, a Stop link will be available on the left to stop the service.
| 4. | Test your Apache installation by opening Internet Explorer and typing http://localhost in the Address field. If Apache is correctly installed and the Apache service is started, the Apache test page (Figure 1.15) appears.
Figure 1.15. The Apache test page confirms a successful installation and configuration of the Apache Web server. 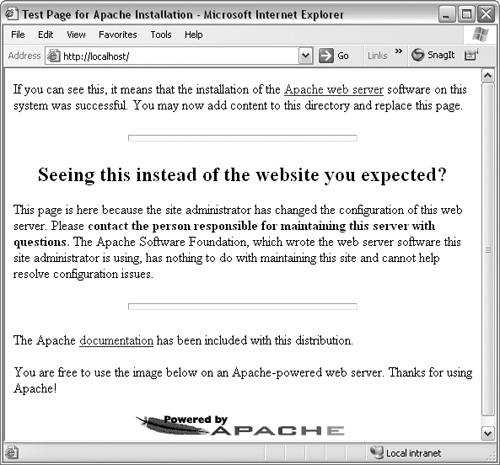
|
Tips If you are using both IIS and Apache Web servers on the same computer, and you have Apache configured as a Windows service that starts when your computer starts, you'll need to turn the Apache service off in the Services window and start the Default Web Site in the Internet Information Services window when you want to use IIS (Figure 1.3). You'll need to restart the Apache service in the Services window when you want to use Apache again. The IIS Default Web Site will automatically stop when Apache is started again. If you use an application server such as ColdFusion or PHP with a local Apache Web server, you may need to do additional configuration for Apache by editing the Apache configuration file. From the Start menu, choose All Programs > Apache HTTP Server > Configure Apache Server > Edit the Apache httpd.conf Configuration File. The httpd.conf file opens in Notepad, where you can make changes to the file. The specific changes are included in the documentation for the application server you are using.
|