| Screensets enable the user to assign window combinations (including all zoom settings and view options) to a number key on the computer's keyboard for fast and easy recall. Let's customize some of the existing screensets from this template. Screenset 1's focus is clearly the Arrange window, with an elongated horizontal Transport window at the bottom of the screen. Especially with larger productions it is advantageous to have as much space as possible in which to view the musical data. Let's set up this screenset for maximum viewable space in the Arrange window, while making sure that you're still able to access important information. 1. | Close the Transport window.
| 2. | In the Arrange window's local menu, choose View > Transport.
Arrange window's local menu 
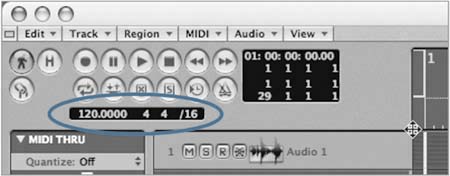
A Transport window appears in the top left corner of the Arrange window.
 As you probably have noticed, you are seeing just part of the information that the Transport window offers. As you probably have noticed, you are seeing just part of the information that the Transport window offers.
| 3. | Position your pointer over the corner where the Bar Ruler meets the Track List.

The pointer will change to a crosshair.
| 4. | Resize the area where the Transport window is situated by dragging down.
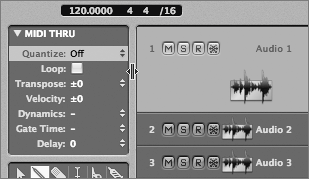
Do this until you can view the tempo, time signature, and division.
| 5. | Click the resize button to expand the Arrange window.
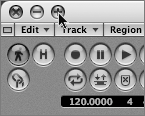
You've gained a little bit more space by having the Transport information displayed in the Arrange window instead of at the bottom of the screen.
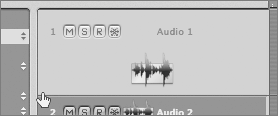
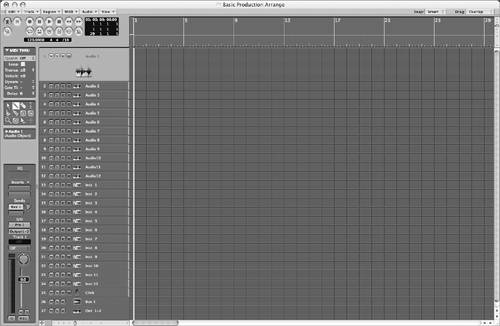
Look closely at the Track List and you will notice that the audio tracks are slightly taller than the audio instrument tracks. Since Logic lets you adjust the height of each track individually, the audio tracks were resized manually for this screenset. This works well for a global view of the arrangement, but let's further refine the screenset to display a larger picture of selected tracks for easier editing.
| 6. | Ctrl-click the bottom left corner of the first audio track.
All of the audio tracks shrink in height to match the audio instrument tracks. This technique works well as a fast way to return tracks to their default height.
| 7. | Verify that Audio 1 track is selected.
| 8. | Chooe View > Auto Track Zoom.
The track will increase in size automatically.
| 9. | Click the bottom left corner of the Audio 1 track (the cursor will turn into a hand with apointing finger) and drag down to increase the track size.
Drag just far enough for the track icon to appear below the track name.
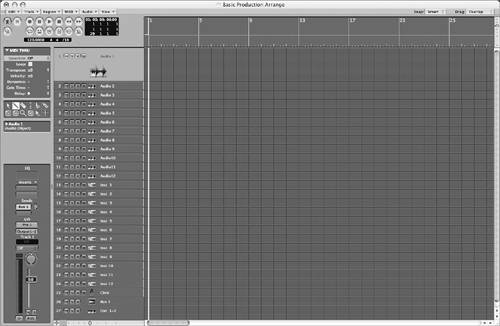
| 10. | Use the vertical Zoom control to zoom in (the slider moves downward) just enough to display all tracks without having to use the scroll bars.
The Track List now displays the selected track in a larger size.
 Try clicking various tracks, and you'll see them expand, depending on the track that is selected. Try clicking various tracks, and you'll see them expand, depending on the track that is selected.
You're almost done with your screenset face-lift. Let's push the envelope a little more to eke out a bit more space, this time on the horizontal side.
| 11. | Position the pointer in the space between the Parameter box and the Track List.
The pointer turns into a horizontal resize tool.
| 12. | Click-drag the pointer to the left to shrink the Region Parameter box, toolbox, Object Parameter box, and channel strip, while gaining space in the region area.
The screenset now displays the maximum amount of space in the main editing area.
 |
Unlocking vs. Locking Screensets If you leave things as they are right now, your screenset will be open to any changes that you further implement, and it will always reflect the last state in which we leave it. In Logic terms, the screenset is unlocked and can be continuously altered. This state has distinct advantages, as you can always make little tweaks that are beneficial for each part of the production (increasing or decreasing zoom levels, for example), updating the screenset as you go along. Having a screenset unlocked is especially valuable in the editing stage. Often you are bouncing back and forth between different editors and making adjustments to focus in on specific parts of the song. It is helpful, then, to return to a screenset that's in the state in which you left it when you want to continue work on that specific area. However, this takes some getting used to, and inadvertent alterations can occur. If you are satisfied with a given configuration of a screenset, it is a good idea to lock it, protecting it from further changes until you unlock it again. Let's try an exercise that will help you get a feel for using unlocked and locked screensets. 1. | Select the Pencil tool in the toolbox.
| 2. | On the Inst 1 track, click the grid line at measure 9 to create a blank region.
NOTE The region automatically zooms vertically (slightly) by virtue of the Auto Track Zoom function we enabled previously. | 3. | Hold down the Control key while rubber-band selecting around the Inst 1 Region you just created.
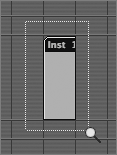
The region will zoom in to a fairly high degree.
| 4. | Activate Screenset 2, then Screenset 1 again.
Notice how recalling Screenset 1 brings back the zoomed state as you left it. Now let's do the same thing again, this time with the screenset locked.
| 5. | Ctrl-click in the background of the Arrange window to return to the previous zoom state.
The Arrange window appears as it was when we started this exercise.
| 6. | Choose Windows > Screensets > Lock Screenset.
NOTE Note that a small black dot appears next to the screenset number. This dot represents a locked screenset. 
| 7. | Hold down the Control key while rubber-band selecting around the Inst 1 region in the same way as you did previously.
| 8. | Activate Screenset 2, then Screenset 1 again.
This time when you return to Screenset 1, the region is displayed exactly as when you locked the screenset. No matter what edits are done with the screenset (in this case zooming in), it will return back to a normalized state, almost like a template in and unto itself.
| 9. | Delete the region you created by selecting it and pressing the Delete key.
|
|