Section 9.4. Erasing and Formatting Disks
9.4. Erasing and Formatting DisksThere are many times when you want to "start over" with a drive, such as when you are upgrading your Mac OS X installation and would rather start from scratch, or when you want to make sure that all of your data is removed from a FireWire drive. Erasing a disk with the Disk Utility is very simple, almost too simple considering the fact that all the data on the disk will be obliterated. The Erase tab of Disk Utility, shown in Figure 9-7, lets you erase and format a disk with the following options: Figure 9-7. Erasing a disk using Disk Utility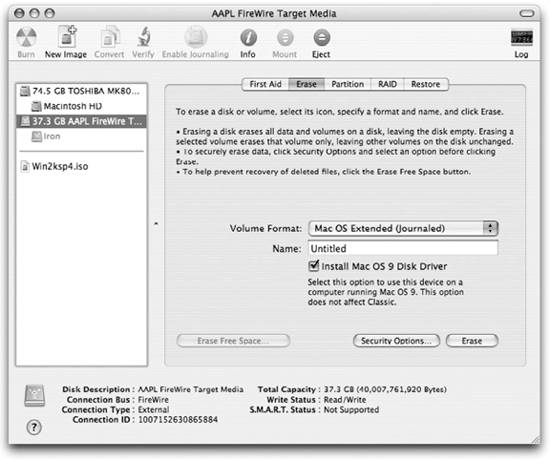
There are additional options hiding behind the Security Options button, shown in Figure 9-8. When you write data to a disk, there is still a faint magnetic remnant of the original data on the drive. Very sophisticated equipment can detect these magnetic traces and re-create data that was once on the drive but erased. Each time data is written to a spot on a disk, the traces from previous data at that spot get covered up and fade. Using the 7-Pass or 35-Pass Erase options, you can be sure (or really, really sure in the case of the 35-Pass) that no data whatsoever is left on the drive. Figure 9-8. Secure erase options in Disk Utility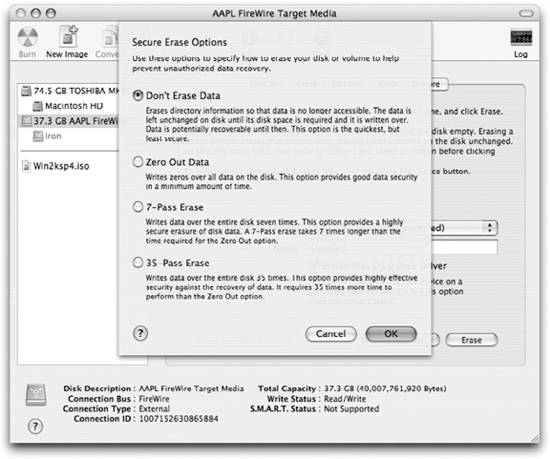 To use the diskutil command to erase a disk, use one of the following commands: diskutil eraseDisk [format] newName [diskid | mountpoint] diskutil zeroDisk [diskid | mountpoint] diskutil randomDisk [numberOfPasses] [diskid | mountpoint] For example, to format an external FireWire disk that had the device ID of disk1, use the following: $ diskutil eraseDisk "Journaled HFS+" Backup disk1 To write zeros across the entire filesystem of a FireWire disk named Backup, use the following: $ diskutil zeroDisk /Volumes/Backup
|

EAN: 2147483647
Pages: 166