Creating a Rollover
A rollover is a visual effect in a Web browser page in which passing the mouse pointer over an area in the page causes another area to visually change. A good example is a Web site that sells clothing. This site could allow you to see how a garment looks using different fabric—you would see the different fabric patterns in the garment when you pass the mouse pointer over a color swatch. In fact, you’ll find rollovers in use on a great many industrial-class commercial Web sites.
| Try This at Home | You can use nested rollovers fairly easily to create menus that expand when the mouse pointer rolls over a top-level menu. Why don’t you try to do so? Implementing an expanding menu using rollovers is a great exercise. |
The Image Object Event Model
Creating a rollover involves the simple use of the properties and events of the HTML Image object. To some degree, Image objects function like any other HTML element in a Web page, and they’re manipulated using JavaScript in the same way. But there are some properties and events that only apply to image elements.
Images placed in an HTML document using the HTML <IMG> tag correspond to JavaScript Image objects. Each graphic, represented by an <IMG> tag, is referenced as a JavaScript object. The Image object can be referred to by its name or as a member of the images array of the document object. The images array of the document object stores an Image object for each image that’s placed on an HTML page using an <IMG> tag.
It probably goes without saying that the major impact an image has on an HTML page isn’t an issue of JavaScript, or HTML, but rather a matter of the graphic itself. As you probably know, the bulk of static graphics displayed on the Web are saved as GIF (.gif) or JPEG (.jpg or .jpeg) files.
Each JavaScript Image object is a child of the document object. Image properties are referenced hierarchically, using the name of the image or the image’s position in the images array. For example, the following:
window.document.images[0]
is the first image in the images array for a given document, and the following:
document.theImage
is an <IMG> element with its name attribute set to equal theImage.
Images have some properties, in addition to name, that are useful in creating visual effects. As is usual with HTML elements, these JavaScript properties correspond to HTML attributes.
First, an Image object’s src property sets (or reads) the URL of the graphic file that’s to be displayed. Most JavaScript image manipulation routines use the src property as the main mechanism for creating visual special effects such as animations (for an example, see the slide show application later in this chapter).
Second, you can use the width and height properties of the Image object to dynamically generate effects having to do with the size of an image.
Image controls support the standard HTML element mouse events, which are shown again in case you don’t remember them in Table 11-1. (Events were explained in Chapter 8, “ Understanding Events and EventDriven Programming.”)
| Event | Fires |
|---|---|
| onClick | When a user clicks on an element. A click event doesn’t occur unless an onMouseDown is followed by an onMouseUp over the same element. In other words, onClick isn’t the same as onMouseDown. |
| onMouseDown | When a user presses the mouse button while the mouse pointer is over an element. |
| onMouseMove | When a user moves the mouse within an element. |
| onMouseOut | When the mouse is moved out of an element. |
| onMouseOver | When the mouse is moved over an element. |
| onMouseUp | When a mouse button is released while the mouse pointer is over an element. |
You can place your code in any of these event handlers. It’s important that you distinguish between the different mouse events so that your JavaScript programs function as they’re intended.
Table 11-2 shows some events that are specific to the Image object.
| Event | Fires |
|---|---|
| onAbort | If a user cancels the download of an image |
| onError | If an error occurs when downloading an image |
| onLoad | When an image finishes loading successfully |
Rollovers
As I’ve already explained, a rollover is a commonly used and easy-toachieve effect in which passing the mouse over one image causes a change in another image. For example, suppose you want to show your Web page audience an easy chair upholstered in the fabric selected by the user or, as in the sample project, a butterfly in the pattern the user selects. You’ve always wanted to dress a butterfly, haven’t you?
This project shows you how to use a rollover to “try on” different patterns for a butterfly.
To Create a Rollover:
-
Create nine image files to be used in the rollover. In the example, these are named as shown in Table 11-3 and can be downloaded from the Apress Web site.
Table 11-3: Graphics Files Used in the Rollover Example Filenames
Contains
white.gif
Blank butterfly image that will be filled with patterns
bubble1-swatch.gif
bubble2-swatch.gif
check1-swatch.gif
check2-swatch.gif
Swatch files that represent possible patterns
bubble1.gif
bubble2.gif
check1.gif
check2.gif
Butterfly filled with the designated pattern
-
Place an <IMG> tag at the beginning of the <BODY> section of an HTML page. This tag will use its src attribute to reference the blank image of a butterfly that’s to be filled with patterns:
<IMG src="/books/2/230/1/html/2/white.gif" height=100 width=175 border=0>
-
For each of the four patterns that will be used to fill the butterfly, create an <IMG> tag that loads the swatch file as the value of the src attribute:
<IMG src="/books/2/230/1/html/2/bubble1-swatch.gif" height=75 width=75 border=2>
-
For each of the four <IMG> tags that represents a pattern, add an onMouseOver event handler that loads the graphic file containing the butterfly filled with the pattern into the first <IMG> tag on the page when the mouse passes over the pattern:
<IMG src="/books/2/230/1/html/2/bubble1-swatch.gif" height=75 width=75 border=2 onMouseOver="document.images[0].src='/books/2/230/1/html/2/bubble1.gif'";>
This code assigns the file bubble1.gif to the src property of the first image on the page, designating it as the zero element of the images array.
-
For each of the four <IMG> tags, add an onMouseOut event handler that returns the original blank butterfly to the first image when the mouse leaves the pattern swatch:
<IMG src="/books/2/230/1/html/2/bubble1-swatch.gif" height=75 width=75 border=2 onMouseOver="document.images[0].src='/books/2/230/1/html/2/bubble1.gif'"; onMouseOut="document.images[0].src='/books/2/230/1/html/2/white.gif';">
-
Save the page (Listing 11-2 shows the complete source code).
Listing 11.2: Creating a Rollover Effect

<HTML> <HEAD> <TITLE>Visualize Your Butterfly!</TITLE> </HEAD> <BODY> <H1> Visualize Your Butterfly! </H1> <H2> Pass your mouse over a pattern to see the butterfly wearing it! </H2> <TABLE cellpadding=5 cellspacing=10> <TR> <TD> <IMG src="/books/2/230/1/html/2/white.gif" height=100 width=175 border=0> </TD> <TD> <IMG src="/books/2/230/1/html/2/bubble1-swatch.gif" height=75 width=75 border=2 onMouseOver="document.images[0].src='/books/2/230/1/html/2/bubble1.gif'"; onMouseOut="document.images[0].src='/books/2/230/1/html/2/white.gif';"> </TD> <TD> <IMG src="/books/2/230/1/html/2/bubble2-swatch.gif" height=75 width=75 border=2 onMouseOver="document.images[0].src='/books/2/230/1/html/2/bubble2.gif';" onMouseOut="document.images[0].src='/books/2/230/1/html/2/white.gif';"> </TD> <TD> <IMG src="/books/2/230/1/html/2/check1-swatch.gif" height=75 width=75 border=2 onMouseOver="document.images[0].src='/books/2/230/1/html/2/check1.gif';" onMouseOut="document.images[0].src='/books/2/230/1/html/2/white.gif';"> </TD> <TD> <IMG src="/books/2/230/1/html/2/check2-swatch.gif" height=75 width=75 border=2 onMouseOver="document.images[0].src='/books/2/230/1/html/2/check2.gif';" onMouseOut="document.images[0].src='/books/2/230/1/html/2/white.gif';"> </TD> </TR> </TABLE> </BODY> </HTML>
-
Open it in a browser. As shown in Figure 11-5, the butterfly is patternless.
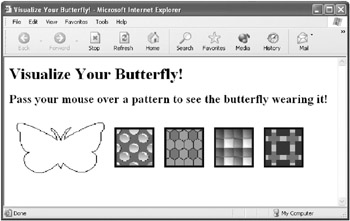
Figure 11-5: The butterfly has no pattern. -
Pass your mouse over a pattern swatch. The butterfly will be “filled in” with the pattern (see Figure 11-6).
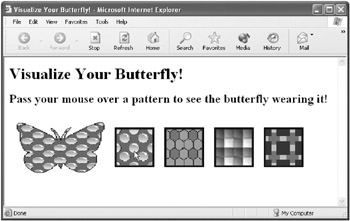
Figure 11-6: The butterfly is “filled in” with the first pattern. -
Move the mouse to another pattern. The butterfly will “fill in” with that pattern (see Figure 11-7).
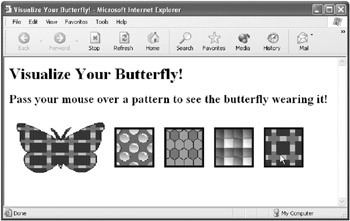
Figure 11-7: The butterfly is now “dressed” using the plaid pattern.
| Note | As I’ve noted several times, it’s obviously true that the visual benefit of the rollover effect depends more on the quality of the graphics used than on programming skill. |
| Tip | There’s nothing to stop you from creating a rollover that changes the graphic rolled over (or clicked) rather than another graphic. This could be called an auto-rollover. |
EAN: 2147483647
Pages: 115