Printing in Project
|
|
Part of managing a project is communicating project information effectively. Many times, this is accomplished through printing and distributing specific project reports. You can print formal reports, and you can print views. For more information about printing reports, see Chapter 17; for more about setting up and printing views, see Chapter 16.
Using Print Preview
Print Preview allows you to preview before printing. Click the Print Preview button on the Standard toolbar, or choose File Ø Print Preview to display the Print Preview screen, shown in Figure 5.9.
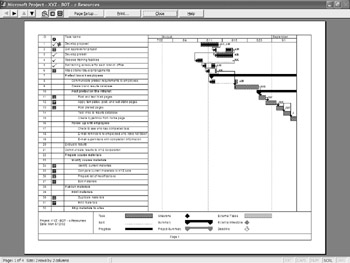
Figure 5.9: Print Preview gives you a clear picture of how the printed document will appear.
Use the Print Preview toolbar, located at the top of the Print Preview screen, to navigate through the document. Table 5.3 describes the toolbar’s buttons.
![]()
| Button | Description |
|---|---|
|
| Use Page Left and Page Right arrows to see additional pages across the view. |
|
| Page Up and Page Down allow you to navigate between multiple pages. |
| | Click the Zoom button and then click anywhere on the document to zoom in and out. |
|
| Click the One Page button to see one page at a time; choose the Multiple Pages button to view all pages of the printout. |
If you want to change the page orientation, margins, headers and footers, legend, or view, click the Page Setup button. When you are ready to go to the Print dialog box, click the Print button. To close out of Print Preview and return to the project, click the Close button. If you need additional assistance to use Print Preview, click the Help button.
Changing Page Setup Options
Access the Page Setup dialog box from Print Preview, or by Choosing File Ø Page Setup. The Page Setup options allow you to do the following:
-
Change the page orientation
-
Adjust the scaling to a percentage or force it to fit on one page
-
Adjust page and margin settings
-
Add headers and footers
-
Add legends
-
Set view options
Adding Headers, Footers, and Legends
Headers, footers, and legends are useful to show project information such as project name, date, page numbers, and keys or legends. Headers and footers appear on every page; you can specify if you want a legend to appear on every page or on its own individual legend page. To enter a header, footer, or legend, click one of the alignment tabs in the Page Setup dialog box (shown in Figure 5.10) and then enter the text you want to appear.
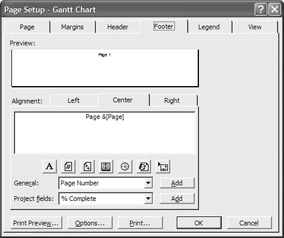
Figure 5.10: Page Setup options include setting headers, footers, and legends.
To enter Fields such as Page Numbers, Number of Pages, Current Date, Current Time, File Name, or Picture, click the corresponding button on the toolbar underneath the text box. You can also select fields from the General and Project fields drop-down lists. Select the field you want to add and then click the Add button located next to each list.
When working with the settings on the legend page, you need to specify whether you want the legend to print on every page or on a legend page, which prints at the end of the project file. You can also specify the width of the legend page, and set the font style, size, and color.
Sending the File to the Printer
After the project file is set up the way you like, it’s time to send it to the printer. Although printing is rather straightforward, there are a couple of settings of which you should be aware, such as the number of pages or copies to print. To print a project file, follow these steps:
-
Choose File Ø Print.
-
Set the Print Range to print certain pages, or accept the default of All.
-
Indicate the number of copies you want printed.
-
Set the Timescale option to print information for only certain dates, or accept the default of All.
-
Choose OK.
You can also do a “fast print” by clicking the Print button on the Standard toolbar. This automatically sends one copy of whatever is visible onscreen to the printer. Be careful with this method because it bypasses the Print dialog box. Be sure that the print range and timescale default of All is what you want; otherwise, you will have to reprint your project file.
|
|
EAN: 2147483647
Pages: 241