Saving Project Files
|
|
In this section, we’ll talk about how to properly save your project files.
Using the Save As Dialog Box
The Save As dialog box appears the first time you save a project. This dialog box is where you identify where you want the file saved and what the filename will be. Similar to the Open dialog box, the Save As dialog box allows you to perform many functions other than just saving files. To save a new Project file, follow these steps:
-
Select File Ø Save As from the File menu, or click the Save button on the Standard toolbar.
-
Use the Save In drop-down list to locate where you want to save the file.
-
Type in the desired filename in the File Name field.
-
Click on the Save button.
| Note | If you need help navigating through the Save As dialog box, refer to the preceding section, “Opening an Existing File.” The options that are available in the Save As dialog box are similar to those in the Open dialog box. |
Using the AutoSave Option
You can also configure Project to automatically save your project files at regular intervals. This is a good safety feature in case the program crashes in the middle of a session. Look for the AutoSave option on the Save tab in of the Options dialog box (Tools Ø Options), shown in Figure 5.8. You can decide how often you want the project to be saved, and whether you want to save just the active project or all open project files. You can also specify whether or not you want to be prompted before every autosave.
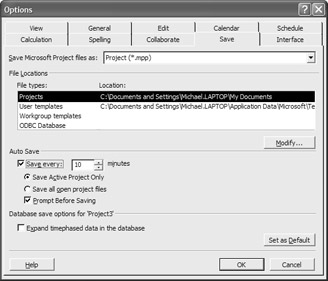
Figure 5.8: AutoSave will save your project automatically.
| Note | The AutoSave feature in Project is not the same as AutoRecovery in Microsoft Word. Project’s AutoSave is a true save, not just an emergency recovery save in the event of a crash. |
|
|
EAN: 2147483647
Pages: 241