Printing a View
|
|
Chapter 16 provides extensive information about creating, modifying, and applying views. If you can display the information onscreen, you’re often one click away from putting it on paper. For example, communicating assignments to team members could be as simple as printing the Gantt chart.
To print the currently displayed view, select File Ø Print, or click the Print button on the standard toolbar. If you’re not sure what the printed view will show, first click the Print Preview button. (Figure 17.4 shows how the XYZ-BOT Gantt chart looks in Print Preview mode.)
In most cases, the onscreen view settings are duplicated when you print. That means you can apply a task or resource filter to the view to print just those tasks or resources that meet the filter criteria (see “Sorting, Filtering, and Grouping” in Chapter 16). Collapse the outline where you don’t need to see the detail behind summary tasks. Expand the outline in places where detail is important. Format text and bar styles, or apply a custom view before you print to see the exact results you want.
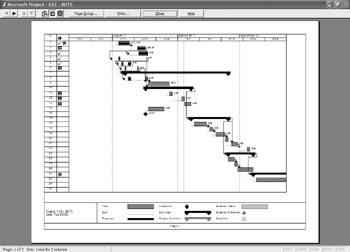
Figure 17.4: Print Preview mode
Printing Part of a View
When you print the Gantt Chart view, all expanded tasks are printed—unless you make some adjustments to the print settings first. Because a project with more than 50 tasks will be too large to fit on one page, Project prints down and across, left to right, starting in the upper left corner of the view. Each page is numbered in the sequence it prints. If you’re interested only in printing the first few tasks in the project, you might need to print only two of the pages from Gantt Chart view (the sheet with the first few tasks and the corresponding chart bars). You do this by clicking File Ø Print to open the Print dialog box and then entering the pages you want to print in the Print Range section.

| Tip | You can also choose to print tasks with start dates that fall within a certain date range. Just adjust the dates in the Timescale section of the Print dialog box. |
If you’re trying to print a specific portion of the view, try inserting manual page breaks before and after the section you want to print. (Select the task you want to be first on the printed page and then click Insert Ø Page Break.) In the Print dialog box, choose the page(s) you want, and make sure that the Manual Page Breaks setting is enabled.
To delete a page break, select the cell below the break and then click Insert Ø Remove Page Break.
Displaying Additional Columns
When you print a view, whether it’s a Resource or Task view, the number of columns displayed onscreen is exactly what gets duplicated on paper. If there are columns in the sheet hidden by the Gantt chart, they won’t show up in the printed view.
You can instruct Project to print all sheet columns, however, without first displaying them onscreen. To do this, choose File Ø Page Setup to open the Page Setup dialog box and then select the View tab.
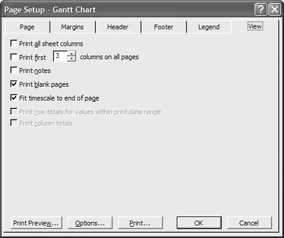
Enable the first option to print all columns; as an alternative, enable the second option and then choose the number of sheet columns you want to print. You can preview how the printed page will look by clicking the Preview button at the bottom of the dialog box.
Hiding Downtime
Most projects have periodic chunks of “downtime.” Although the entire project doesn’t come to a screeching halt, certain resources may not be active on your project during a particular time period. If you’re printing a Resource view, you’ll want to disable the Print Blank Pages feature on the View tab of the Page Setup dialog box so you don’t have pages of blank grid for all your effort!
|
|
EAN: 2147483647
Pages: 241