Editing Code with the Quick Tag Editor
| The Quick Tag Editor is where the true power of the Quick Tag Tools exists. Using the Quick Tag Editor, you can easily examine an HTML tag, change the HTML tag, or completely replace the HTML tag. FrontPage provides color-coding and IntelliSense for code editing within the Quick Tag Editor making it a full-featured tool for editing specific areas of code.
To best get an idea of how all the Quick Tag Editor tools operate, let's create a simple page you can use to experiment with this powerful toolset:
You will use this page throughout this chapter to experiment with the Quick Tag Editor. To access the Quick Tag Editor, either click the arrow button on a tag selector or right-click the tag selector to access the Options menu seen in Figure 27.4. The following Quick Tag Editor options are available to you:
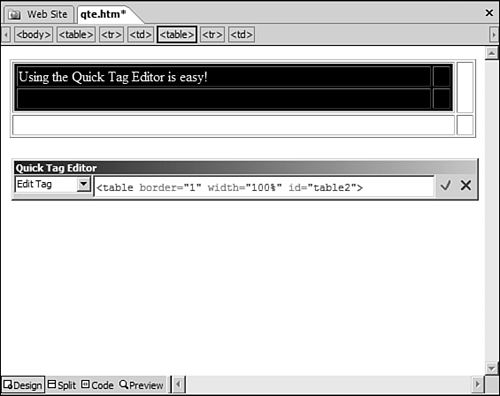
The Edit Tag OptionThe Edit Tag option displays the Quick Tag Editor dialog with the selected HTML tag ready for editing, as shown in Figure 27.6. The code displayed in this dialog is fully color-coded, and FrontPage provides full IntelliSense support. Figure 27.6. The Edit Tag option allows for fast editing of your HTML tags.
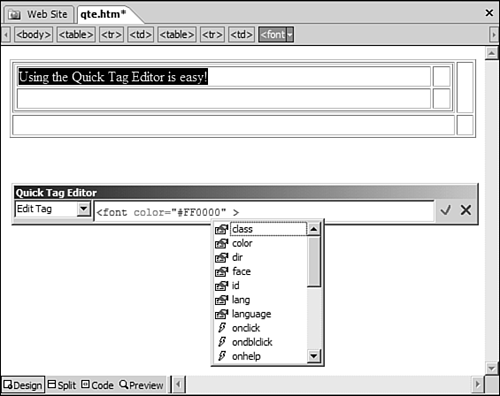
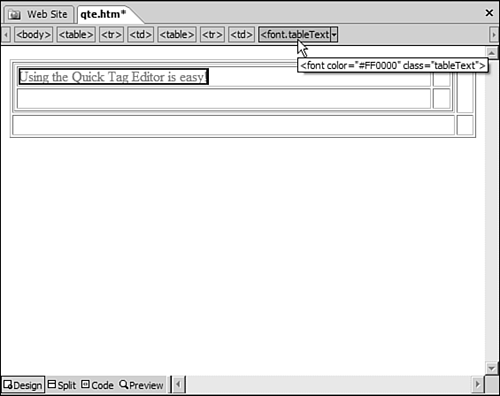
Open the Web page you created and click anywhere inside the text you entered in to the table cell. Notice that a tag selector appears for the <FONT> tag, and if you hover over that tag, a dark border appears around the text you entered. This feature of the Quick Tag Selector makes it simple to select exactly the tag you need when using the Quick Tag Tools. Suppose you have defined a CSS class called tableText that will be used to format any table text in your Web pages. You want to apply the style defined in that class to the text in the table cell. Although you can certainly use Split view to locate the <FONT> tag in code and then edit it there, the Quick Tag Editor makes quick work of the task. To edit the <FONT> tag so that your CSS class applies to it, follow these steps:
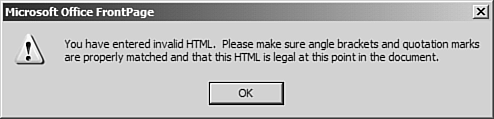
FrontPage will perform syntax checking on the HTML that you enter in to the Quick Tag Editor. If you enter invalid HTML and attempt to commit it to the page, FrontPage will display an error message (see Figure 27.8) and will not allow you to add the HTML to the page. Figure 27.8. The Quick Tag Editor will not allow you to enter invalid HTML.
After adding the class attribute to the <FONT> tag, notice that the tag selector for that element changes to <font.tableText> to indicate the CSS class for the element, as shown in Figure 27.9. If you commonly format your Web pages using CSS classes, the tag selectors make it even more painless to quickly locate tags. Figure 27.9. Tag selectors also indicate the CSS class where appropriate.
The Remove Tag OptionThe Remove Tag option allows you to quickly remove a tag wrapping other HTML elements. This option is only available when the current tag selector represents an HTML tag that is an optional container for other HTML elements. In other words, you can remove a <FONT> tag around some text or a <P> tag around an element because they are optional tags. However, you cannot remove a <TR> tag from a table row because the <TR> tag is not optional. To use the Remove Tag option, follow these steps:
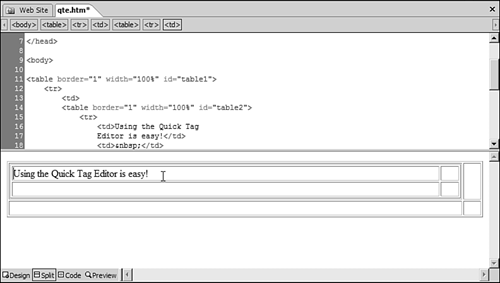
When you remove the tag, the <FONT> tag is removed (see Figure 27.10), but the text contained within the <FONT> tag is retained. Because the tag you removed was responsible for formatting the text, the formatting that you previously applied to the text is removed as well. Figure 27.10. After removing the <font.tableText> tag, the text remains.
TIP To easily tell which part of a page is affected by a tag, hover over the tag selector and FrontPage will draw a dark border around the area. If you display the Options menu for the <TABLE> tag, you'll notice that the Remove Tag menu option is disabled. Once again, the Remove Tag menu option will always be disabled when removing the selected tag will result in invalid HTML on the page. In the case of the <TABLE> tag, removing it would leave <TD> and <TR> tags without a corresponding <TABLE> tag, which would not be valid HTML. The Insert HTML OptionThe Insert HTML option allows you to insert HTML in to your document. The behavior of the Insert HTML option is sometimes hard to predict because it will insert the code in different places depending on whether you have text selected. When you insert HTML using the Insert HTML option, the HTML is inserted at the location of the insertion point if no page elements are selected. If any part of the page is selected, the HTML that you enter is inserted immediately to the left of the tag closest to the selection. In order to truly understand how the Insert HTML option works in different situations, it's best to try out an example.
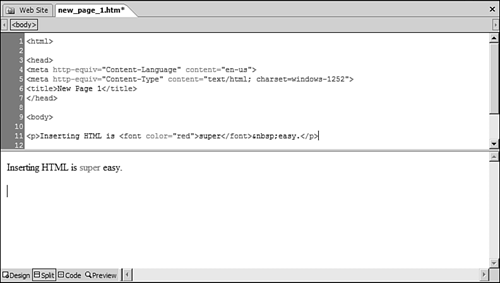
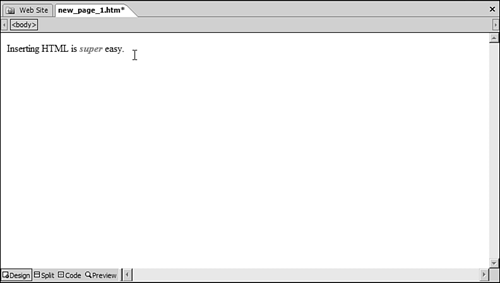
Note that the word "super" now appears before the word "easy" and "super" appears in red. If you look in Code view, you'll see that the HTML you entered was inserted exactly at the insertion point's position, as shown in Figure 27.12. Figure 27.12. The code you entered is inserted right where you placed the insertion point.
TIP The Quick Tag Editor dialog contains a dropdown box that allows you to quickly switch between Quick Tag Tools. Simply click the dropdown and choose Edit Tag, Wrap Tag, or Insert HTML. As you can see by this example, inserting HTML with the Insert HTML option is straightforward when you haven't selected anything before inserting the HTML. However, if you have selected a page element prior to inserting the HTML, figuring out where your HTML will go when you enter it takes a bit more work.
NOTE When entering code, the Insert HTML option will add an opening and closing <strong> tag to the page. FrontPage will always check the code you enter for validity. If you enter an opening tag but not a closing tag, FrontPage will automatically add the closing tag if it is required. You might have thought that adding the <strong> tag with the Quick Tag Editor would surround the word "super" with <strong> tags, but instead, an empty set of <strong> tags appears just to the left of the <font> tag, as seen in Figure 27.13. Anytime you insert HTML with an active selection, the HTML you enter is inserted immediately to the left of the tag represented by the tag selector you choose. In other words, the Insert HTML option will never affect a selection. If you want to enter HTML that will format your selection, use the Edit HTML option or the Wrap Tag option instead. Figure 27.13. The Insert HTML option will always insert the HTML to the left of your selection.
The Wrap Tag OptionThe Wrap Tag option will wrap an HTML tag with the tag you enter. The tag that is wrapped is determined by the tag selector you choose.
The Wrap Tag option wraps the <FONT> tag with the HTML tag you enter in the Quick Tag Editor dialog. Once again, FrontPage will check the HTML you enter for validity. If the HTML you enter is not valid, FrontPage will warn you and will remove it. You can wrap an HTML tag with more than one HTML tag by entering a series of HTML tags in the Quick Tag Editor. For example, in step 4, if you had entered <strong><i> in the Quick Tag Editor dialog, the word "super" would have appeared as bold and italic text, as seen in Figure 27.14. Figure 27.14. Using the Wrap Tag option, it is easy to surround an existing HTML tag with another tag.
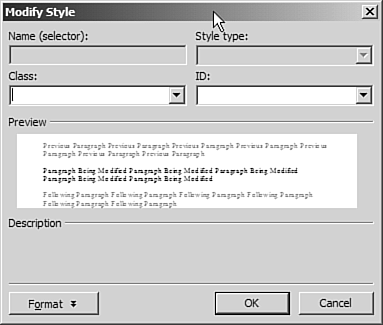
The Tag Properties OptionThe Tag Properties option will display a Properties dialog that is applicable to the type of HTML tag you have selected. For example, if you were to choose the Tag Properties option from a tag selector for the <STRONG> tag you entered, FrontPage will display the Font Properties dialog because the <STRONG> tag is a tag that formats fonts. If there is no Properties dialog for the tag that you have chosen, the Modify Style dialog is displayed as shown in Figure 27.15. Figure 27.15. The Modify Style dialog appears if there is no applicable Properties dialog for the HTML tag you choose.
When changes are made in a Properties dialog, FrontPage will generate code automatically to affect those changes. In some cases, this might cause undesirable effects. To remove the <STRONG> tag from the text you've already entered, follow these steps:
When you remove the <STRONG> tag using this method, FrontPage also removes the <I> tag that you inserted. To correct that, follow these steps:
If you now look at the code that FrontPage generated, you'll see that FrontPage didn't just add the <I> tag back. It also added a <SPAN> tag to format the text. This might not be what you expect to happen, so when editing code with Properties dialogs, it is sometimes useful to remain in Split view so that you can always see what code FrontPage has generated to represent the selections you made in the Properties dialog. |
 For more information on using IntelliSense,
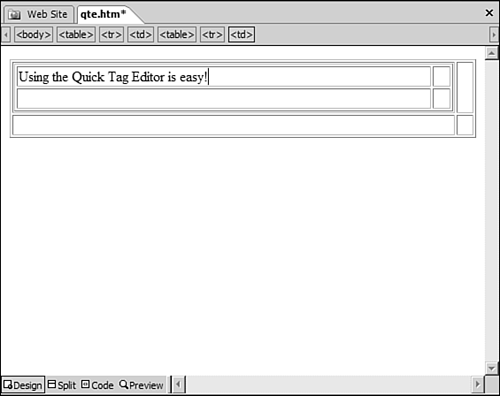


EAN: 2147483647
Pages: 443