Project 1. Wanted Posters For this project, we'll need a suitable victim...er, I mean suitable model. Let's see, who can we coerce, oops, I mean convince to let us play with their image? The young man in the fifth row, yes you. Could you please pass a photo of yourself up here? Thank you. 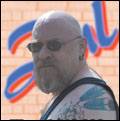 I want this image to have a certain air about itkind of an outlaw-ish feeling. The whole idea here is to portray a fantasy type of image, but with real photographs. To that end, for whichever photo is chosen, the background will most certainly be replaced with something like the image from the digital graffiti project in Chapter 9,"Montages," or something along those lines. After all, it wouldn't do for our "bad guy" to have his photo showing him sitting at the local mall sipping on a latte. Unless, maybe he was sitting on a big ol' motorcycle at the time...in the mall. Well, you get the idea. We need it to reflect the fact that this person is "wanted." Ah, it's so nice to be wanted. 1. | To get started with this project, open the photo you want to use. If you can't find anything suitable, you could go out and shoot something with this project in mind. You'd be surprised at how helpful your neighbors can be. Make sure you don't tell them that you'll be posting copies of this around the neighborhood when you're done. That'll teach them to let their dog bark all night long. If you can't convince your neighbor and you haven't mastered the art of self-portraiture, you can download the image (Tough Guy.tif) I'll be using from the companion website (see Figure 5.1).
Figure 5.1. Hey, this dude doesn't look so tough. 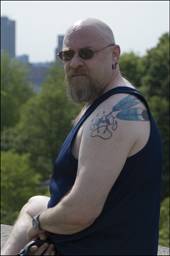
|
Background-ectomy As with many of the projects in this book, we'll be removing the background, or the bad guy from the background, or something like that. In any event, we need to separate the gentleman in Figure 5.1 from his background. You can use one of many methods, of course. I'll briefly outline what I did to this photo and you can follow along, or you can read the section on selections in Appendix B,"Paint Shop Pro 10 in a Nutshell." Even if you're not a big fan of tattoos, you might still want to take a look at the digital tattoos project in Chapter 2,"Digital Plastic Surgery." Give that project a try and then decide if the tattoos you see in Figure 5.1 are real.
2. | Before you begin, you should make a copy of the Background layer to preserve it. To do so, right-click the Background layer and select Duplicate from the pull-down menu.
I started by using the Magic Wand tool to select parts of the backgroundnot the background layer, but the background elements, such as the skyin the photo and then pressing the Delete key. Doing so can, depending on the image, remove much of the material. While you click and delete, make sure you play with the options for the Magic Wand and lower the Tolerance. For example, in Figure 5.2 I've lowered the Tolerance to 6 to help get most of the sky but leave the sky's reflection on the top of the head alone. We want to remove the sky but not the head, right?
Figure 5.2. Use the Tolerance setting to zero in on the areas you want to select. 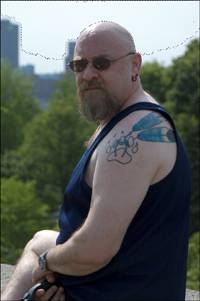
Remember to turn off the visibility of the original Background layer; otherwise, you won't be able to tell when you've deleted part of the background of the image.
| 3. | After making a selection with the Magic Wand tool, I also chose Selections, Modify, Select Similar to bring up the Select Similar dialog box (see Figure 5.3). I then played with the Tolerance values while keeping an eye on the results of the changes by clicking the Preview icon. I wanted to grab the greenery without removing too much of the facial hair. There's some real tricky trimming going on here.
Figure 5.3. Take a little off the side please, but leave most of the hair, will you? 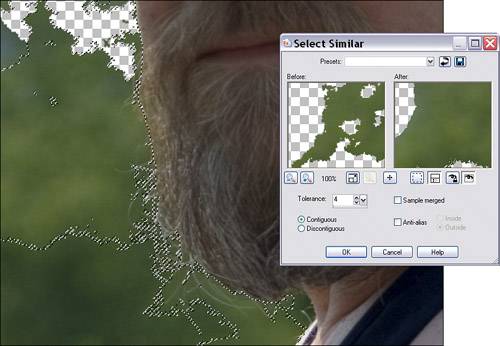
| 4. | When you've removed as much of the background as you can, you might have to zoom in and use the Eraser tool to fine-tune the removal process (see Figure 5.4).
Figure 5.4. Zoom in and remove the rest of the background with the Eraser tool. 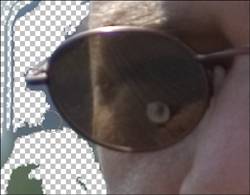
When you're done you should have the suspectsorrythe model against a transparent background.
|
Adding a New Background Now that the original background has been removed, it needs to be replaced with something. I figure a snapshot of a fugitive or wanted poster-type of guy would have to have been photographed against a parking lot or a wall covered with graffiti. There are a number of ways in which a brick wall background can be accomplished. You could, for example, simply photograph a wall. In this project, however, the wall and the graffiti will be created digitally. Let's get started. 5. | Click the bottommost layer in the Layers palette to activate it, and then add a new raster layer. Name the layer Wall.
| 6. | Click the Foreground and Stroke Properties and set the foreground color to white. Select the Flood Fill tool and fill the new layer with white.
| 7. | Click the Background and Fill Properties and turn on the texture option. From the pull-down menu, select Brick Wall; then set the Angle to 0 and the Scale to 250.
| 8. | Set the color to a reddish-brown brick-like color. I used R: 226 G: 134 B: 66, as you can see in Figure 5.5. Right-click in the image to paint in a brick wall.
Figure 5.5. Choosing a texture and color for the background of the wanted poster. 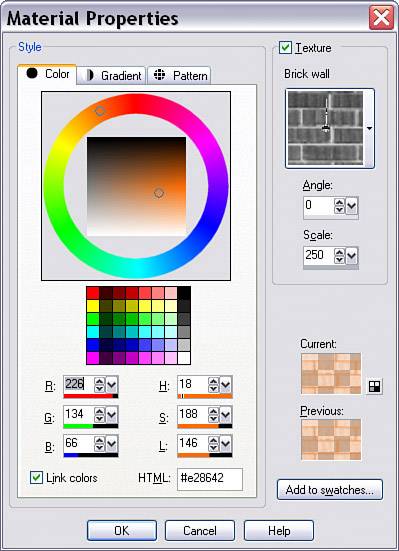
If you'd like, you can substitute the brick wall we're creating with a shot from your digital library. You may, for example, have a picture of a motorcycle, a certain neighborhood where there's construction/demolition going on, an abandoned building, and so on. The idea is to have fun with this and, at the same time, end up with something you can display or send to friends and family.
|
Making the Illusion More Realistic You'll now have a brick wall behind the subject. You can paint some graffiti on the wall if you'd like or do something similar to give the image that not-at-the-mall treatment I mentioned earlier. Whatever method you've chosen to decorate the background, one more thing will make it a little more believable. The background needs to be blurred a little. 9. | Make the Wall layer active and select Adjust, Blur, Gaussian Blur.
Play around with the Radius setting while checking the preview until you get an effect that makes the wall seem as though it's a distance away. I used 15.00 for the Radius. You can see my result in Figure 5.6.
Figure 5.6. Blurring the background to enhance the illusion. 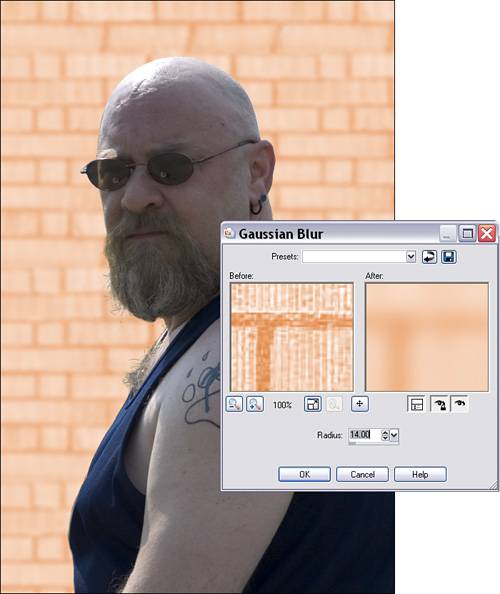
|
Adding the Final Touch Now that the subject is ready, it's time to move in for the kill. We'll use the Text tool to add our wanted information: 10. | Make the topmost layer active and select the Text tool.
| 11. | Set the Foreground color to black and the background color to a gold-ish color. I used R: 226 G: 173 B: 60.
| 12. | Select the Text tool and type in something like Wanted $10,000 Reward, using a font that will complement the look. I chose Playbill, but you can use any font that suits the image you want.
Figure 5.7 shows my final effort. I actually have a photo similar to this stuck to the side of my refrigerator. It's quite a head turner.
Figure 5.7. Our bad guy is now a wanted bad guy. 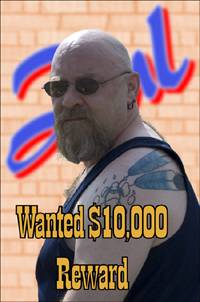
|
You can have even more fun with this image by using it as a basis for the vintage photo project in Chapter 11,"Photos, Photos, PhotosIt's All in the Presentation."
|