Combining Multiple Masks
| By default, all masks are drawn in Add mode, meaning that the contents of the mask are added to the layer selection, and the area outside all of the masks is excluded. There are other options for combining them, however; the five primary mask modes are
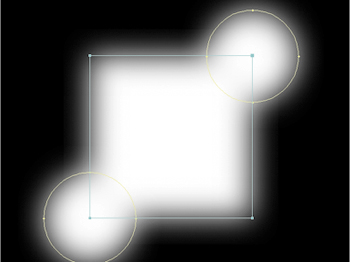
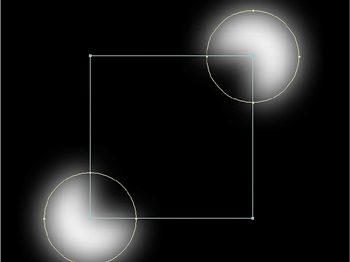
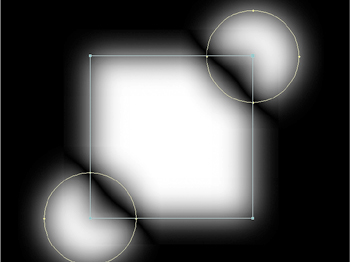
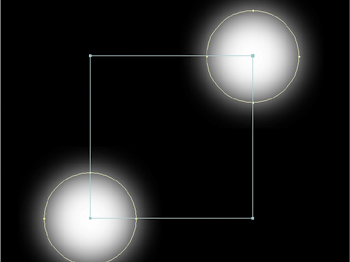
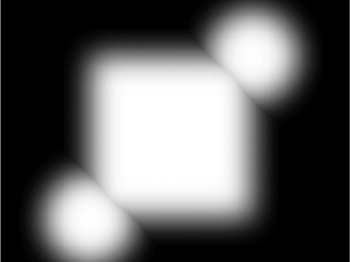
Particularly when rotoscoping (masking an animated shape) it is very wise to take advantage of using multiple masks, for one simple reason: The more points you have to keep track of on a given frame, the more likely you'll have to add a keyframe and the more likely you'll lose track of a point. With multiple masks there is far more forgiveness for small errors and fewer keyframes per mask are needed to complete the job. This topic is explored in greater detail in Chapter 7, "Rotoscoping and Paint." Managing DensityWhen combining masks that have semi-transparent areas, either because the opacity of the masks is less than 100% or, as in the examples shown here, because the edges are heavily feathered, you may not always want the densities to have a completely linear relationship in the overlapping areas. That's when Lighten and Darken modes come into play. Figures 3.20a and b show the result of using each of these modes; they prevent mask densities from building up the way that they do with the other modes. No pixel within the combined masks will have a value that is not already represented in one of the overlapping masks; either the lighter or the darker of the two will be represented. Figure 3.20a and b. With a lighten (3.20a) or a darken (3.20b) mask, the transparency values are chosen either from the mask set to this mode or those overlapping it, depending on which has the lighter (higher) or darker (lower) values.
Keep these in mind when combining multiple feathered or semi-transparent masks. Remember that mask modes apply to the layers above them, so these modes should be applied as each overlapping mask is added, not to the top mask in the stack. Managing Multiple MasksA few features in After Effects exist specifically to help you manage multiple masks in a single layer. One is Cycle Mask Colors, which is tucked away in the User Interface Colors section of Preferences. When Cycle Mask Colors is off, your masks are created in the same color (the mask itself and its swatch in the timeline) each time. To change it, you click the swatch. With Cycle Mask Colors checked on, which I recommend, the mask colors vary on their own.
Also, when editing overlapping masks, you may find it helpful to use the context menu to lock and hide other masks. Context-click on the mask, and choose Lock Other Masks; now you can edit the active mask only. Context-click again, and choose Hide Locked Masks; this time your view is uncluttered as well. |

EAN: 2147483647
Pages: 156