Creating a Form from Scratch
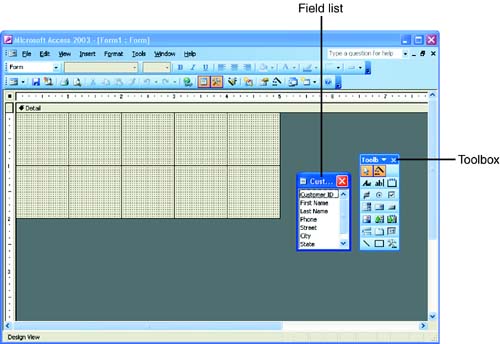
| You can also create a form from scratch in the Form Design view. This method might seem difficult at first, but Access provides tools, such as the Field list and the Toolbox, to help you create your form. The most powerful and difficult way to create a form is with Form Design view. In this view, you decide exactly where to place each field and how to format it. To open the Form Design view and create a new form, follow these steps:
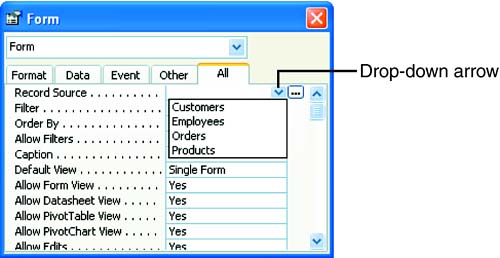
Notice that a Field list and Toolbox appear in the Form Design view. You work with creating form controls (the equivalent of a field in a table) using these tools in the next section. You can also start the process of building a form in the Design view by double-clicking the Create Form in Design View link in the database window. Because you are not specifying a table for the Field list to use (as you did in the steps outlined in this section), however, that Field list won't be available. Instead, you must specify a table for the Field list. Figure 10.7. The properties dialog box enables you to set a number of properties for the form including the source table. In the properties dialog box, be sure that the All tab is selected. Click in the Record Source box, and then use the drop-down arrow that appears to specify the table that will serve as the field source for the form. The Field list appears in the Design View window. Close the properties dialog box.
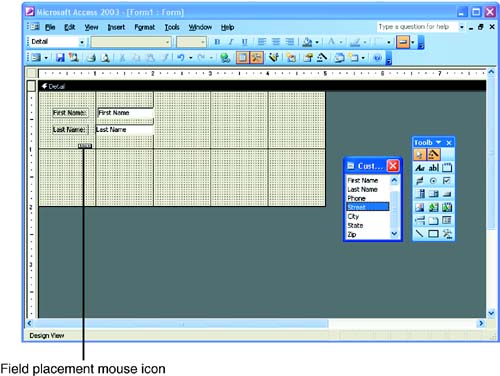
Adding Controls to a FormThe basic idea of the Form Design window is simple: It's similar to a light table or a paste-up board where you place the elements of your form. The fields you add to a form appear in the form's Detail area. The Detail area is the only area visible at first; you'll learn how to add other areas in the next lesson.
To add a control displaying a field to the form, follow these steps:
When you drag a field to a form from the Field list, it becomes a control that displays data from that table field on the form. It is basically a link between the table field and the control on the form. You can drag more than one field to the form at once using the steps described earlier. However, in step 2, rather than clicking and dragging a single field, do one of the following before dragging:
You can move objects around on a form after you initially place them; you'll learn how to do this in the next lesson. Don't worry if your form doesn't look very professional at this point; in the next several lessons, you see how to modify and improve your form.
|
EAN: N/A
Pages: 660