| The Form Wizard offers a good compromise between the automation of AutoForm and the control of creating a form from scratch. The wizard enables you to select the fields, layout, and look for the form. Follow these steps to use the Form Wizard: -
From the database window, click the Forms object type. -
Double-click the Create Form by Using Wizard option located in the database window to open the Form Wizard (see Figure 10.3). Figure 10.3. The Form Wizard enables you to choose which fields you want to include from as many different tables in the database as you like. 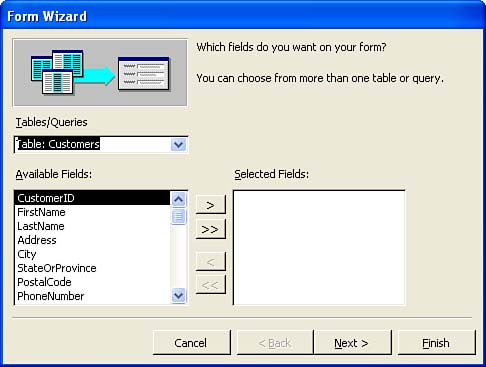 -
From the Tables/Queries drop-down list, choose a table or query from which to select fields. (By default, the first table in alphabetical order is selected, which probably isn't what you want.) -
Click a field in the Available Fields list that you want to include on the form, and then click the Add ( > ) button to move it to the Selected Fields list. -
Repeat step 4 until you've selected all the fields you want to include from that table. If you want to include fields from another table or query, go back to step 3 and choose another table.  | Selecting All Fields You can quickly move all the fields from the Available Fields list to the Selected Fields list by clicking the Add All (>>) button. If you make a mistake, you can remove a field from the Selected Fields list by clicking it and then clicking either the Remove ( < ) button or the Remove All ( << ) button. |
-
Click Next to continue. You're asked to choose a layout: Columnar, Tabular, Datasheet , or Justified . Click each button to see a preview of that type (Columnar is the most common). Select the layout you want to use, and then click Next . -
The next screen asks you to select a style for your form (see Figure 10.4). Click each style listed to see a preview of it; click Next when you've selected a style. Figure 10.4. You can select from several form styles. 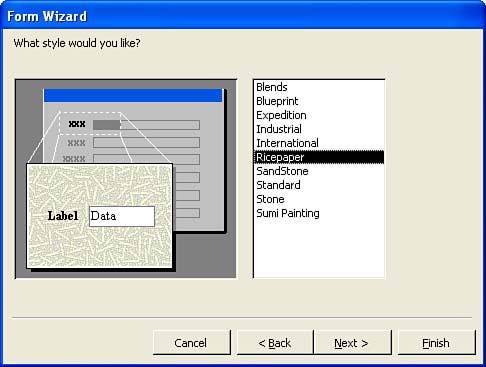 -
On the last screen, enter a title for the form into the text box at the top of the dialog box (if you want a title other than the default). -
Click the Finish button. The form appears, ready for data entry (see Figure 10.5). Figure 10.5. The Form Wizard creates a usable form using the fields, format, and style that you selected. 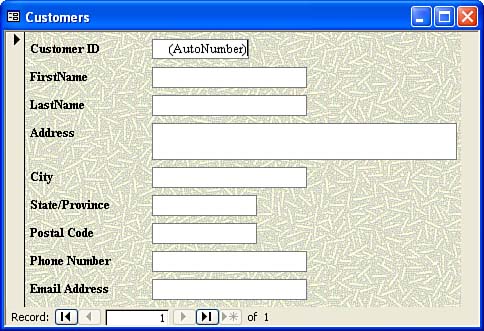 If your form's field labels are cut off or need some additional layout work, you can fix them in the Form Design view. You learn about modifying a form in Lesson 11, "Modifying a Form."  |