Chapter 5. Working with Images
| CONTENTS |
| |
|
- Images and the Web
- Designing with Images
- Interview: Marion Kaltenschnee
- Special Uses for Images
- Working with Dynamic Images
- Editing Images: Working with External Editors
- Summary
Graphic images provide much of the artistry and visual appeal of the web. Used with care and imagination, images can add sparkle and charm; used without discretion, they can slow download times to a crawl and cause more annoyance than enjoyment. Understanding graphics and being able to manipulate them on web pages is critical to a web designer's success.
This chapter examines web image formats, and discusses how to insert graphics into a web document and set their attributes using Dreamweaver. You will learn about the use of the Dreamweaver Assets panel, and then delve into some special uses for images: background images, sliced images, image maps, and single-pixel GIFs. This chapter ends by showing you how to easily create a web photo album with Dreamweaver.
Images and the Web
Images destined for use on the web need to be planned and handled much differently than print-media graphics, and a grounding in the basics of these distinctions is important for the web developer.
Supported File Formats
Web browsers currently support two types of graphic file formats, GIF and JPEG, with a third, PNG, beginning to gain support. Although all three graphic types are compressed, they each compress the graphic data differently.
GIF
The most commonly used kind of image on the web is the GIF (Graphics Interchange Format), which has a file extension of .gif. There are two basic types of GIFs: GIF87 and GIF889a. For the purposes of this book, only the more modern 89a form is discussed. The GIF format is 8-bit, allowing only 256 colors per image. GIF compression is based on compressing contiguous pixels of the same color.
GIFs compress data by restricting the number of colors used in the image to 256 or less. Therefore, GIFs are best suited for line art and other illustrations with limited color palettes and areas of solid color. These graphics can be converted into GIF format without loss of image quality, and the resulting file size is almost always smaller than the same image would be in JPEG format (see Figure 5.1).
Figure 5.1. The GIF format is ideal for illustrations consisting mostly of areas of solid color.

GIFs are not usually a good choice for photographs or photographic-style imagery, which are best handled with the JPEG format discussed in the next section.
GIF images have several useful features, including the following:
| |
|
Note
| | GIF images use the LZW (Lempel-Ziv-Welch) compression scheme (patent held by Unisys). There has been concern that payment would be required for the use of this proprietary scheme, but this concern has not been substantiated. Still, in part due to this potential problem, the PNG format described later in this chapter is being positioned to take the place of the GIF format. |
JPEG
The second most common web image format is JPEG, an acronym for Joint Photographic Experts Group, which was the name of the committee that wrote the standard. JPEGs usually have a file extension of .jpg or .jpeg, and are a format designed for compressing photographic images that might contain thousands, or even millions, of colors and shades of gray. JPEGs store high-quality photographic images in significantly smaller files than GIFs, reducing download time over the Internet.
Unlike GIFs, JPEGs are not well suited to illustrations or text. When illustrations are saved in JPEG format, they might acquire extraneous information, sometimes in the form of unsightly dots known as artifacts (see Figure 5.3). However, JPEGs are ideal for photographs or photographic-type images. However, JPEGs are idea for photographs or photographic-type images.
Figure 5.3. When illustrations are saved in JPEG format, they can acquire unsightly dots known as artifacts.
![]()
JPEGs do not support transparency or animation; for these effects, GIFs must be used. JPEG images do allow a kind of interlacing in a format known as the progressive JPEG. Progressive JPEGs fade onto the screen from a low to a high resolution, starting out fuzzy and becoming more and more clear. Like interlaced GIFs, progressive JPEGs tend to be a little larger in file size than their nonprogressive equivalents.
PNG
PNG stands for Portable Network Graphics. The PNG format has comparable features to the GIF89a, and a few more. PNGs feature greater color depth support, color and gamma correction, and 8-bit transparency (useful for anti-aliased edges, translucent drop shadows, and so on). Especially notable is the fact that the compression algorithm for PNG is not proprietary, which makes PNG likely to take the place of GIF. No 4.x-generation browser supports PNG well enough to rely on it, so web developers would be wise to avoid this format until the browser support improves.
Images and Bandwidth Considerations
Bandwidth is the amount of data that can be transmitted across a link on the Internet in a certain length of time, often measured in bits per second (bps), kilobits per second (Kbps), or megabits per second (Mbps). Although high-speed connections are becoming steadily more common with the increasing availability of Cable Internet and DSL (Digital Subscriber Line) service, many web users still depend on slow dial-up connections. Frustration over slow-loading web pages is almost universal. A web site developer who keeps this in mind and makes every effort to produce fast-loading pages will find that his creations are much more popular than sites with a longer load time.
Graphics are the primary culprit in this problem, and so the web designer's effort to provide quick-loading pages needs to focus on reducing the total file size of graphics on each page. Because graphics can deliver such a powerful visual impact, it's easy to get carried away with using them, but some restraint is definitely in order.
Some basic strategies for reducing a page's total file size include the following:
-
Eliminate all unnecessary images.
-
Reduce the number of colors in GIF images. Reducing the bit depth of a GIF from 8 bits (256 colors) to 5 bits (32 colors) can significantly reduce the file's byte count.
-
Use the right kind of compression format for each image. GIFs are almost always better for illustrations and JPEGs for photographs.
-
When using JPEGs, increase the degree of compression as far as possible while not sacrificing too much image quality.
Images and Accessibility Issues
Web site developers need to be aware that the target audience for most web sites includes those people with visual impairments. Currently, the web's most serious accessibility problems are related to blind- and sight-impaired users, simply because most web pages are so visual.
A number of considerations must be remembered when building handicapped-accessible web sites; a good resource for learning more can be found at http://www.cast.org/bobby, a web site maintained by the Center for Applied Special Technology (CAST). This site provides information, links, and a free service to help web page authors identify and repair significant barriers to access by individuals with disabilities.
The use of images is one of the areas in which web designers stray the furthest from providing accessible web pages, and so this usage deserves a special mention. The following list enumerates some of the most important considerations with regard to web graphics and accessibility:
-
Images should always include alt attributes. This code provides an alternative way to "display" your images to people who can't see them. Ideally, an alt attribute verbalizes the meaning or role of the image, describing what the image is intended to communicate and what will happen if it is clicked. alt text should be brief and to the point, and can be added to an image tag in Dreamweaver easily using the Property inspector.
-
Text colors and backgrounds can contribute to legibility, or can make reading your text almost impossible. Be sure that your color combinations have enough contrast and that they aren't unreadable for red-green colorblind users. Busy background patterns are often annoying to normally sighted visitors and can cause your page to be useless to a partially sighted user.
-
Image maps should use alt attributes for each area's link option.
| | Dreamweaver MX offers some helpful new options for making sure that web pages are as handicapped-accessible as possible. One of these is a user preference which, when turned on, causes Dreamweaver to prompt you to include certain attributes when you are inserting an image. This preference can be turned on by choosing Edit > Preferences > Accessibility, and checking Show Attributes When Inserting Images. |
When this preference is set, and you use Dreamweaver's Insert bar or Insert > Image menu command and select an image to insert, the Image Tag Accessibility Attributes dialog box opens, as shown in Figure 5.4.
Figure 5.4. The Image Tag Accessibility Attributes dialog box.

Here you can specify an alt attribute for the image as well as a longdesc attribute. The longdesc attribute's value can be any URL; its purpose is to further describe and identify the image verbally.
Note
| | Using Dreamweaver's Site Reports, you can check to be sure you have included alt attributes in all your <img> tags. To run the report, choose Site > Reports. From the drop-down menu at the top of the Reports dialog box, choose which documents you wish to check. Check the box Missing ALT Text, and click Run. Dreamweaver will run the check and display its findings in the Results panel. |
Note
| | Search engines are essentially like blind users; many of the techniques you employ to accommodate the visually impaired also make it possible for search engine spiders to navigate your site and index your content without being able to "see" the images. See Chapter 7, "Utilizing Head Content," for more on maximizing your pages' searchability. |
Designing with Images
Certain essentials with regard to the use of images usually become part of the Dreamweaver web developer's skill set; this section presents some of the ABCs of the effective use of web graphics.
Good Basic Practices
Care in the naming of image files and in organization of image files in your directory structure are good habits worth learning.
File Naming
Much of what enables a beginner to become an intermediate designer, and an intermediate an expert, is the simple ability and willingness to be careful and fastidious in the organizational chores involved in building a web site. The naming of image files is one of these prosaic but crucial practices.
The following are the most important "do's and don'ts" of file naming:
-
Do make your filenames meaningful. Filenames do not need to be limited to eight characters, and it is often wiser to use complete words than abbreviations, which can be misspelled.
-
Do use underscores to aid readability. You'll stay more organized with names such as headshot_fred.jpg than with phtofrd.jpg.
-
Do not use special characters other than the underscore or hyphen in file names.
-
Do not use spaces in file names.
Folder Organization
Also critical to a web developer's work is the arrangement of site files in a folder hierarchy that makes sense. It is recommended that, even for the very simplest of sites, a separate folder below the site root be created to hold all the site's image files.
Many developers follow this practice on site after site, even naming the folder the same way every time (often "images" is used) and never have to think twice about where in the site structure a GIF or JPEG is located.
Inserting an Image
You can insert an image in a Dreamweaver document in several ways. With the document insertion point where you want the image to appear, do one of the following:
-
On the Insert bar, from the Common tab, click the insert image icon (it looks like a picture of a tiny tree).
-
From the main menu, choose Insert > Image.
-
Press Ctrl+Alt+I (Windows) or Cmd+Option+I (Mac).
Another way to insert an image is to drag the Insert Image icon from the Insert bar to the point in the document where you want the image to be inserted.
All these methods result in the Select Image Source dialog box being opened (see Figure 5.5).
Figure 5.5. The Select Image Source dialog box.
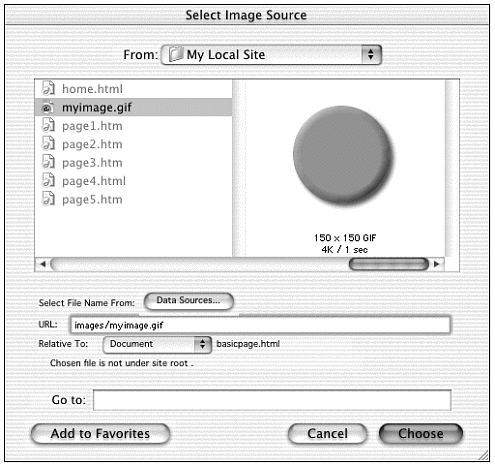
The Select Image Source dialog box enables you to choose an image file from any location on your local system. Browse to the desired image file, and select it. When you have set all necessary options, click OK.
At the bottom of the dialog box is an option that deserves special mention, the Relative To field. When you insert an image into your document, Dreamweaver adds HTML code to the page, which specifies the path to the image; this path gives the browser directions as to how to find the image so that it can be displayed. For files within the site, these directions can be given in two ways: relative to the site's root directory or relative to the document. A relative to site root path describes where the file is located in relation to the directory that contains all the site's files, as set in your Dreamweaver Site Definition. An IMG tag with a site-root-relative path looks like this:
<img src="/images/clock.jpg">
A relative to document path describes where the file is located in relation to the HTML file where the image is being added. An <img> tag with a document-relative path looks like this:
<img src="images/clock.jpg">
This setting in Dreamweaver is "sticky" it will remain on one setting until and unless it is changed. Unless there is a compelling reason to do otherwise, when working in Dreamweaver, it's best to stick with document-relative paths for images, and for all other internal links. See Chapter 6, "Links and Navigation," for more about document-relative, site-root relative, and absolute URLs.
Note
| | Absolute paths provide the complete URL of the linked document, including the protocol to use (usually http:// for web pages). For example, http://www.macromedia.com/ support/dreamweaver/contents.html is an absolute path. You must use an absolute path to link to a document on another server that is not part of your site. |
Setting Image Properties
When you insert an image into your document while working in Design view, the image will appear in the Document window, and it will be selected. While the image is selected, take a look at the Property inspector, which provides the opportunity to set a number of different attributes for the image (see Figure 5.6).
Figure 5.6. When an image is selected, the Property inspector allows a number of properties to be set.

Exercise 5.1 Inserting an Image with Wrapped Text
In this exercise, you'll insert an image into a web page and allow text to flow (or wrap) around it.
Before you start, copy the chapter_05 folder on the CD to your hard drive. Define a site called Chapter 5, with this folder as the local root folder.
-
From the chapter_05 folder on your hard drive, open the file insert_image. You'll see that the file displays some strange-looking Latin "filler text."
-
Place the cursor at the beginning of the first paragraph and, on the Common tab of the Insert bar, click the Image icon.
-
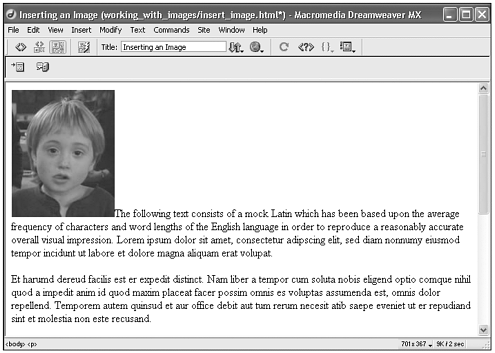
In the Select Image Source dialog box, browse to the images folder (within the local chapter_05 folder) and select zoli.gif. At the bottom of the dialog box, be sure that the Relative To option is set to Document and click OK. You'll see that the image has been inserted into your document (see Figure 5.7).
Figure 5.7. When an image is first inserted, the default alignment property causes it to sit on its own line.
-
With the image still selected, notice the W and H fields in the Property inspector. Dreamweaver has entered the exact width and height of the image in pixels as attributes of the <img> tag. It is best to leave these fields exactly as they are, and to always make any changes to an image's dimensions in a graphics program.
-
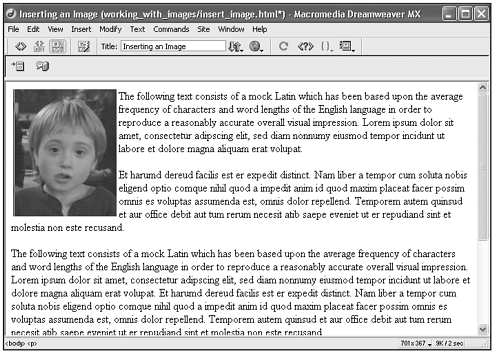
With the image still selected, on the Property inspector, from the Align drop-down list, choose Left. The text will flow around the image and continue on below it (see Figure 5.8).
Figure 5.8. When an image is aligned left, it will sit on the left side of the browser window or containing element, and text will flow around it on its right side.
-
With the image still selected, now try setting Align to Right.
-
Return the image to left-aligned, and note that the text comes very close to the edge of the image, both at the graphic's right side, and possibly above and/or below the image, depending on the size of your Dreamweaver Document window and the way the text flows. To give the image more space, select it, and in the Vspace field enter 5; in the Hspace field, enter 10. Notice how this gives the image white space of 5 pixels on both the top and bottom and 10 pixels on both the right and left.
-
Select the image again, and in the Property inspector, in the ALT field, type a text string to serve as an alternate to the actual graphic. This is important for those who are browsing the web with images turned off or who are visually impaired. You might use Close-Up Photo of Little Boy.
-
Save your document and choose File > Preview in Browser (or press F12) to view it in a browser. Note what happens when the cursor lingers over the image for a few seconds.
Tip
| | The various versions of Netscape Navigator 4 are infamous for their problematic renderings of HTML pages. One such "bug" sometimes occurs when images are right- or left-aligned and text needs to flow around them. In certain circumstances, Netscape 4 allows the text to accommodate the image, but the text will not return to flowing across the full screen (or container) after it gets past the bottom edge of the image. A workaround for this problem is to use double line-break tags (<br><br>) to separate paragraphs. |
Positioning Images Using Tables
Using tables to position page elements is covered in detail in Chapter 10, "Using Dreamweaver's Page Layout Aids." This section briefly touches on the usefulness of tables for aligning images on an HTML page. The following exercise provides a good example of an application of this technique.
Exercise 5.2 Positioning Images Using Tables
In this exercise, you'll arrange several images on a page, using HTML tables to position them.
If you haven't done so yet, copy the chapter_05 folder on the CD to your hard drive. Define a site called Chapter 5, with this folder as the local root folder.
-
Open a new blank document and name it acme_widgets.html.
-
Pull down the Modify menu and choose Page Properties. In each of the fields Left Margin, Top Margin, Margin Width, and Margin Height, place a 0. This tells the browser not to maintain the usual default margins on the top and left side.
-
In the Common tab of the Insert bar, click the Insert Table icon (it looks like a little gray 3x2 table). In the Insert Table dialog box that opens, specify these attributes:
-
Rows: 1
-
Columns: 2
-
Width: 100%
-
Border: 0
-
Cell Padding: 0
-
Cell Spacing: 0
-
-
Click OK to insert the table into the document (see Figure 5.9).
Figure 5.9. A table as it looks upon first being inserted in the Dreamweaver Document window.

-
The table has two columns, each consisting of one cell. Place the insertion point in the left cell. Click the Insert Image icon, browse to the images folder (within the chapter_05 folder), choose header_left.gif, and click OK. Relative To should have remained set to Document and should not need to be reset (see Figure 5.10).
Figure 5.10. The exercise page with just the left graphic inserted.
-
Place the cursor just to the right of the image you've inserted and press Tab; this moves the insertion point into the right table cell, which can be hard to do otherwise. Now click the Insert Image icon again, browse to header_right.gif, and insert it (see Figure 5.11).
Figure 5.11. The second image won't sit on the far right where it belongs until the table cell alignment is set.

-
The goal is to force the second image to the right side of the browser window. To accomplish this, put the insertion point anywhere in the right cell. In the tag selector at the bottom left of the Document window, click the rightmost <td> tag to select the table cell in which you've just inserted the second graphic image. In the Property inspector, in the Horz drop-down list, choose Right. This aligns all the content in that table cell to the right.
-
Save your document and press F12 to view it in your primary browser. Try resizing your browser window drag the edges to make it narrower and then wider. Because of the way it has been made in two parts and inserted into a 100%-width table, the header you've created stretches and shrinks to accommodate the size of the browser window (see Figure 5.12).
Figure 5.12. Exercise 5.2 as it should look when completed.

Note
| | Setting an image's alignment, as you did in the first exercise in this chapter, tells the browser where to put the image in relation to the text around it. Setting a table cell's alignment tells the browser where to align any content contained within the table cell. Because no text is involved in this second exercise, using table cell alignment was used, although setting the image alignment would have the same effect. |
Tip
| | The tag selector is one of the easiest ways to select an HTML element. The tag selector shows the tags that contain the current selection or insertion point. The tags display from left to right in order of the outermost tag to the innermost tag. Selecting a tag in the tag selector activates the appropriate Property inspector for that element. |
Linking Images
Images can be used as hyperlinks, and images are frequently used as graphic buttons. Making a single image into a link is quite simple with Dreamweaver. Just follow these steps:
-
Select the image.
-
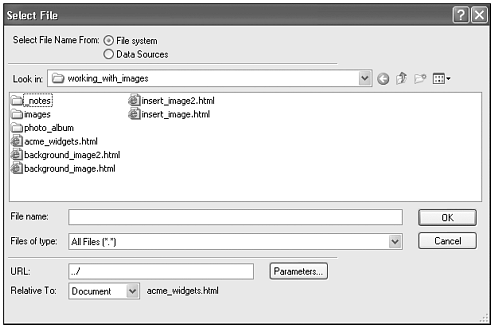
Toward the middle of the Property inspector, click the yellow browse-for-file button next to the empty Link field and choose the file you want to link to.
Alternatively, just type the URL into the Link field (see Figure 5.13).
Figure 5.13. The Select File dialog box.
Adding a link to an image encloses the <img> tag in <a> tags, as in this example:
<a href="acme_widgets.html"><img src="images/zoli.jpg" width="150" height="184" border="0"></a>
Normally, a browser will display a hyperlinked image by putting a border around the image in the same color as a colored text link. This was useful in the early days of the web to indicate that an image was a link. Many web developers feel this visual cue is not necessary any longer because there are other signs that an image is a link (primarily, the "little hand" mouse-pointer). To remove this border, just select the image, and enter 0 in the Border field in the Property inspector.
The possibilities for using images as links go much further. Image maps are discussed briefly later in this chapter, and are covered more thoroughly in Chapter 6. You also read about rollover buttons in Chapter 6 as well as in Chapter 16, "Getting Interactive with Behaviors."
Using the Dreamweaver Assets Panel with Images
The Dreamweaver Assets panel provides a useful way to organize and reuse elements within a particular site, and is covered in Chapter 22, "Local Site Management."
One of the nine asset categories is Images. When working on an active document within a given site, the Assets panel will display a complete list of all GIF, JPEG, and PNG files used in the site (see Figure 5.14).
Figure 5.14. When the Images category is selected, the Assets panel will display a list of all image files used in the site.
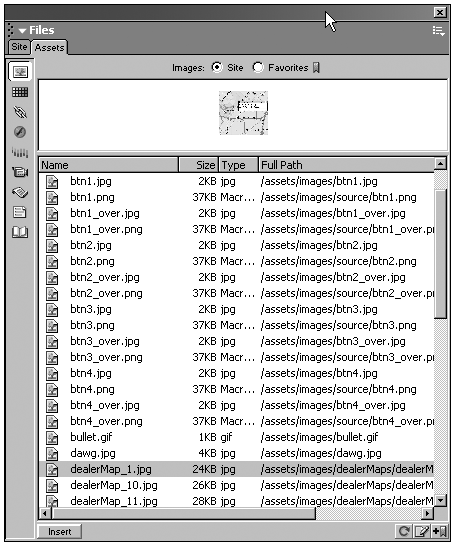
As with the other types of elements included in the Assets panel, images can be previewed, inserted directly into a document, opened in an external editor, or copied to another site.
Note
| | You must define a site before you can use the Assets panel; see Chapter 22. |
Tip
| | When a site has a large number of images, certain images that will be used repeatedly can be added to the Assets panel's Favorites list. Images included in the Favorites list are easier to locate and can be managed in several ways that ordinary assets can't. |
Interview: Marion Kaltenschnee
Business Name: Kaltenschnee Webdesign
URL: www.kaltenschnee.de
How did you get started in Web design? What has your learning process been like? What kind of work are you currently doing?
I bought my first computer in 1986. My computer's OS was on a DD floppy disk (the very same floppy disk that also held my entire thesis of 150 pages). That's not how I got into web design, but that's how I got into working with computers. My friends considered this a cold and calculating act. However, I was sick of writing papers on my electric typewriter. Wasting paper and time typing stuff over and over again and yet never being able to deliver a beautiful clean copy.
Ever since then, I worked with computers. Over the years, I worked with scheduling programs, graphic programs, databases, charting programs yet nothing fulfilled me. Then, I read about HTML and coded a page with horizontal rules and <h1> headers in Notepad. I was hooked. I was also five months pregnant and had to move across Canada. Couldn't find a job. So I learned HTML. Recently, I started learning ColdFusion.
Everything I know, I learned by trial and error, which took a long time. In retrospect, it would have been more efficient to take courses or to start reading books much earlier, but in a way, this was a long intensive road of discovery that helped me ripen as a web designer. I am doing freelance work for small businesses.
What hardware and software do you use in your work?
Single-sided ideology is not my thing. I prefer Macs, yet own a PC. For software, I use Macromedia Dreamweaver, Fireworks, and Flash, the Corel Suite and Corel Knock-out. For dynamic sites, I use Homesite. When I grow up, I shall upgrade to UltraDev. For dynamic sites, I found myself using a pencil Is that considered hardware or software? The lead was a 1B.
Tell us a little about the ways you normally work with web graphics.
-
Photos. Scanned-in material usually needs some work to better harmonize with the color scheme and style of the web site. Brightness, contrast, intensity, hue, and saturation to say the least. Sometimes, photos need to be retouched heavily: get the photographer's knee out of the picture; cover up those pimples; touch up that fold line from the company's brochure.
-
Anything to make the graphic material supplied by the customer more aesthetic. There's a lot of trial and error involved, but you develop an eye what to try.
-
Vector graphics. Sometimes, it is more useful to redraw a company logo with a Bezier tool than to scan it in, for example, when working with Flash. Some scanned-in logos can be vectorized using tools like Corel Trace. The result is a smaller, cleaner file that you can manipulate to your heart's content.
When you have had the opportunity to be a little more creative with images, what have you tried? What would you like to experiment with?
It is fun to scan real-life stuff. You can scan in just about anything that is flat or flattenable. I've scanned in medieval parchment, roses, lavender, peacock feathers, hair, fur, silk, lips, gift wrap, and leaves.
I use bits and pieces of this stuff for lots of things for example, to make my own patterns or textures for Fireworks.
I'd like to make collages. rich in color, luminescent. And I'd like to learn more about making realistic-looking objects a la Japi Honoo.
What trends on the web and in the web designer's work do you see as important?
-
CSS. Learning all about it is a win-win situation.
-
Flash. In my opinion, it is overused by people who don't know how to use it but customers want it.
-
XML/XHTML.
What advice would you give to someone just starting out in Web design?
-
Keep your daytime job (at first).
-
Be tolerant and generous. Helping others helps you learn and makes the world a better place.
-
Don't forget there's a whole wide natural world out there.
Special Uses for Images
Going beyond simple inline images opens the door to techniques that allow for a great deal more variety and complexity; this section reviews some of the most popular and more advanced web graphic techniques.
Background Images
Since the early days of the web, images have been used as page backgrounds, with results ranging from subtle and artistic to garish and distracting. Used with discretion, background images can add distinctive visual effects to a web page.
HTML provides the ability to associate an image with the background of a document by using the BACKGROUND attribute of the <body> tag:
<body background="bluegreen.gif">
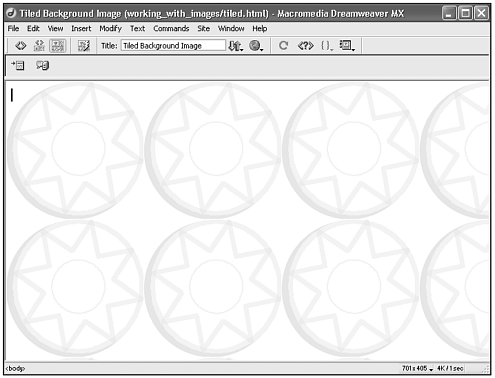
This attribute will cause a browser to load the file bluegreen.gif and then "tile" it in the document background, repeating it in both the horizontal and vertical directions to fill the entire document (see Figure 5.15).
Figure 5.15. A tiled background.
Cascading Style Sheets also enable you to specify an image as a background, but allow a whole lot more flexibility and control, enabling you to create varied and interesting effects.
Refer to Chapter 13, "Using Cascading Style Sheets," for a fuller explanation of the process of writing style sheets with Dreamweaver. This chapter just goes over some of the effects possible with CSS background images.
The examples use a document-wide (internal) style sheet, but the style declarations discussed also can be included in a linked (external) style sheet. It is important to note as well that not every CSS property is supported by every browser. This chapter sticks mostly to widely supported styles, but testing in all the target browsers is always necessary.
Tip
| | With CSS, a background image can be applied to any element, whether block-level or inline, including paragraphs, headings, anchors, tables, table cells, and so on. |
Tip
| | A background image can be applied to an HTML element either by redefining the element, or by applying a custom class to a particular instance of the element on the page. |
The possibilities for background images with CSS are almost limitless. Table 5.1 shows some of the potential options.
| CSS Property | Use |
|---|---|
| background-image | For specifying an image file URL to be used as a background image. |
| background-repeat | For determining whether an image is to be repeated horizontally, vertically, in both directions, or not at all. |
| background-position | For specifying where the image should be positioned in relation to the element to which it is applied. |
| background-attachment | For declaring a background image as fixed with respect to the viewing area, and thus unchanged by the effects of scrolling. |
Exercise 5.3 walks you through experimenting with some CSS background image possibilities.
Exercise 5.3 Using Background Images
In this exercise, you'll explore some of the different ways that CSS can be used to position background images.
If you haven't done so yet, copy the chapter_05 folder on the CD to your hard drive. Define a site called Chapter 5, with this folder as the local root folder.
-
Open the document background_image.html.
-
Open the CSS Styles panel by clicking its icon on the Mini-Launcher at the bottom of the Document window, or by pulling down the Window menu and choosing CSS Styles.
-
Click the New CSS Style icon at the bottom of the CSS Styles panel, as shown in Figure 5.16.
Figure 5.16. Click the New CSS Style icon to open the New CSS Style dialog box, as shown in Figure 5.17.
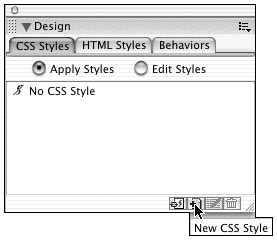
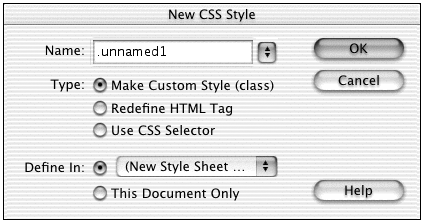
Figure 5.17. The New CSS Style dialog box.
-
Next to Type, select Redefine HTML Tag. From the drop-down list next to Tag, select Body. Next to Define In, select This Document Only. You've just told Dreamweaver that you want to redefine the <body> tag in a document-wide style sheet.
-
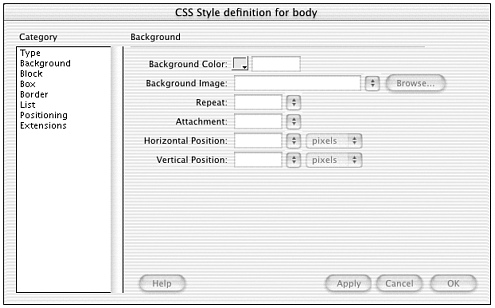
Click OK. This opens the CSS Style Definition for Body dialog box. On the left side of this box, you'll see a list of categories; choose Background (see Figure 5.18).
Figure 5.18. The CSS Style Definition for Body dialog box.
-
Click the Browse button next to the Background Image field and browse to the chapter_05/images folder, and choose star_small.gif. Click OK, and in the next box, click Done.
-
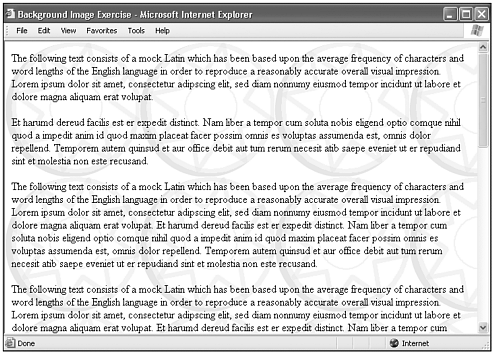
In the Dreamweaver Document window, the image appears as a background to the page, and is tiled in both directions to fill the viewing area. Although the Dreamweaver Document window displays many CSS styles, it doesn't display all of them, and it's important to preview CSS-styled pages with actual browsers. Use F12 and Control+F12 (Windows) or Cmd+F12 (Mac) to view this page in your default preview browsers for the remainder of this exercise (see 5.19). (Default browsers for previewing in Dreamweaver are set up in Edit > Preferences > Preview in Browser.) It's best to close the browser window used to preview after each use.
Figure 5.19. The exercise document at Step 8, shown in the browser window.
-
Now return to the Document window, and in the CSS Styles panel, select the radio button for Edit Styles. The left-hand pane of the panel should now list Body. Double-click the word Body, and choose the Background category.
-
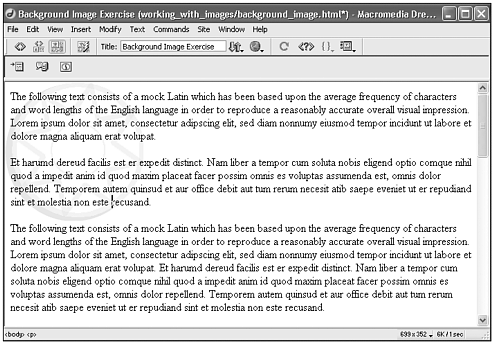
From the Repeat drop-down list, choose no-repeat. Click OK and Done, and preview in the actual browser again. You'll see that the star image now appears only once, in the upper-left corner (see Figure 5.20).
Figure 5.20. The no-repeat value for the property background-repeat keeps the image from tiling.
-
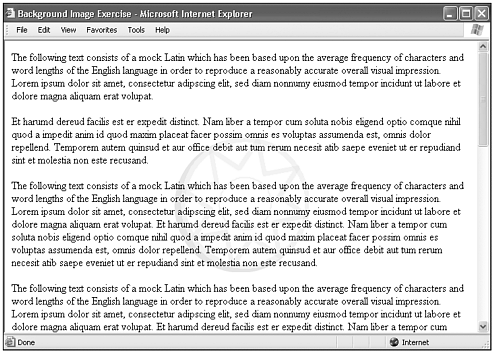
Repeat step 9. This time, choose Center as the horizontal position and Center as the Vertical position. Click OK and Done. Preview with the browser (see Figure 5.21). Here, the image is centered vertically and horizontally in the <body> of the document. Remember, it is important to preview your document in an actual browser, because Dreamweaver's Document window provides only an approximation of the actual result in a browser, and does not support all CSS styles.
Figure 5.21. The background-position property enables you to specify the location of the image within the element.
-
Repeat step 9. Now choose Attachment: Fixed, click OK and Done, and preview with the browser. Use the right scrollbar, and notice the fixed position of the background image. Note that this property is not supported by Netscape 4 series browsers.
-
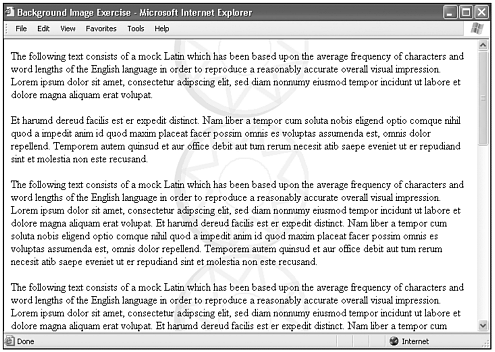
Once more, repeat step 9. This time, choose Repeat: repeat-Y. Click OK and Done and preview with the actual browser. You'll see that the image repeats along the horizontal axis of the page (see Figure 5.22).
Figure 5.22. The repeat-Y value for the background-repeat property causes the image to tile along the horizontal axis only.
-
Try using an image of your own, perhaps a much larger or much smaller one (images with subtle color and low contrast are best for backgrounds) and experiment with the different options. Remember that a background image can be applied to elements other than the <body> tag as well; you might try adding a table and applying a background to one of its cells. The possibilities can be very stimulating to the designer's creative abilities!
Sliced Images
Many of the best web sites make use of image slices and tables. An image slice is a portion of a larger image, like a puzzle piece, except that image slices are always rectangular. When image slices are arranged in the same table, and the Cell Spacing and Cell Padding are set to O, the layout design is seamless and no one can tell that you are actually using a set of chopped-up images.
Note
| | Tables without set dimensions behave like "shrink wrap," closing in tightly around whatever they contain. |
Fireworks includes a variety of tools for making image slices and for exporting the slices as a table you can view in Dreamweaver.
After you have sliced your image, you can name and export each slice individually and build the table in Dreamweaver on your own. You can also save the HTML for the table directly from Fireworks.
When your images are sliced and placed seamlessly into a table, select a specific slice and use the Link field on the Property inspector to link it to another file. You also can give each slice its own name and alt attribute in the Property inspector. In addition, you can link certain parts of image slices using an image map.
Image Maps
An image map is HTML code that designates areas of a graphic image as hotspots. Hotspots can have hyperlinks so, in the browser, when a user clicks a hotspot, an action occurs, such as a new page being loaded.
Image maps can be very useful; Chapter 6 covers them in detail.
Single-Pixel GIFs
A single-pixel GIF is just what it sounds like: a GIF image consisting of only a single pixel, and usually made transparent. These little units are popular with web designers because they easily solve some common layout problems and contribute to some interesting design possibilities. Two of these uses are described here.
A single-pixel GIF can easily be created in any graphics program; just open a new document with the dimensions 1x1 and save (or export) it as a transparent GIF.
Note
| | Single-pixel GIFs are often referred to as spacer GIFs or shims. |
Single-Pixel GIFs as Spacers
Web browsers will interpret the size of a graphic from the width and height attributes of the <img> tag, and so it is possible to stretch the size of an image. As discussed earlier, it's usually not a good idea to change the width and height attributes to resize an image in the browser, but the single-pixel GIF is the one exception to this rule. Strategically placed in a page layout, and sized with the desired width and height, a spacer GIF can help to arrange page elements in the desired positions, while contributing almost nothing to page weight and remaining invisible.
Tip
| | Single-pixel gifs are tiny, and hard to see in Design view! When inserting a single-pixel GIF, be sure to adjust its height and width before deselecting it after you've deselected it, it's very hard to find and select it again. If you do lose a single-pixel GIF, select the items around it and go to Code view. somewhere in the selected code, you'll find the <img> tag. Change the width and height there. |
Single-Pixel GIFs as Rules
An interesting technique involving single-pixel GIFs allows the creation of horizontal or vertical rules. Rules are straight lines for separation of page content, or just for decoration. HTML provides a horizontal rule tag, and these beveled gray lines have been seen on the web since its first days; but with tables and GIF spacers, many special effects can be created that are impossible with the <hr> tag.
The technique is based on tables. In its simplest form, a table is created whose only purpose is to create a rule (or perhaps several rules parallel to one another). A transparent single-pixel GIF is inserted into the empty table cell just to prop it open, and the background color of the cell is set to the desired color for the rule. The table is then set to the desired width. When percentage-based tables are used, lines can be built to stretch and shrink to fit the user's browser window size.
Because tables without set dimensions act like shrink wrap, the table cell holding the GIF will close in around it, allowing only a thin line of the cell's background color to show.
In this way, some distinctive visual effects can be created with almost no graphics, and with the ability to flow with a "liquid" page layout.
You also can create vertical rules, although, because of the nature of tables and vertical dimensions, they depend on being placed in one column of a table where an adjacent column holds content that will serve to prop open the cell.
Working with Dynamic Images
| |
|
Generally, images and other media files are not stored in databases. Rather, the database stores a file name or URL that points to the image. The dynamically generated web page can then contain an <img> tag that uses a database field in the src attribute. Like this:
<img src="<%=(Recordset1.Fields.Item("filename").Value)%>"> Assuming that the database contains a record with the filename field set to "necklace.gif", the above references would generate code like this:
<img src="necklace.gif">
To insert a dynamic image (simplest method):
-
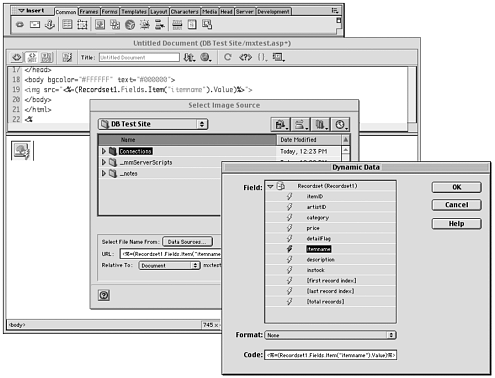
In the Insert bar, click the Image object, as you would for any image (see Figure 5.23).
Figure 5.23. Inserting an image with a dynamic source.
-
When the Insert Image dialog box appears, select Data Source instead of File System.
-
A list of available fields in the current document's recordset(s) will appear. Choose one of these fields and click OK. The image is inserted in the document with a placeholder (lightning bolt) icon.
Look in the Server Behaviors panel and you'll see that a new Dynamic Attribute behavior has been added to the page. The dynamic attribute is your image's src.
Assigning Width and Height
Note that, when you insert a dynamic image, Dreamweaver doesn't give it a width or height. That's because, since the image src information has not yet been determined, Dreamweaver doesn't know its dimensions. If you know for certain that all images referred to in your database will have the same dimensions, and you know what those dimensions are, you can add the width and height yourself, by entering them in the image Property inspector. If you're not sure of the dimensions, or if your images' dimensions might vary, leave these attributes unassigned.
Working with Partial URLs
The database field used to generate the src does not have to contain the entire absolute or relative path to the image. If, for instance, your images will be in an images subfolder, and the database field called on includes only the filename, you can create the rest of the path as you're placing the dynamic image. In the Insert Image dialog box, after you've chosen the database field to use as the src, type the rest of the path information into the URL field, like this (added code is in bold):
images/<%=(Recordset1.Fields.Item("filename").Value)%> If you name your images carefully, you can even do away with the filename database field entirely. Say your database has a field called itemname. You can tweak the code that appears in the URL field when you insert the dynamic image, to look like this (added code in bold):
images/<%=(Recordset1.Fields.Item("itemname").Value)%>.gif"
Assuming the itemname field for one of your collected records contains necklace, the generated HTML will look like this:
<img src="images/necklace.gif">
Making Other Image Properties Dynamic
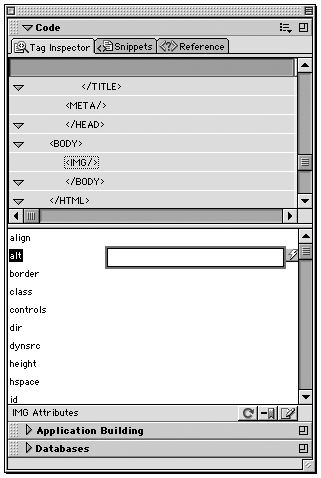
Any property of an image can be filled in with the value from a database field, assuming the field contains meaningful information relevant to that property. (It's pointless setting the width or height to get their values from a field that might not always contain numbers, for instance.) Other properties you might want to set dynamically include alt, id, and lowsrc. To make other properties of an image dynamic, use the Tag Inspector (see Figure 5.24), like this:
Figure 5.24. Using the Tag Inspector to assign dynamic image properties.
-
Insert the image as described in the previous section.
-
With the image selected, open the Tag Inspector. Make sure the <img> tag for the image is highlighted. All properties of the tag will show in the inspector.
-
From the list of properties, find alt, lowsrc, or whatever property you want to change. Click in the value area next to that property.
-
For some properties, a lightning bolt icon will appear. Click the icon to open a dialog box showing the currently available database fields. Choose one, and that field's value will be assigned to that property.
-
For other properties, a browse/folder icon will appear. Click the folder icon to open a dialog box for choosing a source file. In this dialog box, choose Data Source instead of File System, and a list of database fields will appear. Choose one.
Editing Images: Working with External Editors
Whether you use Macromedia Fireworks or another image editing program, Dreamweaver enables you to specify your choice of external programs so that they can be easily accessed when it is time to work on the graphics needed for a web site.
Using Fireworks with Dreamweaver
Dreamweaver and Fireworks are designed to be used together; and it is easy to work on files interchangeably between the two. Designed to allow a streamlined workflow for editing, optimizing, and placing web graphics in HTML pages, these two programs are an ideal combination for building professional web sites. This subject is covered in detail in the Appendix A, "Using Dreamweaver and Fireworks Together."
Using Other Graphics Programs with Dreamweaver
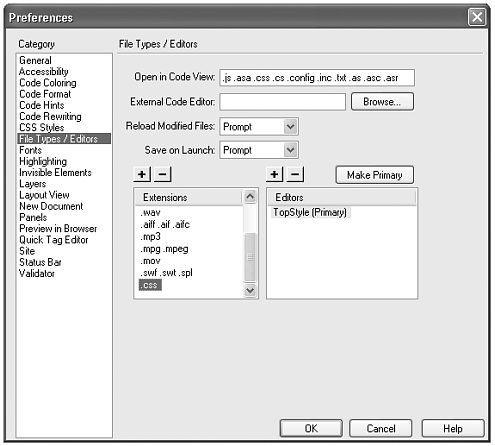
Dreamweaver MX provides preferences for automatically launching specific applications to edit specific file types. If desired, graphics programs such as Adobe Photoshop, Adobe Illustrator, CorelDRAW, or Paint Shop Pro can be specified as the external editor for images in Dreamweaver. Here's how:
-
In Dreamweaver, choose Edit > Preferences and select File Types/Editors (see Figure 5.25).
Figure 5.25. The File Types/Editors pane of the Preferences dialog box.
-
In the Extensions list, select a web file extension (.gif, .jpg, or .png).
-
In the Editors list, select the application desired and click Make Primary. If the application doesn't appear in the list, click the plus (+) button just above the Editors field, browse to the application, and double-click it. If the Editors list has more than one application in it, select your chosen application and click Make Primary.
-
Repeat as necessary to set your graphics program as the editor for other web graphics file formats.
With your chosen graphics program set up as the primary editor for a file type, double-clicking a file of that type in the Site panel will open that application.
Summary
Web graphics can do great things for a web page when they're understood and used properly. This chapter covered the basics of the use of images on the web, looking at some of the simple and fancier ways to incorporate them. In upcoming discussions of tables, layers, and frames, you will learn more about the numerous possibilities for arranging images, along with text, on web sites.
| CONTENTS |
EAN: 2147483647
Pages: 49
