| When the skeleton has been properly set up, you can bind the skeleton to the character's skin. Maya offers two direct ways to go about this: Maya also offers two indirect ways to attach a character to a skeleton: With Smooth Skinning, vertices (polygonal character models) or CVs (for NURBS character models) of the skin might be influenced by the position of multiple joints. After setting up Smooth Skinning, you would go through each joint and adjust the weighting on its nearby skin. You can do this by numerically editing the weights in a spreadsheet, or by visually painting the weights on the skin as a grayscale visual interaction. For Rigid Skinning, each point is moved by one joint only. This obviously creates problems where joints bend, because a crude implosion of the character mesh will occur therethat is, the geometry attached to the bending joint will move with the joint, while the geometry where the joint attaches will remain in place, creating a collision of CVs or vertices. Maya offers a rigid mesh smoother called a flexor to smooth the bent areas in this case. Lattice Skinning uses lattice deformers, skinning their influence lattices. This approach has the advantage of making it easy to adjust how the character is deformed by adjusting the influence of lattice points. Wrap Skinning works on the wrap influence objects of wrap deformers. The advantage of this approach is that it allows for easy connection of directly animated low-resolution character models (for editing) to high-resolution models (for rendering) by allowing the low-resolution model to wrap deform the high-resolution model. Tutorial: Binding the Character to the Skeleton Next we'll actually bind the character's "skin"the mesh of the BoxBoy characterto the skeleton. For this tutorial, we will use the rigid bind approach, and add flexors to fix the problems that occur at the bend points of the character. -
Select the root of the skeleton by opening the Outliner (hotkey: shift+O ) and opening the waist and transform1 objects to get to the joint1 root of the skeleton. Next, shift-select the BoxBoy character in the Perspective view. Now, bind the skeleton to the character with Hotbox Skin Bind Skin Rigid Bind option box. Reset the settings and choose Bind Skin. -
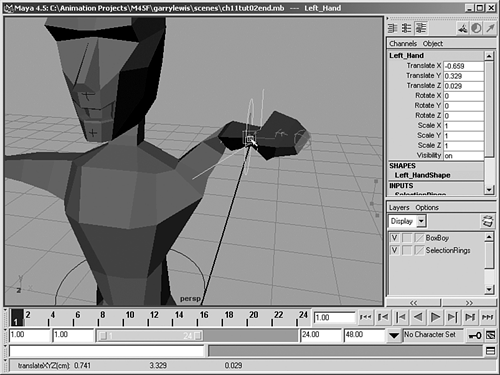
Now try selecting the hand circles and moving the hands up in the air. You'll see a kind of "bunching" and pulling at the shoulder joint that doesn't look right, as shown in Figure 11.12. Adding a flexor will fix this. Undo any position change of the hand.   Figure 11.12. Inhuman bending will occur at some joints after rigid binding.  tip Now that the character is bound to the skeleton, you may need to get the character back to this neutral pose after having applied animation to the skeleton. Flexors, for example, should always be applied to the skeleton in its bind pose. If you need to get back to this pose, you can always select the root joint of the skeleton and put it back into the bind pose with Skin Go to Bind Pose. Usually, you must disable IK solving first, with Modify Evaluate Nodes IK Solvers to toggle this function on and off. -
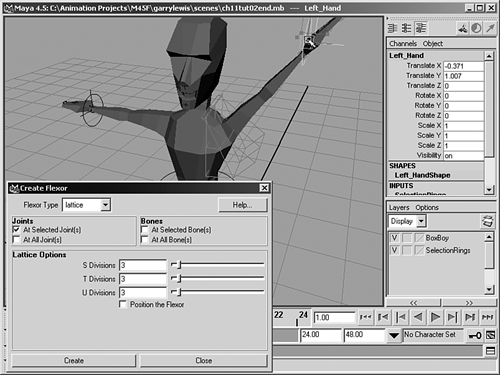
To fix the shoulder, select the character's left bicep joint. Now choose Hotbox Skin Edit Rigid Skin Create Flexor The Create Flexor dialog will appear. Set Flexor Type to Lattice. Check only the At Selected Joints for the Joints and none of the Bones options. Set the Flexor Lattice Options to 3x3x3 and click Create. A lattice will appear around the shoulder. The Create Flexor dialog will remain open . -
Test the flexor by moving around the Left_Hand circle while in Shaded view. You should be able to see how the flexor adapts to the shoulder rotation and warps the nearby BoxBoy mesh, as shown in Figure 11.13. Figure 11.13. The added shoulder flexor smoothes the bending effect.  -
Make a new layer, name it flexors, and then select the new flexor and add it to this layer. Turn off the BoxBoy layer's visibility. -
Now select the character's right bicep joint. In the Create Flexor dialog, confirm that the settings appear as before, and click Create. Leave the Create Flexor dialog open. -
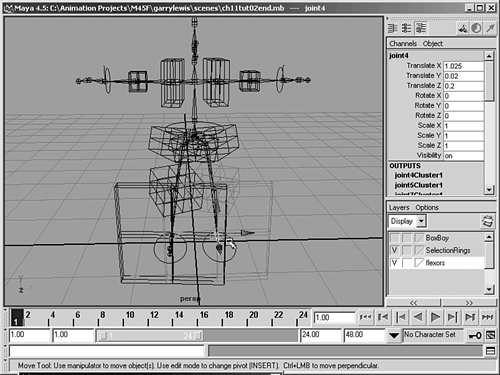
Repeat the last step for the elbows, knees, hips, and ankles of the character. Assign all the created flexors to the flexors layer. The flexors will be sized differently depending on the joint, as shown in Figure 11.14. Figure 11.14. The skeleton with flexors at all the critical bending joints.  -
Now we'll adjust the flexor settings. Toggle the BoxBoy mesh visibility on. Select the Left_Hand ring and bring the arm to the side of the character. Select the right shoulder flexor for the character, and in the Channel Box, select the label "Creasing" and MMB-drag in the viewport to adjust this value in real time (Maya's Virtual slider). After you see the effect, set this value to -0.4. Try this with the Rounding variable to see its effect. Leave this value set at 1.0. Put the hand back where it was by selecting the Left_Hand ring and setting its translate to 0,0,0 in the Channel Box. Set the left shoulder flexor values to the same settings. -
Toggle visibility off for the flexors. Now we'll create a handle for the entire character. Create a NURBS circle with Hotbox Create NURBS Primitives Circle. Name the circle BoxBoy_handle. Assign the circle to the SelectionRings layer. -
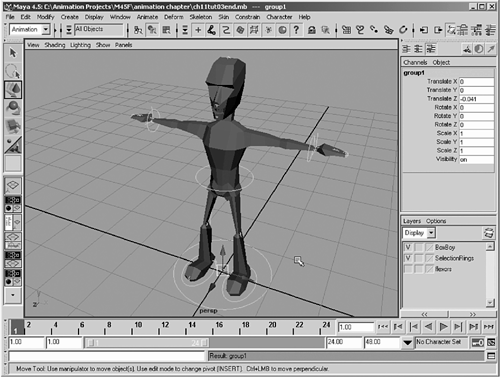
Select all the selection rings, with BoxBoy_handle last. Then choose Hotbox Edit Group option box, reset the settings, and click Group. Now, any time you need to move the entire character to a starting position, you can simply select the base ring named BoxBoy_handle, and press the up arrow to select the entire group of rings. You can then move it wherever you want, as shown in Figure 11.15. Figure 11.15. An overall handle added to the base of the character allows for fast positioning.  Now that we've got our character bending the right way, we can create some animation and make use of the hand and foot selection rings we created. When animating your own characters , sometimes you'll have to go backward and fix skinning deformation problems that were not evident until you posed the character in a position more extreme than in your prior tests.   |
