Character Animation
|
| < Day Day Up > |
|
Animating the character (Character Animation) is usually both the most complicated and the most interesting task. There are several packages for the Windows/Intel platform created for this purpose: for example, Life Forms Studio from Credo Interactive (http://www.lifeforms.com) or Life Studio from LifeMode Interactive (http://www.lifemi.com). As a rule, there are no modeling tools in these packages; you must import the model from a multi-purpose package, animate it, then export the model to the format of the appropriate package. In most cases, you can use source files obtained via motion capture. Some packages, such as Kaydara MOCAP from Kaydara (http://www.kaydara.com), offer complex solutions.
Traditionally, the best multi-purpose package in this niche is the Maya package from Alias|Wavefront, but gradually the other packages have intruded into this area of the 3D graphics. 3ds max is not an exception here, with the character animation tools becoming more advanced from one version to another.
Discussing character animation in 3ds max, it would be unfair not to mention the Character Studio package, the 3ds max plug-in intended exclusively for character animation. While this book was being written, the fourth version of the above package was released. It offers many new features for character adjustment and animation. Discreet has priced this package at $995. If you are serious about character animation, it must be at your disposal.
So, what is offered by 3ds max to raise the efficiency of character animation? First, notice the character assembly features (Character Assembly). These allow you to work with the character's objects as a whole, save animation as files, and load them when necessary.
Another novelty is animation based on the "pose-to-pose" principle (Pose-To-Pose). The method considerably speeds up the animation of many objects.
Let's go back to our character, the astronaut.
When linking the objects, we tried too hard and linked the control objects of the legs (Foot-R, Foot-L, Knee-R, Knee-L) and arms (Arm-R, Arm-L, Elbow-R, Elbow-L) to the base objects (_BODY and Chest). These links must be broken before the character is assembled.
-
Select the above objects and break the links by pressing the Unlink Selection button on the main toolbar.

Create the Character Assembly.
-
Select all objects in your scene (and the screen handlers), then create the character:
-
Main menu à Character à Create Character
-
An object will be created symbolizing the character (Fig. 4.27). Actually, this is a fake object, an "icon" to which the rest of the assembly's objects are linked. Try to move, rotate, and scale it. As you can see, all objects correctly perform these manipulations, allowing you to forget the scale of your character.
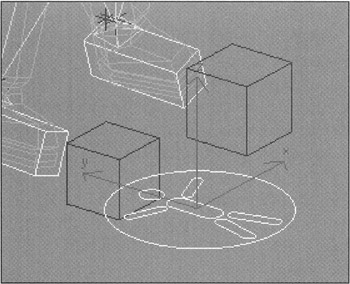
Figure 4.27: Object of the Character Assembly type
On the control panel, there are several buttons for this object that also allow you to manipulate the assembly objects and the whole character. We will use only some of these features.
| Note | The developers of 3ds max strongly recommend adjusting the links of the objects' parameters using the Wire system after the character is assembled (i.e., "within" the character). In our case, these adjustments were made beforehand. We experimented a little and encountered no special problems or, rather, failed to notice the difference. This peculiarity already may have been corrected in version 5.1. Still, we suggest that you to follow the developers' recommendation. |
To explain further operations, below is a brief description of traditional animation recording algorithms and those of the Pose-To-Pose animation method.
To start traditional animation recording, press the Auto Key button. (In previous versions of 3ds max, the appropriate button was named Animate.) The Time Slider is moved to the required frame. Any movements and other changes of the object in this frame will lead to the key creation only for the changed parameter. For further animation, go to the required frame and change the required parameter.
In Pose-To-Pose animation, the sequence and result are somewhat different. Press the Set Key button (or, rather, Toggle Set Key Mode), and the object will be edited (moved, rotated, etc.) in the required frame of the animation. No animation recording takes place because you specified the animation keys by pressing the Set Key button. The keys will be specified for all parameters highlighted in the Key Filters dialog, no matter if they were changed or not. The changes to parameters that are not highlighted will be ignored.
It is convenient to use the named selection sets (Selection Set) in Pose-To-Pose animation. These sets simultaneously create keys for all objects of the selection, considerably accelerating the animation process of many objects.
Let's use this method to animate our astronaut.
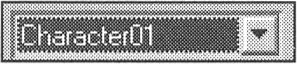
Character assembly could be used for this animation. You could use it by opening the drop-down list in the animation control panel (Animation keying controls). The Character01 line is in this list.
The use of this method, however, will set you back a bit. Why? You will animate only the control objects, but the keys will be set on the parameters of all objects of the assembly. Therefore, it is better to create and use a new selection (Named Selection Set) consisting only of the control objects.
-
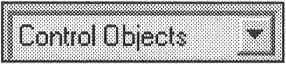
Select the control objects and create the new selection by entering its name in the main panel line (e.g., Control Objects). Press <Enter>.
-
You can add or delete objects from this selection in the Named Selection Sets dialog (Fig. 4.28).
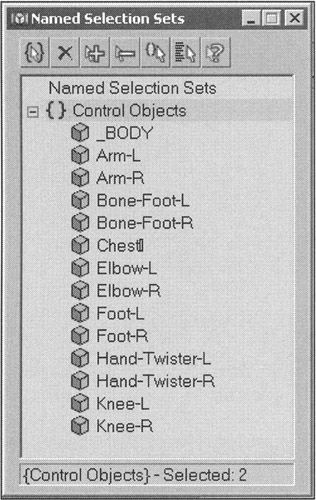
Figure 4.28: Named Selection Sets control window
| Note | Don't include the screen manipulators in the selection! It is appropriate to animate the fingers at the end, and there is no need to create the same amount of keys for them as for the other objects. |
Hide some of the objects to simplify the animation. You can do this by hiding the bones — the objects of the Bone type — or the character itself. In either case, it is convenient to use the floating window of the objects' display (Display Floater) (Fig. 4.29):
-
Main menu à Tools à Display Floater
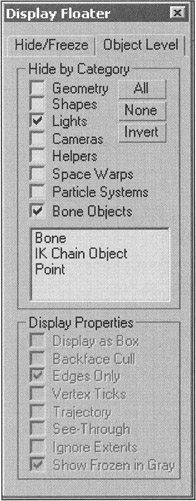
Figure 4.29: Display Floater window
We propose that you use the option for hiding objects by their type (Hide By Category). This will allow you to see immediately any faults in your model's adjustment. To show this, we will hide the character itself in the further illustrations.
-
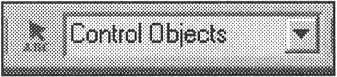
Select Control Objects in the drop-down list of the animation keying-controls panel.
-
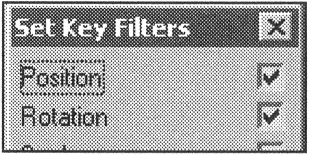
Check the Position and Rotation lines in the Set Key Filters dialog.
-
Press the Set Key button.
-
Put the character into its original posture in the initial frame of the animation by moving and rotating the control objects (Fig. 4.30). Press the Set Key button.
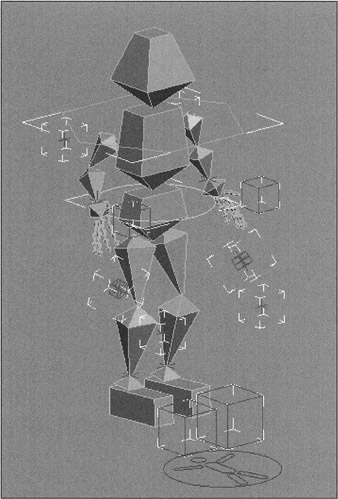
Figure 4.30: Original posture of the character
| Note | The control objects are set so that some of them only have to be moved, others — only rotated. Be very attentive! |
Further animation is done in the same way. Go to the next frames and record the intermediate phases of movement. Fig. 4.31 shows the movement phases of the character. For clarity, the control objects are hidden, and the phases are shifted relative to each other.
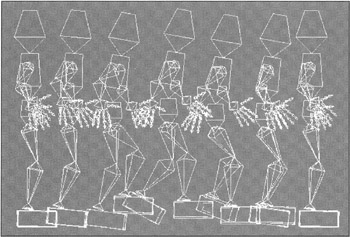
Figure 4.31: Phases of the character's movement
The astronaut's gait turned out to be rather ludicrous, but it's up to you to correct it!
So, what advice can we give about creating animation? First, have patience; manual animation of characters is a painstaking process in any package.
Remember that the gravitation on the Moon is six times less than that of the Earth, so the spacesuit can hardly be used as a jogging outfit.
Go from general to particular during the animation: First, roughly animate the legs and the arms, then the position and bend of the torso, and later the twists of the boots, hands, etc.
To create looped animation, your astronaut should come to a halt in the same posture as he started his motion. To do this, select all Control Objects. Then copy the keys from the initial frame to the last one by moving them on the time scale (TimeLine) and holding down the <Shift> key. The astronaut will return to his initial position. Transfer all Control Objects to the required place and specify the new keys in this frame.
Finally, purchase a good book on anatomy and human motions or find the appropriate information in the Internet.
Our astronaut has made his first and, frankly, rather unsteady step. The animation process took us about 30 minutes, while the duration of the animation itself is only 1.5 seconds. The ratio leaves much to be desired!
To see what is offered in 3ds max to enhance efficiency:
Select the Character01 object. On the control panel in the Animation group, three buttons can be used to control the animation.
Hopefully, there is no need to explain why the Reset All Animation button should be left alone.
Save your animation as a file using the Save Animation button (e.g., as Step1.anm file).
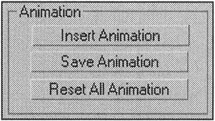
The Insert Animation button allows you to load the animation parameters from file for the current character. The parameters for when our astronaut makes two identical, running steps are shown in Fig. 4.32.
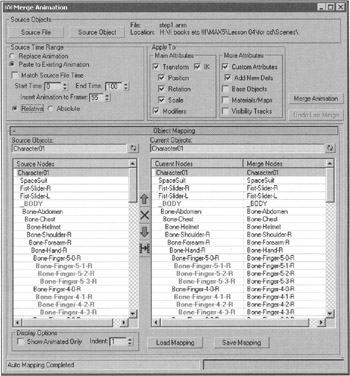
Figure 4.32: Animation loading from the file dialog
| Explanation | In the Source Time Range group, you can adjust the animation loading. To make the astronaut take the second step, the animation should be added from the last frame of the current animation. Our astronaut comes to a halt on the 50th frame, so the animation should be added approximately from the 55th frame. The Start Time and End Time borders determine the part to be loaded. The Relative/Absolute toggle, if set in the Relative position, allows the character to continue forward motion. The Apply To group is used to specify the parameters that will be affected by loading the animation. The large Object Mapping rollout allows you to reassign the objects' current correspondence and that of the file being loaded. When animation is loaded, an automatic adjustment of correspondence takes place based on the objects' names (Auto Name Mapping). If something disappoints you, reassign the links among the objects (e.g., to make the astronaut step with the other leg). In our case, there should be no hindrances, so don't hesitate to press the Merge Animation button. Our astronaut makes the second step fully identical to the first one. |
How do we recommended that you use the Animation tool? It makes sense to create a library of separate movements. For example, three files are desirable for simple walking: start of the motion (ending with a half-step), full step, and end of the motion. You can create a single file for this and load it by parts later, but remember which frame contains each motion. Unfortunately, all of this will have to be recorded somewhere "on paper;" there are no additional options for the creation and control of the motion databases in 3ds max. It is possible that by the time this book is on your desk the great enthusiast of 3ds max, Borislav Petrov, will offer 3ds max users script for solving many problems related to character animation. Information on this project is available at http://www.scriptspot.com/bobo/darkmoon/eNLArge/.
If you plan to create several characters, it makes sense to apply one system of the control objects and bones to all of them.
In Lesson 7 we will actively use our astronaut and discuss in detail some other features of animation.
|
| < Day Day Up > |
|
EAN: N/A
Pages: 136
- The Effects of an Enterprise Resource Planning System (ERP) Implementation on Job Characteristics – A Study using the Hackman and Oldham Job Characteristics Model
- Data Mining for Business Process Reengineering
- Intrinsic and Contextual Data Quality: The Effect of Media and Personal Involvement
- Healthcare Information: From Administrative to Practice Databases
- Relevance and Micro-Relevance for the Professional as Determinants of IT-Diffusion and IT-Use in Healthcare