The Workings of the Knowledge Bank Application
|
The Knowledge Bank application allows users to upload articles in the KnowledgeBank database, which is a centralized database. Users can view their own directory listing and search articles based on specified criteria.
When the application is loaded, the Login page is displayed as shown in Figure 13.9.
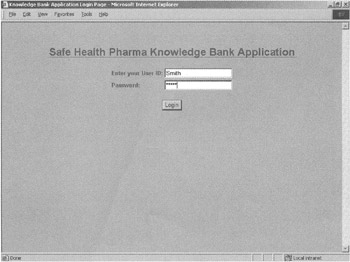
Figure 13.9: The Login page.
The Login page requests the user ID and password. After the page is submitted, the processlogin.cfm file validates the user by referring to the Logins table in the KnowledgeBank database. If the user is Admin, the Admin Module Start page is displayed. Otherwise, the User Module Start page is loaded in the browser. If the user ID and password combination is not validated successfully, an error message is displayed on the Login page, as shown in Figure 13.10.
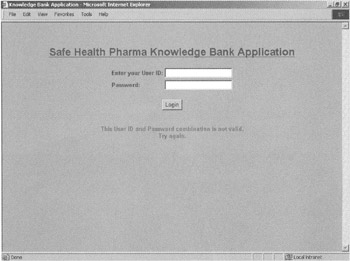
Figure 13.10: The Login page with an error message.
Before looking at the working code for the application, let's look at how to configure the data source to be used for this project.
Configuring the Data Source
An SQL Server 2000 database named KnowledgeBank is used as the back-end database for the Knowledge Bank application. To interact with this database, you need to configure a data source:
-
Choose Start, Programs, Macromedia ColdFusion MX, Administrator. The ColdFusion MX Administrator page appears, as shown in Figure 13.11. To use the Administrator page, you need to provide the administrator password.
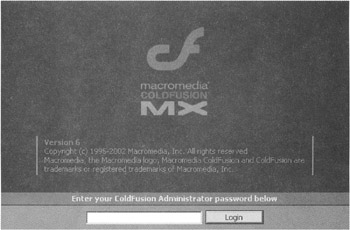
Figure 13.11: The ColdFusion MX Administrator interface. -
On the ColdFusion MX Administrator start page, click Data Sources under the main Data Services heading to display the Data Sources interface, as shown in Figure 13.12. This interface allows you to add and manage the data source connections and Data Source Names (DSNs). There are two sections in this interface.
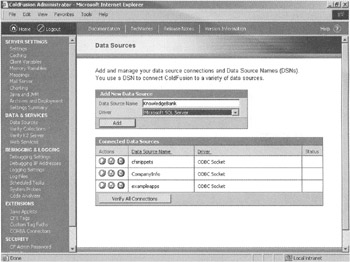
Figure 13.12: The screen for adding and managing data sources. -
In the Data Source Name field, enter KnowledgeBank. From the Driver down-drop list, select Microsoft SQL Server. Click the Add button.
-
On the next screen, enter KnowledgeBank in the Database field, enter localhost in the Server field, and retain the default value in the Port field. In the Username field, enter the username to be used while connecting to the KnowledgeBank database. Enter the password in the Password field. In the Description field, enter the description for the data source. Figure 13.13 shows the screen with values for all fields.
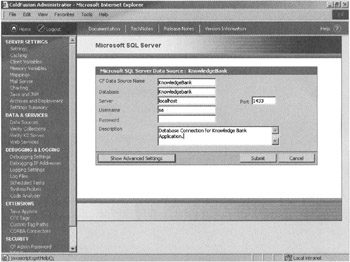
Figure 13.13: The interface to provide details about the KnowledgeBank data source. -
Click the Submit button to create the data source. Figure 13.14 shows the successful creation of the data source.
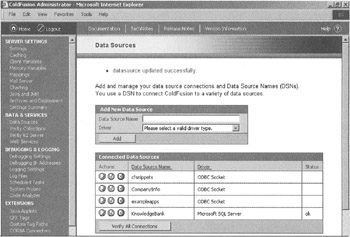
Figure 13.14: The interface indicating successful creation of the KnowledgeBank data source. -
In the Connected Data Sources list, the KnowledgeBank data source appears. Using this interface, you can edit, delete, and verify the data source. Figure 13.15 shows the KnowledgeBank data source in the Connected Data Sources list. The icons to the left are used to edit, verify, and delete the data source.

Figure 13.15: The interface displaying the data source in the Connected Data Sources list.
Validating the Application Users
When the user submits the login information, the processlogin.cfm file is loaded. This file connects to the database and, with the help of the SELECT statement, extracts the user ID and password from the Logins table corresponding to the user ID and password supplied by the user. The SQL WHERE clause is used for finding the matching record. The following code shows how the <CFQUERY> tag is used:
<CFQUERY NAME="Verify_login" DATASOURCE="KnowledgeBank"> SELECT UserID, password FROM logins WHERE UserID = '#FORM.user_id#' AND password = '#FORM.password#' </CFQUERY>
The <CFQUERY> tag needs to know the name of the data source to interact with the database. The DATASOURCE attribute is used to set the value of the specific data source. In this case, it's set to the data source KnowledgeBank. The output of the query can be used in the later part of the code by referring to the query results by the name specified in the NAME attribute of the <CFQUERY> tag.
The following code snippet tests if RECORDCOUNT of the query Verify_login is equal to 0:
<CFIF Verify_login.RECORDCOUNT IS 0>
If it's equal to 0, the login.cfm file is loaded again and an error message is also displayed on it. If RECORDCOUNT is not 0, the code further checks if Form.user_id is a common user or an administrator.
<CFIF #FORM.user_id# EQ "Admin"> <CFSET SESSION.UserID = #Form.user_id#> <CFLOCATION URL="AdminStartPage.cfm" ADDTOKEN="no"> <CFELSE> <CFOUTPUT QUERY = "Verify_login"> <CFLOCK TIMEOUT="30" SCOPE="session" TYPE="exclusive"> <CFSET SESSION.UserID = #UserID#> <CFSET SESSION.USERDIR = #DirectoryName#> <CFSET SESSION.USERSTATUS = #Status#> <CFSET SESSION.USERDELPERM = #DeletePermission#> </CFLOCK> </CFOUTPUT> <CFLOCATION URL="UserStartPage.cfm" ADDTOKEN="no"> </CFIF>
If the value of user ID #FORM.user_id#, as specified in the form, is equal to Admin, the SESSION variable UserID is set to #Form.user_id# and the application is redirected to the Admin Module Start page by loading the AdminStartPage.cfm file. The SESSION variables are used to store information for a given session between the browser and the Web server.
On the other hand, if #FORM.user_id# is not equal to Admin, the information about the logged-in user, such as user ID, directory, status, and Delete permission, is stored in SESSION variables. In this case, the application is redirected to the User Module Start page by loading the UserStartPage.cfm file. The <CFLOCK> tag is used to lock the SESSION variables whenever a user is referring to them. This locking helps prevent the session variables from being corrupted when they're accessed simultaneously.
In this code, the SESSION variables are used to hold user information. To use the SESSION variables in the Login.cfm page, they need to be declared in the Application.cfm file. The Application.cfm file is executed whenever the Login.cfm file is loaded in the browser:
<cfapplication name = "Knowledge Bank Application" SESSIONMANAGEMENT="Yes" setClientCookies = "Yes" SESSIONTIMEOUT="#CreateTimeSpan(0,0,30,0)#"> <cferror type="exception" template="ErrorHandler.cfm" exception="ANY">
Notice that the SESSIONMANAGEMENT attribute of the <CFAPPLICATION> tag is set to YES. This is required for the working of SESSION variables. The <CFERROR> tag is used to specify the file to be loaded whenever an application-level error occurs. The specified file is named ErrorHandler.cfm:
<HTML> <HEAD> <TITLE>Knowledge Bank Application: Error Handler</TITLE> </HEAD> <BODY BGCOLOR="99CC99"> <DIV align="center"><B><FONT FACE="Arial" SIZE="4" Color="006666"><U>Error Occurred in the Application</U></FONT></B></DIV><BR> <HR> <CFOUTPUT> #Error.MESSAGE# <HR> <B>TYPE: </B> #Error.TYPE#<BR> <B>DETAILS: </B> #Error.DETAIL#<BR> <B>ERRORCODE: </B> #Error.ERRORCODE#<BR> <B>EXTENDEDINFO: </B> #Error.EXTENDEDINFO#<BR> </CFOUTPUT> </BODY> </HTML>
The Workings of the User Module
The User Module enables the users to upload articles, view directory listing, and search for the required articles in the KnowledgeBank database. The following sections discuss the implementation of each functionality.
Uploading Articles
The User Module Start page accepts the details about the article to be uploaded. It also provides links to view the directory listing and search articles. The following code in the UserStartPage.cfm file creates the form and the fields:
<cfform ACTION="upload.cfm" METHOD="POST" ENCTYPE="multipart/form-data"> <TABLE> <TR> <TD><B>* Title:</B></TD> <TD><cfinput TYPE="Text" NAME="Article_Title" SIZE="50" MAXLENGTH="200" REQUIRED="YES" MESSAGE="Title of the Article should be specified"> </TD> </TR> <TR> <TD><B>* Author:</B></TD> <TD><cfinput TYPE="Text" NAME="Author" SIZE="50" MAXLENGTH="100" REQUIRED="YES" MESSAGE="Author of the article should be specified"> </TD> </TR> <TR> <TD><B>* Category: </B></TD> <TD><SELECT Name="category" Size="1"> <OPTION>Fine Chemicals</OPTION> <OPTION>Health Foods</OPTION> <OPTION>Animal Health Care</OPTION> <OPTION>Pharmaceuticals</OPTION> <OPTION>New Drug Discovery</OPTION></SELECT> </TD> </TR> <TR> <TD><B>Article Description: </B></TD> <TD><cfinput TYPE="TEXT" Name = "Article_Desc" size= "50" MAXLENGTH="200"> </TD> </TR> <TR> <TD><B>Keywords in the Article: </B></TD> <TD><cfinput TYPE = "TEXT" Name = "Article_Keywords" Size = "50" MAXLENGTH="100"> </TD> </TR> <TR> <TD><B>* Article Version: </B></TD> <TD><cfinput TYPE = "TEXT" Name = "Article_version" Size = "20" MAXLENGTH="2" REQUIRED="YES" VALIDATE="integer" MESSAGE="Article version should be specified"> </TD> </TR> <TR> <TD><B>* Research Center: </B></TD> <TD><SELECT Name="RCenter" Size="1"> <OPTION>France</OPTION> <OPTION>Ireland</OPTION> <OPTION>News Zealand</OPTION> <OPTION>India</OPTION> <OPTION>Peru</OPTION></SELECT> </TD> </TR> <TR> <TD><B>File For the Article: </B></TD> <TD><input type="file" name="MyFile"></TD> </TR> </TABLE> <BR> <INPUT TYPE="Submit" NAME="btnSave" VALUE="Upload Article"><BR> </cfform>
To use the File control, the ENCTYPE attribute of the <CFFORM> tag should be set to multipart/form-data. The attributes like Validate, Required, and Message are used with the <CFINPUT> tag to implement the functionality of validating the user input before the data on the form can be further processed. If the value for the Required attribute is set to YES for a field, ColdFusion form processing checks the field to make sure that user has provided some input in that field. The Message attribute is used to give a message to the user if the field does not have an input. It also gives a message if the value for the field is not according to the Validate attribute.
After entering the file upload details, the user clicks the Upload Article button to upload the article file and save the details of the uploaded article in the Articles table of the KnowledgeBank database. When the Upload Article button is clicked, the file specified in the ACTION attribute of the <CFFORM> tag is called. This file contains the functionality to upload the file and save the article details record in the database. The following code shows the attribute settings of the <CFFORM> tag:
<cfform ACTION="upload.cfm" METHOD="POST" ENCTYPE="multipart/form-data">
The code in the Upload.cfm file is given as follows:
<HTML> <HEAD> <TITLE>Knowledge Bank Application: Uploading Article</TITLE> </HEAD> <BODY BGCOLOR="99CC99"> <CFIF len(Form.MyFile) is 0> <I><FONT FACE="Arial" SIZE="3" Color="990000"><B>There is no File Selected for Upload.</B></FONT></I> <P> <TABLE Align ="Left"> <TR> <TD><a href ="UserStartPage.cfm"><FONT FACE="Arial" SIZE="2" Color="006666"><B>Back to Start Page</B></FONT></a> </TD> </TR> </TABLE> </BODY> </HTML> <CFABORT> </CFIF> <CFLOCK TIMEOUT="30" SCOPE="session" TYPE="readonly"> <CFIF IsDefined("SESSION.USERID")> <CFSET varDir = "C:\inetpub\wwwroot\ProjectTwo\" & #SESSION.USERDIR#> <CFFILE ACTION = "UPLOAD" FILEFIELD = "MyFile" DESTINATION = #varDir# NAMECONFLICT="SKIP"> </CFIF> </CFLOCK> <CFIF #File.FileWasSaved# EQ "YES"> <CFSET varFile = "/" & #SESSION.USERDIR# & "/" & #File.ServerFile#> <CFQUERY NAME="InsertArticleRecord" DATASOURCE="Knowledgebank"> INSERT INTO Articles (ArticleTitle, DateOfUpload, Author, Category, Description, keywords, VersionOfArticle, FileName, ResearchCenter, UpLoadedBy) VALUES ('#Form.Article_Title#','#DateFormat(Now())#','#Form.Author#', '#Form.category#','#Form.Article_desc#','#Form.Article_keywords#', '#Form.Article_version#','#varFile#','#Form.RCenter#', '#SESSION.USERID#') </CFQUERY> <FONT FACE="Arial" SIZE="3" COLOR="006666"><B>New Article Uploaded.</B></FONT> <CFSET varLogFile = "C:\Knowledgebank\" & trim(#SESSION.USERID#) & "Log.txt"> <CFFILE ACTION="APPEND" FILE=#varLogFile# OUTPUT="**#Form.Article_Title# is uploaded**"> <CFELSE> <CFIF #File.FileExisted# EQ "YES"> <FONT FACE="Arial" SIZE="3" COLOR="##ff0000"><B>Article Already Uploaded.</B></FONT> </CFIF> </CFIF> <BR> <BR> <a href ="UserStartPage.cfm"><FONT FACE="Arial" SIZE="2" Color="006666"><B>Back to Start Page</B></FONT></a> </BODY> </HTML> The preceding code first checks if the user has provided any file name for uploading. If no file name has been provided, the <CFABORT> tag is used to stop any further processing. If the upload file name is provided, the SESSION.UserID variable is checked. If this variable is defined, the <CFFILE> tag is used to upload the file in the specific user's directory on the server. If the file is successfully uploaded, the File.FileWasSaved variable is set to YES and the record is inserted in the Articles table of KnowledgeBank database using the <CFQUERY> tag and the INSERT statement. After the record is inserted in the database, an entry is made in the Activity log file of the specific user in the C:\knowledgebank directory. On the other hand, if the File.FileWasSaved variable is not equal to YES, the File.FileExisted variable is checked. If this variable is set to YES, a message is displayed to the user indicating that the file has already been uploaded.
In addition to accepting the details of the file to be uploaded, the User Module Start page also displays two links: View Directory Listing and Search Knowledge Bank. The following code in the UserStartPage.cfm file shows how these links are coded:
<a href ="ViewDirectoryListing.cfm"><FONT FACE="Arial" SIZE="2" Color="006666"><B>View Directory Listing</B></FONT></a><BR> <a href ="SearchArticles.cfm"><FONT FACE="Arial" SIZE="2" Color="006666"><B>Search Knowledge Bank</B></FONT></a>
When a user clicks the View Directory Listing link, the ViewDirectoryListing.cfm file is loaded. When a user clicks the Search Knowledge Bank link, the SearchArticles.cfm file is loaded.
Viewing the Directory Listing
As mentioned earlier, when the user clicks the View Directory Listing link, the ViewDirectoryListing.cfm file is loaded into the browser. The following code in the ViewDirectoryListing.cfm file displays the Directory listing from the specified directory:
<HTML><HEAD><TITLE>Knowledge Bank Application: Directory Listing</TITLE></HEAD> <BODY BGCOLOR="99CC99"> <DIV ALIGN="Left"> <FONT FACE="Arial" SIZE="3" COLOR="006666"><BR> <B><U>Listing of Files in Your Directory:</U><BR></B></FONT> <CFIF SESSION.USERDELPERM EQ "Y"> <FONT FACE="Arial" SIZE="2" COLOR="006666"><BR> <B>(Click on the File Name to Delete the File.)</B></FONT> <CFELSE> <FONT FACE="Arial" SIZE="2" COLOR="006666"><BR> <B>(You do not have Permission to Delete the Files.)</B></FONT> </CFIF> <BR><BR> </DIV> <CFST varDir = "C:\inetpub\wwwroot\ProjectTwo\" & #SESSION.USERDIR#> <CFDIRECTORY ACTION="List" DIRECTORY=#varDir# NAME="ShowDir" SORT="Name ASC"> <TABLE BORDER=0 WIDTH=100%> <TR> <TD WIDTH=25%><STRONG>Name of the File</STRONG></TD> <TD WIDTH=25%><STRONG>Size (in bytes)</STRONG></TD> <TD><STRONG>Date Last Modified</STRONG></TD> </TR> <CFOUTPUT QUERY="ShowDir"> <TR> <CFIF SESSION.USERDELPERM EQ "Y"> <TD><a href ="DeleteFile.cfm?FN=#URLEncodedFormat(Name)#"> #Name#</a> </TD> <CFELSE> <TD>#Name#</TD> </CFIF> <TD>#Size#</TD> <TD>#DateLastModified#</TD> </TR> </CFOUTPUT> </TABLE> <BR> <a href ="UserStartPage.cfm"><FONT FACE="Arial" SIZE="2" Color="006666"><B>Back to Start Page</B></FONT></a> </BODY> </HTML>
The <CFDIRECTORY> tag is used to create a query output for displaying the directory listing. The existing logged-in user is identified from the SESSION.USERID variable. The varDir variable is used to dynamically build the complete path for the directory to be displayed. In the <CFDIRECTORY> tag, the various attributes are set as shown in Table 13.16.
| Attribute | Value |
|---|---|
| ACTION | List |
| DIRECTORY | varDir |
| NAME | ShowDir |
| SORT | Name ASC |
The <CFOUTPUT> tag is used to display the directory listing. The QUERY attribute of the <CFOUTPUT> tag is set to ShowDir. The name of the file, the size of the file, and the last modified date of the files are displayed in the directory listing.
The SESSION.USERDELPERM variable is checked to find if the user has a permission to delete files. If this SESSION variable contains Y, the user has the permission to delete files from their own directory. In that case, the name of the file is displayed as a hyperlink. If the user clicks this link, the file for this article is deleted and the record entry from the database is also removed. The file named DeleteFile.cfm is loaded when a user clicks the hyperlink. When the DeleteFile.cfm file is loaded, the name of the file to be deleted (the hyperlink text), is passed as a parameter. The code from DeleteFile.cfm is shown as follows:
<HTML><HEAD><TITLE>Knowledge Bank Application: Deleting File</TITLE></HEAD> <BODY BGCOLOR="99CC99"> <CFLOCK TIMEOUT="30" SCOPE="session" TYPE="readonly"> <CFIF IsDefined("SESSION.USERID")> <CFIF SESSION.USERDELPERM EQ "Y"> <CFSET varFile = "C:\inetpub\wwwroot\ProjectTwo\" & #SESSION.USERDIR# & "\" & #URL.FN#> <CFFILE ACTION = "DELETE" FILE = #varFile#> <CFSET varFile = "/" & #SESSION.USERDIR# & "/" & #URL.FN#> <CFQUERY NAME="DeleteRecord" DATASOURCE="Knowledgebank"> DELETE FROM Articles WHERE UploadedBy = '#SESSION.USERID#' AND FileName = '#varFile#' </CFQUERY> <CFSET varLogFile = "C:\Knowledgebank\" & trim(#SESSION.USERID#) & "Log.txt"> <CFFILE ACTION="APPEND" FILE=#varLogFile# OUTPUT="**#varFile# has been deleted**"> <DIV ALIGN="Left"> <FONT FACE="Arial" SIZE="3" COLOR="006666"><BR> <B>Selected File has been Deleted !!<BR></B></FONT> </DIV> <BR><BR> <a href ="UserStartPage.cfm"><FONT FACE="Arial" SIZE="2" Color="006666"><B>Back to Start Page</B></FONT></a><BR> <a href ="ViewDirectorylisting.cfm"><FONT FACE="Arial" SIZE="2" Color="006666"><B>Back to Directory Listing</B></FONT></a> <CFELSE> <DIV ALIGN="Left"> <FONT FACE="Arial" SIZE="3" COLOR="006666"><BR> <B><U>Selected File could not be Deleted.</U><BR></B></FONT> </DIV> <BR><BR> <a href ="UserStartPage.cfm"><FONT FACE="Arial" SIZE="2" Color="006666"><B>Back to Start Page</B></FONT></a><BR> <a href ="ViewDirectorylisting.cfm"><FONT FACE="Arial" SIZE="2" Color="006666"><B>Back to Directory Listing</B></FONT></a> </CFIF> </CFIF> </CFLOCK> </BODY> </HTML> This code checks if the SESSION.USERID variable is defined and the user has the Delete permission. If these conditions are true, the <CFFILE> tag is used with the ACTION attribute set to DELETE. The file name to be deleted is provided with the FILE attribute. After deleting the file, the article record is also deleted from the Articles table in the KnowledgeBank database. The <CFFILE> tag is also used to append an entry in the user activity log.
Searching the Knowledge Bank for Articles
The Search Knowledge Bank Criteria page is used to search for article records in the KnowledgeBank database based on a criterion specified by the user. The search can be performed based on the category of the article, author of the article, and the research center from where the article originated. The user can select the value to be matched in the corresponding List control. If no criterion is specified, all the verified articles records are displayed. After specifying the criteria, the user clicks the Search Articles button to display the search results on a new page. The SearchResults.cfm file dynamically generates this page.
Users can navigate to the Search Knowledge Bank Criteria page by using the Search Knowledge Bank link on the User Module Start page. On clicking this link, the SearchArticles.cfm file is loaded. After specifying the search criteria, when the user clicks the Search Articles button, the SearchResults.cfm file is loaded to display the Search Results page. This page first builds the WHERE clause from the criteria specified by the user. It checks the value in the List control to decide the construct of the WHERE clause to be used in the get_article_info query. The following code shows how the WHERE clause is built dynamically:
<CFSET TheWhereClause = " Verified='Y' "> <CFIF Form.category GT ""> <CFSET TheWhereClause = TheWhereClause & " and Category = '" & Form.category & "'" > </CFIF> <CFIF Form.authorname GT ""> <CFSET TheWhereClause = TheWhereClause & " and Author = '" & Form.authorname & "'" > </CFIF> <CFIF Form.rcenter GT ""> <CFSET TheWhereClause = TheWhereClause & " and ResearchCenter = '" & Form.rcenter & "'" > </CFIF>
The TheWhereClause variable is used to store the final WHERE clause. After the WHERE clause is built, it is passed to the get_article_info query. The results of the query are displayed in a tabular format. The following code shows the get_article_info query:
<CFQUERY NAME="get_article_info" DATASOURCE="knowledgebank"> SELECT ArticleTitle, Author, Category, DateOfUpload, Description, ResearchCenter, FileName FROM Articles WHERE #PreserveSingleQuotes(TheWhereClause)# </CFQUERY>
In the preceding code, the PreserveSingleQuotes function is used to preserve the single quotes specified in the criteria value text box. The single quotes if used otherwise can produce a syntax error in the SQL statement. Next, the code checks if RECORDCOUNT of the get_article_info query is 0. If it is 0, a message is displayed to the user specifying that no matching records have been found. Using the <CFABORT> tag stops the further processing of SearchResults.cfm. This code is shown as follows:
<CFIF get_article_info.RECORDCOUNT IS 0> <I><FONT FACE="Arial" SIZE="3" Color="006666"><B>There are no records found for the criteria specified.</B></FONT></I> <HR> <TABLE Align ="Center"> <TR> <TD><a href ="SearchArticles.cfm"><FONT FACE="Arial" SIZE="2" Color="006666"><B>Search More Articles</B></FONT></a></TD> </TR> <TR> <TD><a href ="UserStartPage.cfm"><FONT FACE="Arial" SIZE="2" Color="006666"><B>Back to Start Page</B></FONT></a></TD> </TR> </TABLE> </BODY> </HTML> <CFABORT> </CFIF>
If RECORDCOUNT is not 0, the results are displayed in a tabular format. The title of the article is displayed as a hyperlink, which, when clicked, opens the article in a new window.
The Workings of the Admin Module
The Admin Module enables the application's administrator to create new logins and verify articles submitted by research employees. The following sections implement each part of this functionality.
Creating New Logins
The Admin Module Start page is used to accept the details about the new login to be created. It also provides links for verifying new articles and viewing the activity log for a selected user. The following code in the AdminStartPage.cfm file creates the forms and the fields:
<cfform ACTION="CreateLogin.cfm" METHOD="POST"> <TABLE> <TR> <TD><B>* User ID:</B></TD> <TD><cfinput TYPE="Text" NAME="UserID" SIZE="15" MAXLENGTH="10" REQUIRED="YES" MESSAGE="User ID should be specified"></TD> </TR> <TR> <TD><B>* Password:</B></TD> <TD><cfinput TYPE="Text" NAME="Password" SIZE="15" MAXLENGTH="10" REQUIRED="YES" MESSAGE="Password should be specified"></TD> </TR> <TR> <TD><B>* Status: </B></TD> <TD><SELECT Name="Status" Size="1"> <OPTION>Active</OPTION> <OPTION>Deactive</OPTION></SELECT></TD> </TR> <TR> <TD><B>* Delete Permission: </B></TD> <TD><SELECT Name="DelPerm" Size="1"> <OPTION>Y</OPTION> <OPTION>N</OPTION></SELECT></TD> </TR> <TR> <TD><B>* Directory Name: </B></TD> <TD><cfinput TYPE = "TEXT" Name = "DirName" Size = "50" MAXLENGTH="100" REQUIRED="YES" MESSAGE="Directory name should be specified"></TD> </TR> </TABLE> <BR> <INPUT TYPE="Submit" NAME="btnSave" VALUE="Create Login"><BR> </cfform>
In the preceding code, the attributes like Validate, Required, and Message are used in the <CFINPUT> tags to validate the user's input before the data on the form can be processed further.
After entering the login details, the administrator clicks the Create Login button to store the login details in the Logins table of the KnowledgeBank database. The file specified in the ACTION attribute of the <CFFORM> tag is executed. The specified file is named CreateLogin.cfm. The following code shows the attribute settings of the <CFFORM> tag:
<cfform ACTION="CreateLogin.cfm" METHOD="POST">
Here's the code in the CreateLogin.cfm file:
<HTML> <HEAD> <TITLE>Knowledge Bank Application: Creating Login</TITLE> </HEAD> <BODY BGCOLOR="99CC99"> <CFLOCK TIMEOUT="30" SCOPE="session" TYPE="readonly"> <CFIF IsDefined("SESSION.USERID")> <CFIF #SESSION.USERID# EQ "Admin"> <CFQUERY NAME="createlogin" DATASOURCE="Knowledgebank"> INSERT INTO logins (UserID, Password, DirectoryName, Status, DeletePermission) VALUES ('#Form.UserID#','#Form.Password#','#Form.DirName#', '#Form.Status#','#Form.DelPerm#') </CFQUERY> <CFSET varDir = "C:\inetpub\wwwroot\ProjectTwo\" & #Form.DirName#> <CFDIRECTORY ACTION="create" DIRECTORY= #varDir#> <CFSET varDir = "C:\Knowledgebank\" & #Form.UserID# & "Log.txt"> <CFFILE ACTION ="WRITE" FILE=#varDir# OUTPUT = "**The Login was created at: #Now()#**"> </CFIF> </CFIF> </CFLOCK> <FONT FACE="Arial" SIZE="3" COLOR="006666"><B>New Login Created.</B></FONT> <BR> <BR> <a href ="AdminStartPage.cfm"><FONT FACE="Arial" SIZE="2" Color="006666"> <B>Back to Start Page</B></FONT></a> </BODY> </HTML> The <CFQUERY> tag is used to insert a new record in the Logins table in the KnowledgeBank database. After the record is inserted in the database, the <CFDIRECTORY> tag is used to create a directory for the new user. The directory name is specified in the Create Login form on the Admin Module Start page. An activity log is also created for the user in the c:\knowledgebank directory. The name of the log file is based on the user ID. For example, if the name of the user is Smith, the name of the activity log file is SmithLog.txt. An initial message that the login has been created is stored in the log file.
The Admin Module Start page also allows viewing of the activity log for a selected user. The following code shows the form created for accepting the user ID:
<CFFORM ACTION="ViewActivityLog.cfm" METHOD="POST"> <CFSELECT Name = "SelectedUser" Size = "3" MULTIPLE="NO" QUERY="get_users" Value="UserID" DISPLAY="UserID" REQUIRED="NO"></CFSELECT> <INPUT TYPE="Submit" NAME="btnView" VALUE="View Activity Log"><BR> </CFFORM>
The <CFSELECT> tag is used to display the list of existing users from the Logins table in the KnowledgeBank database. The QUERY attribute in the <CFSELECT> tag is set to get_users. This query is written by using the <CFQUERY> tag. The following code shows this query:
<CFQUERY NAME="get_users" DATASOURCE="knowledgebank"> SELECT DISTINCT UserID FROM Logins </CFQUERY>
The user can select a user ID from the List control and click the View Activity Log button to execute the ViewActivityLog.cfm file, which is specified in the ACTION attribute of the form.
The code from ViewActivityLog.cfm file is as follows:
<HTML><HEAD><TITLE>Knowledge Bank Application: Activity Log</TITLE></HEAD> <BODY BGCOLOR="99CC99"> <CFOUTPUT> <P><B><FONT FACE="Arial" SIZE="4" Color="006666"><U>Activity Log for #Form.SelectedUser#</U></FONT></B></P> </CFOUTPUT> <CFSET varFile = "c:\Knowledgebank\" & trim(#Form.SelectedUser#) & "Log.txt"> <CFFILE ACTION = "Read" FILE = #varFile# VARIABLE="varLog"> <CFOUTPUT>#varLog#</CFOUTPUT> <BR> <BR> <a href ="AdminStartPage.cfm"><FONT FACE="Arial" SIZE="2" Color="006666"><B>Back to Start Page</B></FONT></a> </BODY> </HTML>
In the preceding code, the <CFFILE> tag is used to read the activity log file into a variable named varLog, which is then displayed using the <CFOUTPUT> tag.
Verifying New Articles
The Admin Module Start page displays a Verify New Articles link. When the administrator clicks this link, the VerifyNewArticles.cfm file is executed todisplay the Verify New Articles page. This page shows the articles that are not verified. The administrator has to verify each article by looking at its content. After an article is verified, it's made available to the users. The administrator can select multiple articles to be verified by using the Checkbox control. The administrator can also see the content of the article by clicking its title. The code for the VerifyNewArticles.cfm file is as follows:
<CFSET TheWhereClause = " Verified='N' "> <CFQUERY NAME="get_article_info" DATASOURCE="knowledgebank"> SELECT ArticleID, ArticleTitle, Author, Category, DateOfUpload, Description, ResearchCenter, FileName FROM Articles WHERE #PreserveSingleQuotes(TheWhereClause)# </CFQUERY> <!DOCTYPE HTML PUBLIC "-//W3C//DTD HTML 4.0 Transitional//EN"> <HTML> <HEAD> <TITLE>Knowledge Bank Application: New Articles</TITLE> </HEAD> <BODY BGCOLOR="99CC99"> <CFIF get_article_info.RECORDCOUNT IS 0> <I><FONT FACE="Arial" SIZE="3" Color="006666"><B>There are no New Articles to be Verified.</B></FONT></I> <HR> <TABLE Align ="Center"> <TR> <TD><a href ="AdminStartPage.cfm"><FONT FACE="Arial" SIZE="2" Color="006666"><B>Back to Start Page</B></FONT></a></TD> </TR> </TABLE> </BODY> </HTML> <CFABORT> </CFIF> <DIV><B><FONT FACE="Arial" SIZE="2" Color="006666">List of New Articles to be Verified:</FONT></B></DIV> <B><FONT FACE="Arial" SIZE="2" Color="006666">(Click on the Article's Title to View the Article.)</FONT></B> <BR><BR> <CFFORM action="UpdateVerified.cfm" method="post"> <TABLE BORDER="1" Align ="Center"> <TR bgcolor="66CC99"> <TH>Article ID</TH> <TH>Article's Title</TH> <TH>Author</TH> <TH>Category</TH> <TH>Date Uploaded</TH> <TH>Description</TH> <TH>Research Center</TH> <TR> <CFOUTPUT QUERY = "get_article_info"> <CFIF CurrentRow Mod 2> <cfset BackColor = "99CC99"> <CFELSE> <cfset BackColor = "006666"> </CFIF> <TR bgcolor = #BackColor#> <TD><CFINPUT Type = "checkbox" Name = "ArticleID" Value = "#ArticleID#"> #ArticleID# </TD> <TD><a href ="#URLEncodedFormat(FileName)#" target="_blank">#ArticleTitle#</a></TD> <TD>#Author#</TD> <TD>#Category#</TD> <TD>#DateOfUpload#</TD> <TD>#Description#</TD> <TD>#ResearchCenter#</TD> </TR> </CFOUTPUT> </TABLE> <BR> <INPUT TYPE="Submit" NAME="btnSave" VALUE="Mark Selected Articles as Verified"><BR> </CFFORM> <BR> <TABLE Align ="center"> <TR> <TD><a href ="AdminStartPage.cfm"><FONT FACE="Arial" SIZE="2" Color="006666"><B>Back to Start Page</B></FONT></a></TD> </TR> </TABLE> </BODY> </HTML>
To display the articles that are not yet verified, a query named get_article_info is written by using the <CFQUERY> tag. This query contains a SELECT statement, which retrieves the article details, such as article ID, title, author, category, date when the article was uploaded, description of the article, research center, and filename of the article from the Articles table in the KnowledgeBank database. The WHERE clause in this SQL statement specifies that the verified field in the Articles table should be 'N' for the selected records.
If RECORDCOUNT for the get_article_info query is 0, the administrator gets a message that there are no new articles to be verified. If RECORDCOUNT is not 0, the new article records are displayed within a form. The article ID is displayed as a Checkbox control. The article title is displayed as a hyperlink. The administrator can click this link to see the content of the article before verifying it. The articles will open in a separate browser window.
The form also contains a Mark Selected Articles as Verified button at the bottom of the form. After the administrator selects the records, he clicks this button and the UpdateVerified.cfm file specified in the ACTION attribute of the <CFFORM> tag is executed. This file updates the verified field in the Articles table in the KnowledgeBank database. The code in the UpdateVerified.cfm file is as follows:
<cfparam name="FORM.ArticleID" default=""> <CFIF FORM.ArticleID IS NOT ""> <CFSET Length = ListLen(#Form.ArticleID#)> <CFLOOP INDEX = "element" FROM = "1" TO= "#Length#"> <CFSET varArticleID = ListGetAt(#Form.ArticleID#,element)> <CFQUERY NAME="UpdateRecord" DATASOURCE="Knowledgebank"> UPDATE Articles SET Verified = 'Y' WHERE ArticleID = #varArticleID# </CFQUERY> </CFLOOP> </CFIF> <!DOCTYPE HTML PUBLIC "-//W3C//DTD HTML 4.0 Transitional//EN"> <HTML> <HEAD> <TITLE>Knowledge Bank Application: Updating Record Confirmation</TITLE> </HEAD> <BODY BGCOLOR="99CC99"> <I><FONT FACE="Arial" SIZE="3" Color="006666"><B>The Record(s) have been Updated Successfully.</B></FONT></I> <P> <TABLE Align ="Left"> <TR> <TD><a href ="AdminStartPage.cfm"><FONT FACE="Arial" SIZE="2" Color="006666"><B>Back to Start Page</B></FONT></a></TD> </TR> <TR> <TD><a href ="VerifyNewArticles.cfm"><FONT FACE="Arial" SIZE="2" Color="006666"><B>Verify More Articles</B></FONT></a></TD> </TR> </TABLE> </BODY> </HTML>
The preceding code checks if the ArticleID control contains any value. If it contains a value, the <CFLOOP> tag is used to create a loop. This loop extracts each article ID and updates the corresponding record in the Articles table by using the <CFQUERY> tag. The value of the verified field for the selected article ID is set to Y in the Articles table. After updating all the selected records, the administrator gets a message that the records have been updated. The code also creates links for navigating back to the Start page and verifying more articles.
Now that you understand the code for all the Web pages, I'll provide the code for all the Web pages. Listing 13.1 provides the complete code for the Login.cfm file.
Listing 13.1: Login.cfm
<!DOCTYPE HTML PUBLIC "-//W3C//DTD HTML 4.0 Transitional//EN"> <CFOUTPUT> <HTML><HEAD><TITLE>Knowledge Bank Application Login Page</TITLE></HEAD> <BODY BGCOLOR="99CC99"> <BR><BR> <DIV ALIGN="center"> <B><FONT FACE="Arial" SIZE="5" color="006666"><U>Safe Health Pharma Knowledge Bank Application</U></FONT></B><BR><BR> <FORM ACTION="processlogin.cfm" METHOD="POST" name="Login" ><FONT FACE="Arial" SIZE="2"> <TABLE> <TR> <TD><FONT FACE="Arial" SIZE="2" Color="006666"><B>Enter your User ID:</B></FONT></TD> <TD><INPUT TYPE="Text" NAME="user_id" SIZE="20"></TD> </TR> <TR> <TD><FONT FACE="Arial" SIZE="2" Color="006666"><B>Password:</B></FONT></TD> <TD><INPUT TYPE="password" NAME="password" SIZE="20"></TD> </TR> </TABLE> <P><INPUT TYPE="submit" NAME="Submit" VALUE="Login"> </P> </FORM> </DIV> </BODY> </HTML> </CFOUTPUT>
Listing 13.2 provides the complete code for the ProcessLogin.cfm file.
Listing 13.2: ProcessLogin.cfm
<!DOCTYPE HTML PUBLIC "-//W3C//DTD HTML 4.0 Transitional//EN"> <CFQUERY NAME="Verify_login" DATASOURCE="KnowledgeBank"> SELECT UserID, password,DirectoryName,Status,DeletePermission FROM logins WHERE UserID = '#FORM.user_id#' AND password = '#FORM.password#' </CFQUERY> <CFIF Verify_login.RECORDCOUNT IS 0> <CFOUTPUT> <HTML><HEAD><TITLE>Knowledge Bank Application</TITLE></HEAD> <BODY BGCOLOR="99CC99"> <DIV ALIGN="center"> <CFINCLUDE TEMPLATE="login.cfm"> <FONT FACE="Arial" SIZE="2" COLOR="red"> <BR> <B>This user ID and password combination is not valid.<BR>Try again.</B> </FONT> </DIV> </BODY> </HTML> </CFOUTPUT> <CFABORT> <CFELSE> <CFIF #FORM.user_id# EQ "Admin"> <CFSET SESSION.UserID = #Form.user_id#> <CFLOCATION URL="AdminStartPage.cfm" ADDTOKEN="no"> <CFELSE> <CFOUTPUT QUERY = "Verify_login"> <CFLOCK TIMEOUT="30" SCOPE="session" TYPE="exclusive"> <CFSET SESSION.UserID = #UserID#> <CFSET SESSION.USERDIR = #DirectoryName#> <CFSET SESSION.USERSTATUS = #Status#> <CFSET SESSION.USERDELPERM = #DeletePermission#> </CFLOCK> </CFOUTPUT> <CFLOCATION URL="UserStartPage.cfm" ADDTOKEN="no"> </CFIF> </CFIF>
Listing 13.3 provides the complete code for the UserStartPage.cfm file.
Listing 13.3: UserStartPage.cfm
<HTML> <HEAD> <TITLE>Knowledge Bank Application: User Module Start Page</TITLE> </HEAD> <BODY BGCOLOR="99CC99"> <DIV align="center"><B><FONT FACE="Arial" SIZE="4" Color="006666"><U>User Module Start Page</U></FONT></B></DIV><BR> <B><FONT FACE="Arial" SIZE="2" Color="006666">Provide Details for Article to be Uploaded.</FONT></B> <cfform ACTION="upload.cfm" METHOD="POST" ENCTYPE="multipart/form-data"> <TABLE> <TR> <TD><B>* Title:</B></TD> <TD><cfinput TYPE="Text" NAME="Article_Title" SIZE="50" MAXLENGTH="200" REQUIRED="YES" MESSAGE="Title of the article should be specified"> </TD> </TR> <TR> <TD><B>* Author:</B></TD> <TD><cfinput TYPE="Text" NAME="Author" SIZE="50" MAXLENGTH="100" REQUIRED="YES" MESSAGE="Author of the article should be specified"> </TD> </TR> <TR> <TD><B>* Category: </B></TD> <TD><SELECT Name="category" Size="1"> <OPTION>Fine Chemicals</OPTION> <OPTION>Health Foods</OPTION> <OPTION>Animal Health Care</OPTION> <OPTION>Pharmaceuticals</OPTION> <OPTION>New Drug Discovery</OPTION></SELECT></TD> </TR> <TR> <TD><B>Article Description: </B></TD> <TD><cfinput TYPE="TEXT" Name = "Article_Desc" size= "50" MAXLENGTH="200"> </TD> </TR> <TR> <TD><B>Keywords in the Article: </B></TD> <TD><cfinput TYPE = "TEXT" Name = "Article_Keywords" Size = "50" MAXLENGTH="100"> </TD> </TR> <TR> <TD><B>* Article Version: </B></TD> <TD><cfinput TYPE = "TEXT" Name = "Article_version" Size = "20" MAXLENGTH="2" REQUIRED="YES" VALIDATE="integer" MESSAGE="Article version should be specified"> </TD> </TR> <TR> <TD><B>* Research Center: </B></TD> <TD><SELECT Name="RCenter" Size="1"> <OPTION>France</OPTION> <OPTION>Ireland</OPTION> <OPTION>News Zealand</OPTION> <OPTION>India</OPTION> <OPTION>Peru</OPTION></SELECT></TD> </TR> <TR> <TD><B>File For the Article: </B></TD> <TD><input type="file" name="MyFile"></TD> </TR> </TABLE> <BR> <INPUT TYPE="Submit" NAME="btnSave" VALUE="Upload Article"><BR> </cfform> <a href ="ViewDirectoryListing.cfm"><FONT FACE="Arial" SIZE="2" Color="006666"><B>View Directory Listing</B></FONT></a><BR> <a href ="SearchArticles.cfm"><FONT FACE="Arial" SIZE="2" Color="006666"><B>Search Knowledge Bank</B></FONT></a> </BODY> </HTML>
Listing 13.4 provides the complete code for the Upload.cfm file.
Listing 13.4: Upload.cfm
<HTML> <HEAD> <TITLE>Knowledge Bank Application: Uploading Article</TITLE> </HEAD> <BODY BGCOLOR="99CC99"> <CFIF len(Form.MyFile) is 0> <I><FONT FACE="Arial" SIZE="3" Color="990000"><B>There is no File Selected for Upload.</B></FONT></I> <P> <TABLE Align ="Left"> <TR> <TD><a href ="UserStartPage.cfm"><FONT FACE="Arial" SIZE="2" Color="006666"><B>Back to Start Page</B></FONT></a> </TD> </TR> </TABLE> </BODY> </HTML> <CFABORT> </CFIF> <CFLOCK TIMEOUT="30" SCOPE="session" TYPE="readonly"> <CFIF IsDefined("SESSION.USERID")> <CFSET varDir = "C:\inetpub\wwwroot\ProjectTwo\" & #SESSION.USERDIR#> <CFFILE ACTION = "UPLOAD" FILEFIELD = "MyFile" DESTINATION = #varDir# NAMECONFLICT="SKIP"> </CFIF> </CFLOCK> <CFIF #File.FileWasSaved# EQ "YES"> <CFSET varFile = "/" & #SESSION.USERDIR# & "/" & #File.ServerFile#> <CFQUERY NAME="InsertArticleRecord" DATASOURCE="Knowledgebank"> INSERT INTO Articles (ArticleTitle, DateOfUpload, Author, Category, Description, keywords, VersionOfArticle, FileName, ResearchCenter, UpLoadedBy) VALUES ('#Form.Article_Title#','#DateFormat(Now())#','#Form.Author#', '#Form.category#','#Form.Article_desc#','#Form.Article_keywords#', '#Form.Article_version#','#varFile#','#Form.RCenter#', '#SESSION.USERID#') </CFQUERY> <FONT FACE="Arial" SIZE="3" COLOR="006666"><B>New Article Uploaded.</B></FONT> <CFSET varLogFile = "C:\Knowledgebank\" & trim(#SESSION.USERID#) & "Log.txt"> <CFFILE ACTION="APPEND" FILE=#varLogFile# OUTPUT="**#Form.Article_Title# is uploaded**"> <CFELSE> <CFIF #File.FileExisted# EQ "YES"> <FONT FACE="Arial" SIZE="3" COLOR="##ff0000"><B>Article Already Uploaded.</B></FONT> </CFIF> </CFIF> <BR> <BR> <a href ="UserStartPage.cfm"><FONT FACE="Arial" SIZE="2" Color="006666"><B>Back to Start Page</B></FONT></a> </BODY> </HTML> Listing 13.5 provides the complete code for the ViewDirectoryListing.cfm file.
Listing 13.5: ViewDirectoryListing.cfm
<HTML><HEAD><TITLE>Knowledge Bank Application: Directory Listing</TITLE></HEAD> <BODY BGCOLOR="99CC99"> <DIV ALIGN="Left"> <FONT FACE="Arial" SIZE="3" COLOR="006666"><BR> <B><U>Listing of Files in Your Directory:</U><BR></B></FONT> <CFIF SESSION.USERDELPERM EQ "Y"> <FONT FACE="Arial" SIZE="2" COLOR="006666"><BR> <B>(Click on the File Name to Delete the File.)</B></FONT> <CFELSE> <FONT FACE="Arial" SIZE="2" COLOR="006666"><BR> <B>(You do not have Permission to Delete the Files.)</B></FONT> </CFIF> <BR><BR> </DIV> <CFSET varDir = "C:\inetpub\wwwroot\ProjectTwo\" & #SESSION.USERDIR#> <CFDIRECTORY ACTION="List" DIRECTORY=#varDir# NAME="ShowDir" SORT="Name ASC"> <TABLE BORDER=0 WIDTH=100%> <TR> <TD WIDTH=25%><STRONG>Name of the File</STRONG></TD> <TD WIDTH=25%><STRONG>Size (in bytes)</STRONG></TD> <TD><STRONG>Date Last Modified</STRONG></TD> </TR> <CFOUTPUT QUERY="ShowDir"> <TR> <CFIF SESSION.USERDELPERM EQ "Y"> <TD><a href ="DeleteFile.cfm?FN=#URLEncodedFormat(Name)#"> #Name#</a> </TD> <CFELSE> <TD>#Name#</TD> </CFIF> <TD>#Size#</TD> <TD>#DateLastModified#</TD> </TR> </CFOUTPUT> </TABLE> <BR> <a href ="UserStartPage.cfm"><FONT FACE="Arial" SIZE="2" Color="006666"><B>Back to Start Page</B></FONT></a> </BODY> </HTML>
Listing 13.6 provides the complete code for the DeleteFile.cfm file.
Listing 13.6: DeleteFile.cfm
HTML><HEAD><TITLE>Knowledge Bank Application: Deleting File</TITLE></HEAD> <BODY BGCOLOR="99CC99"> <CFLOCK TIMEOUT="30" SCOPE="session" TYPE="readonly"> <CFIF IsDefined("SESSION.USERID")> <CFIF SESSION.USERDELPERM EQ "Y"> <CFSET varFile = "C:\inetpub\wwwroot\ProjectTwo\" & #SESSION.USERDIR# & "\" & #URL.FN#> <CFFILE ACTION = "DELETE" FILE = #varFile#> <CFSET varFile = "/" & #SESSION.USERDIR# & "/" & #URL.FN#> <CFQUERY NAME="DeleteRecord" DATASOURCE="Knowledgebank"> DELETE FROM Articles WHERE UploadedBy = '#SESSION.USERID#' AND FileName = '#varFile#' </CFQUERY> <CFSET varLogFile = "C:\Knowledgebank\" & trim(#SESSION.USERID#) & "Log.txt"> <CFFILE ACTION="APPEND" FILE=#varLogFile# OUTPUT="**#varFile# has been deleted**"> <DIV ALIGN="Left"> <FONT FACE="Arial" SIZE="3" COLOR="006666"><BR> <B>Selected File has been Deleted !!<BR></B></FONT> </DIV> <BR><BR> <a href ="UserStartPage.cfm"><FONT FACE="Arial" SIZE="2" Color="006666"><B>Back to Start Page</B></FONT></a><BR> <a href ="ViewDirectorylisting.cfm"><FONT FACE="Arial" SIZE="2" Color="006666"><B>Back to Directory Listing</B></FONT></a> <CFELSE> <DIV ALIGN="Left"> <FONT FACE="Arial" SIZE="3" COLOR="006666"><BR> <B><U>Selected File could not be Deleted.</U><BR></B></FONT> </DIV> <BR><BR> <a href ="UserStartPage.cfm"><FONT FACE="Arial" SIZE="2" Color="006666"><B>Back to Start Page</B></FONT></a><BR> <a href ="ViewDirectorylisting.cfm"><FONT FACE="Arial" SIZE="2" Color="006666"><B>Back to Directory Listing</B></FONT></a> </CFIF> </CFIF> </CFLOCK> </body> </html> Listing 13.7 provides the complete code for the SearchArticles.cfm file.
Listing 13.7: SearchArticles.cfm
<CFQUERY NAME="get_categories" DATASOURCE="knowledgebank"> SELECT DISTINCT Category FROM Articles </CFQUERY> <CFQUERY NAME="get_authors" DATASOURCE="knowledgebank"> SELECT DISTINCT Author FROM Articles </CFQUERY> <CFQUERY NAME="get_rcenters" DATASOURCE="knowledgebank"> SELECT DISTINCT ResearchCenter FROM Articles </CFQUERY> <HTML><HEAD><TITLE>Knowledge Bank Application: Search Form</TITLE></HEAD> <BODY BGCOLOR="99CC99"> <P><B><FONT FACE="Arial" SIZE="4" Color="006666"><U>Knowledge Bank Application: Search Criteria</U></FONT></B></P> <B><FONT FACE="Arial" SIZE="2" Color="006666">Only Verified Articles will be Displayed in the Search Results</FONT></B> <HR> <CFFORM action = "SearchResults.cfm" Method = "POST"> <TABLE> <TR> <TD><FONT FACE="Arial" SIZE="2" Color ="006666"><B>Article Category: </B></FONT></TD> <TD> <CFSELECT Name = "category" Size = "3" MULTIPLE="NO" QUERY="get_categories" Value="category" DISPLAY="category" REQUIRED="NO"></CFSELECT> </TD> </TR> <TR> <TD><FONT FACE="Arial" SIZE="2" Color="006666"><B>Article Authors: </B></FONT></TD> <TD> <CFSELECT Name = "authorname" Size = "3" MULTIPLE="NO" QUERY="get_authors" Value="Author" DISPLAY="Author" REQUIRED="NO"></CFSELECT> </TD> </TR> <TR> <TD><FONT FACE="Arial" SIZE="2" Color ="006666"><B>From Research Center: </B></FONT></TD> <TD> <CFSELECT Name = "rcenter" Size = "3" MULTIPLE="NO" QUERY="get_rcenters" Value="ResearchCenter" DISPLAY="ResearchCenter" REQUIRED="NO"></CFSELECT> </TD> </TR> </TABLE> <HR> <INPUT type = "Submit" Name = "Submit" Value = "Search Articles"><BR><BR> <a href ="UserStartPage.cfm"><FONT FACE="Arial" SIZE="2" Color="006666"><B>Back to Start Page</B></FONT></a> </CFFORM> </BODY> </HTML>
Listing 13.8 provides the complete code for the SearchResults.cfm file.
Listing 13.8: SearchResults.cfm
<cfparam name="FORM.category" default=""> <cfparam name="FORM.authorname" default=""> <cfparam name="FORM.rcenter" default=""> <CFSET TheWhereClause = " Verified='Y' "> <CFIF Form.category GT ""> <CFSET TheWhereClause = TheWhereClause & " and Category = '" & Form.category & "'" > </CFIF> <CFIF Form.authorname GT ""> <CFSET TheWhereClause = TheWhereClause & " and Author = '" & Form.authorname & "'" > </CFIF> <CFIF Form.rcenter GT ""> <CFSET TheWhereClause = TheWhereClause & " and ResearchCenter = '" & Form.rcenter & "'" > </CFIF> <CFQUERY NAME="get_article_info" DATASOURCE="knowledgebank"> SELECT ArticleTitle, Author, Category, DateOfUpload, Description, ResearchCenter, FileName FROM Articles WHERE #PreserveSingleQuotes(TheWhereClause)# </CFQUERY> <!DOCTYPE HTML PUBLIC "-//W3C//DTD HTML 4.0 Transitional//EN"> <HTML> <HEAD> <TITLE>Knowledge Bank Application: Matching Articles</TITLE> </HEAD> <BODY BGCOLOR="99CC99"> <CFIF get_article_info.RECORDCOUNT IS 0> <I><FONT FACE="Arial" SIZE="3" Color="006666"><B>There are no records found for the criteria specified.</B></FONT></I> <HR> <TABLE Align ="Center"> <TR> <TD><a href ="SearchArticles.cfm"><FONT FACE="Arial" SIZE="2" Color="006666"><B>Search More Articles</B></FONT></a></TD> </TR> <TR> <TD><a href ="UserStartPage.cfm"><FONT FACE="Arial" SIZE="2" Color="006666"><B>Back to Start Page</B></FONT></a></TD> </TR> </TABLE> </BODY> </HTML> <CFABORT> </CFIF> <DIV><B><FONT FACE="Arial" SIZE="2" Color="006666">List of Matching Articles:</FONT></B></DIV> <B><FONT FACE="Arial" SIZE="2" Color="006666">(Click on the Article's Title to View the Article.)</FONT></B> <BR><BR> <TABLE BORDER="1" Align ="Center"> <TR bgcolor = "66CC99"> <TH>Article's Title</TH> <TH>Author</TH> <TH>Category</TH> <TH>Date Uploaded</TH> <TH>Description</TH> <TH>Research Center</TH> <TR> <CFOUTPUT QUERY = "get_article_info"> <CFIF CurrentRow Mod 2> <cfset BackColor = "99CC99"> <CFELSE> <cfset BackColor = "006666"> </CFIF> <TR bgcolor = #BackColor#> <TD><a href ="#URLEncodedFormat(FileName)#" target="_blank">#ArticleTitle#</a></TD> <TD>#Author#</TD> <TD>#Category#</TD> <TD>#DateOfUpload#</TD> <TD>#Description#</TD> <TD>#ResearchCenter#</TD> </TR> </CFOUTPUT> </TABLE> <BR> <TABLE Align ="center"> <TR> <TD><a href ="SearchArticles.cfm"><FONT FACE="Arial" SIZE="2" Color="006666"><B>Search More Articles</B></FONT></a></TD> </TR> <TR> <TD><a href ="UserStartPage.cfm"><FONT FACE="Arial" SIZE="2" Color="006666"><B>Back to Start Page</B></FONT></a></TD> </TR> </TABLE> </BODY> </HTML>
Listing 13.9 provides the complete code for the AdminStartPage.cfm file.
Listing 13.9: AdminStartPage.cfm
<CFQUERY NAME="get_users" DATASOURCE="knowledgebank"> SELECT DISTINCT UserID FROM Logins </CFQUERY> <HTML> <HEAD> <TITLE>Knowledge Bank Application: Admin Module Start Page</TITLE> </HEAD> <BODY BGCOLOR="99CC99"> <DIV align="center"><B><FONT FACE="Arial" SIZE="4" Color="006666"><U>Admin Module Start Page</U></FONT></B></DIV><BR> <HR> <B><FONT FACE="Arial" SIZE="2" Color="006666">Provide Details for Login to be Created.</FONT></B> <cfform ACTION="CreateLogin.cfm" METHOD="POST"> <TABLE> <TR> <TD><B>* User ID:</B></TD> <TD><cfinput TYPE="Text" NAME="UserID" SIZE="15" MAXLENGTH="10" REQUIRED="YES" MESSAGE="User ID should be specified"></TD> </TR> <TR> <TD><B>* Password:</B></TD> <TD><cfinput TYPE="Text" NAME="Password" SIZE="15" MAXLENGTH="10" REQUIRED="YES" MESSAGE="Password should be specified"></TD> </TR> <TR> <TD><B>* Status: </B></TD> <TD><SELECT Name="Status" Size="1"> <OPTION>Active</OPTION> <OPTION>Deactive</OPTION></SELECT></TD> </TR> <TR> <TD><B>* Delete Permission: </B></TD> <TD><SELECT Name="DelPerm" Size="1"> <OPTION>Y</OPTION> <OPTION>N</OPTION></SELECT></TD> </TR> <TR> <TD><B>* Directory Name: </B></TD> <TD><cfinput TYPE = "TEXT" Name = "DirName" Size = "50" MAXLENGTH="100" REQUIRED="YES" MESSAGE="Directory name should be specified"></TD> </TR> </TABLE> <BR> <INPUT TYPE="Submit" NAME="btnSave" VALUE="Create Login"><BR> </cfform> <HR> <a href ="VerifyNewArticles.cfm"><FONT FACE="Arial" SIZE="2" Color="006666"><B>Verify New Articles</B></FONT></a><BR> <CFFORM ACTION="ViewActivityLog.Cfm" METHOD="POST"> <CFSELECT Name = "SelectedUser" Size = "3" MULTIPLE="NO" QUERY="get_users" Value="UserID" DISPLAY="UserID" REQUIRED="NO"></CFSELECT> <INPUT TYPE="Submit" NAME="btnView" VALUE="View Activity Log"><BR> </CFFORM> <HR> </BODY> </HTML>
Listing 13.10 provides the complete code for the CreateLogin.cfm file.
Listing 13.10: CreateLogin.cfm
<HTML> <HEAD> <TITLE>Knowledge Bank Application: Creating Login</TITLE> </HEAD> <BODY BGCOLOR="99CC99"> <CFLOCK TIMEOUT="30" SCOPE="session" TYPE="readonly"> <CFIF IsDefined("SESSION.USERID")> <CFIF #SESSION.USERID# EQ "Admin"> <CFQUERY NAME="createlogin" DATASOURCE="Knowledgebank"> INSERT INTO logins (UserID, Password, DirectoryName, Status, DeletePermission) VALUES ('#Form.UserID#','#Form.Password#','#Form.DirName#', '#Form.Status#','#Form.DelPerm#') </CFQUERY> <CFSET varDir = "C:\inetpub\wwwroot\ProjectTwo\" & #Form.DirName#> <CFDIRECTORY ACTION="create" DIRECTORY= #varDir#> <CFSET varDir = "C:\Knowledgebank\" & #Form.UserID# & "Log.txt"> <CFFILE ACTION ="WRITE" FILE=#varDir# OUTPUT = "**The Login was created at: #Now()#**"> </CFIF> </CFIF> </CFLOCK> <FONT FACE="Arial" SIZE="3" COLOR="006666"><B>New Login Created.</B></FONT> <BR> <BR> <a href ="AdminStartPage.cfm"><FONT FACE="Arial" SIZE="2" Color="006666"><B> Back to Start Page</B></FONT></a> </BODY> </HTML> Listing 13.11 provides the complete code for the ViewActivityLog.cfm file.
Listing 13.11: ViewActivityLog.cfm
<HTML><HEAD><TITLE>Knowledge Bank Application: Activity Log</TITLE></HEAD> <BODY BGCOLOR="99CC99"> <CFOUTPUT> <P><B><FONT FACE="Arial" SIZE="4" Color="006666"><U>Activity Log for #Form.SelectedUser#</U></FONT></B></P> </CFOUTPUT> <CFSET varFile = "c:\Knowledgebank\" & trim(#Form.SelectedUser#) & "Log.txt"> <CFFILE ACTION = "Read" FILE = #varFile# VARIABLE="varLog"> <CFOUTPUT>#varLog#</CFOUTPUT> <BR> <BR> <a href ="AdminStartPage.cfm"><FONT FACE="Arial" SIZE="2" Color="006666"><B>Back to Start Page</B></FONT></a> </BODY> </HTML>
Listing 13.12 provides the complete code for the VerifyNewArticles.cfm file.
Listing 13.12: VerifyNewArticles.cfm
<CFSET TheWhereClause = " Verified='N' "> <CFQUERY NAME="get_article_info" DATASOURCE="knowledgebank"> SELECT ArticleID, ArticleTitle, Author, Category, DateOfUpload, Description, ResearchCenter, FileName FROM Articles WHERE #PreserveSingleQuotes(TheWhereClause)# </CFQUERY> <!DOCTYPE HTML PUBLIC "-//W3C//DTD HTML 4.0 Transitional//EN"> <HTML> <HEAD> <TITLE>Knowledge Bank Application: New Articles</TITLE> </HEAD> <BODY BGCOLOR="99CC99"> <CFIF get_article_info.RECORDCOUNT IS 0> <I><FONT FACE="Arial" SIZE="3" Color="006666"><B>There are no New Articles to be Verified.</B></FONT></I> <HR> <TABLE Align ="Center"> <TR> <TD><a href ="AdminStartPage.cfm"><FONT FACE="Arial" SIZE="2" Color="006666"><B>Back to Start Page</B></FONT></a></TD> </TR> </TABLE> </BODY> </HTML> <CFABORT> </CFIF> <DIV><B><FONT FACE="Arial" SIZE="2" Color="006666">List of New Articles to be Verified:</FONT></B></DIV> <B><FONT FACE="Arial" SIZE="2" Color="006666">(Click on the Article's Title to View the Article.)</FONT></B> <BR><BR> <CFFORM action="UpdateVerified.cfm" method="post"> <TABLE BORDER="1" Align ="Center"> <TR bgcolor="66CC99"> <TH>Article ID</TH> <TH>Article's Title</TH> <TH>Author</TH> <TH>Category</TH> <TH>Date Uploaded</TH> <TH>Description</TH> <TH>Research Center</TH> <TR> <CFOUTPUT QUERY = "get_article_info"> <CFIF CurrentRow Mod 2> <cfset BackColor = "99CC99"> <CFELSE> <cfset BackColor = "006666"> </CFIF> <TR bgcolor = #BackColor#> <TD><CFINPUT Type = "checkbox" Name = "ArticleID" Value = "#ArticleID#"> #ArticleID# </TD> <TD><a href ="#URLEncodedFormat(FileName)#" target="_blank">#ArticleTitle#</a></TD> <TD>#Author#</TD> <TD>#Category#</TD> <TD>#DateOfUpload#</TD> <TD>#Description#</TD> <TD>#ResearchCenter#</TD> </TR> </CFOUTPUT> </TABLE> <BR> <INPUT TYPE="Submit" NAME="btnSave" VALUE="Mark Selected Articles as Verified"><BR> </CFFORM> <BR> <TABLE Align ="center"> <TR> <TD><a href ="AdminStartPage.cfm"><FONT FACE="Arial" SIZE="2" Color="006666"><B>Back to Start Page</B></FONT></a></TD> </TR> </TABLE> </BODY> </HTML>
Listing 13.13 provides the complete code for the UpdateVerified.cfm file.
Listing 13.13: UpdateVerified.cfm
<cfparam name="FORM.ArticleID" default=""> <CFIF FORM.ArticleID IS NOT ""> <CFSET Length = ListLen(#Form.ArticleID#)> <CFLOOP INDEX = "element" FROM = "1" TO="#Length#"> <CFSET varArticleID = ListGetAt(#Form.ArticleID#,element)> <CFQUERY NAME="UpdateRecord" DATASOURCE="Knowledgebank"> UPDATE Articles SET Verified = 'Y' WHERE ArticleID = #varArticleID# </CFQUERY> </CFLOOP> </CFIF> <!DOCTYPE HTML PUBLIC "-//W3C//DTD HTML 4.0 Transitional//EN"> <HTML> <HEAD> <TITLE>Knowledge Bank Application: Updating Record Confirmation</TITLE> </HEAD> <BODY BGCOLOR="99CC99"> <I><FONT FACE="Arial" SIZE="3" Color="006666"><B>The Record(s) have been Updated Successfully.</B></FONT></I> <P> <TABLE Align ="Left"> <TR> <TD><a href ="AdminStartPage.cfm"><FONT FACE="Arial" SIZE="2" Color="006666"><B>Back to Start Page</B></FONT></a></TD> </TR> <TR> <TD><a href ="VerifyNewArticles.cfm"><FONT FACE="Arial" SIZE="2" Color="006666"><B>Verify More Articles</B></FONT></a></TD> </TR> </TABLE> </BODY> </HTML>
Listing 13.14 provides the complete code for the Application.cfm file.
Listing 13.14: Application.cfm
<cfapplication name = "Knowledge Bank Application" SESSIONMANAGEMENT="Yes" setClientCookies = "Yes" SESSIONTIMEOUT="#CreateTimeSpan(0,0,30,0)#"> <cferror type="exception" template="ErrorHandler.cfm" exception="ANY">
Listing 13.15 provides the complete code for the ErrorHandler.cfm file.
Listing 13.15: ErrorHandler.cfm
<HTML> <HEAD> <TITLE>Knowledge Bank Application: Error Handler</TITLE> </HEAD> <BODY BGCOLOR="99CC99"> <DIV align="center"><B><FONT FACE="Arial" SIZE="4" Color="006666"><U>Error Occurred in the Application</U></FONT></B></DIV><BR> <HR> <CFOUTPUT> #Error.MESSAGE# <HR> <B>TYPE: </B> #Error.TYPE#<BR> <B>DETAILS: </B> #Error.DETAIL#<BR> <B>ERRORCODE: </B> #Error.ERRORCODE#<BR> <B>EXTENDEDINFO: </B> #Error.EXTENDEDINFO#<BR> </CFOUTPUT> </BODY> </HTML>
|
EAN: 2147483647
Pages: 200