Section 30. Add, Delete, and Size Tracks
30. Add, Delete, and Size Tracks
4 About Video Capture 14 Add Media with the Adobe Media Downloader 29 About the Timeline and Video tracks
77 Create a Picture-in-Picture Effect 87 Create a Brady Bunch Effect 97 Create a Title Overlay for Your Video By default, Premiere Elements gives you two video and two audio tracks with which to work. You have the ability to add additional video and audio tracks at any time. You'll need additional tracks for special effects such as picture-in- picture (showing multiple images at the same time), adding background images, titles, and text. Each still image also needs its own track; therefore, the more images you want to display simultaneously, the more tracks you need. Tracks are prioritized from top to bottom (or layered in visibility); the bottom track being track number 1. The higher the track number, the higher the priority. When adding an image to track 1, with nothing above it, the image on track 1 is clearly visible in the Monitor. If you add an image to track 2, directly above the track 1 image, all you see in the Monitor is the track 2 image because the higher track has priority. This all becomes more understandable when you resize and position the images, lower their opacity, or make parts of the tracks transparent. When those effects are applied to higher tracks, parts (or all) of the lower tracks become visible. One of the best examples of this is seen in 87 Create a Brady Bunch Effect. Each image in the famous Brady Bunch intro is on a separate track, scaled and positioned so all the images are visible in the same screen. Keep Track Priority in mind as you add clips to the Timeline. Make sure what you want to see is on the proper track; and that there are no clips on tracks above it that don't belong there. After adding additional tracks, you might need to delete some empty tracks. That can easily be accomplished with a few keystrokes. 30. Add, Delete, and Size Tracks 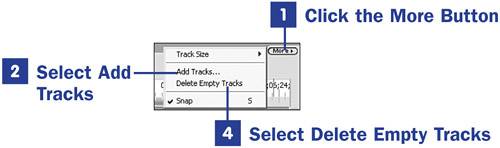
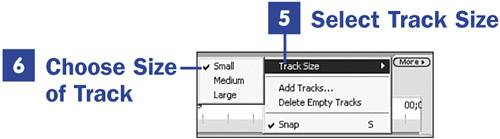
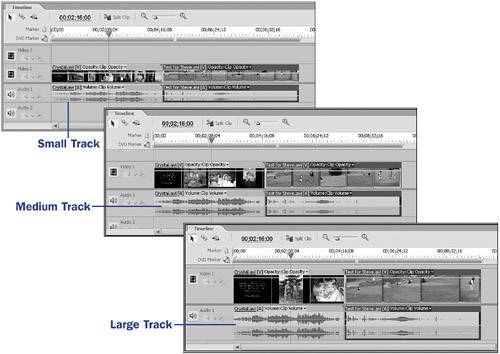 Premiere Elements also enables you to set the size of the tracks. Changing the track size also enlarges the thumbnail images you see on the Timeline, making it easier to see the audio and video detail.
To change the default number of tracks displayed in the Timeline, choose Project, Project Settings, Default Timeline from the main menu at the top of your screen. There, you can set the default number of tracks (for both video and audio tracks) for all your future projects. Changing the default does not alter the number of tracks in any projects created before this change.
|
 BEFORE YOU BEGIN
 SEE ALSO
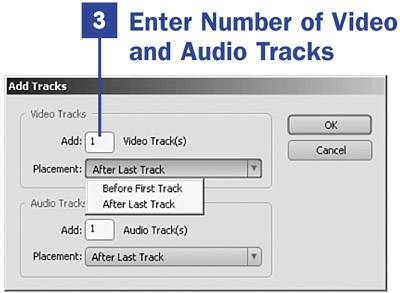
 NOTE
NOTEEAN: 2147483647
Pages: 199