26. Make an Instant Slideshow  BEFORE YOU BEGIN BEFORE YOU BEGIN
22 Prepare a Still for Video 23 Scale and Position a Still 29 About the Timeline and Video Layers
 SEE ALSO SEE ALSO
13 About the Media Panel 16 Create and Use Media Folders 17 Sort the Media Panel by Different Characteristics 19 Trim Clips in the Media Panel 46 Add a Video Transition
If you have a selection of still images, Premiere Elements can automatically turn them into a slideshow on your Timeline. In addition, this feature gives you the option of customizing several of the slideshow's characteristics.  NOTE NOTE
Although we usually think of slides as still images, the Create Slideshow feature can also be used to load video clips, which will play at the intervals you designate in the Still Image Duration setting.
26. Make an Instant Slideshow 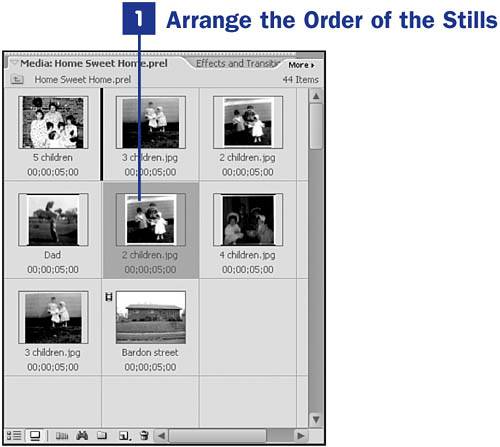
1. | Arrange the Order of the Stills
A convenient feature of the Create Slideshow tool is that it can add stills to the Timeline in the order they appear in the Media panelthis is usually much easier than rearranging the order of the slides after the stills have been placed on the Timeline. In the Media panel, arrange your stills in the order you want them to appear in the final slideshow. To do so, click the Media panel's More button and select the Icon View (see 13 About the Media Panel). You can then arrange your clips in any order by simply dragging them around within the panel.
You might find it helpful to create a separate folder in the Media panel for the still images, separating your stills from the rest of your project's media (see 16 Create and Use Media Folders).
NOTE As an alternative to presorting your stills before creating the slideshow, you can select the slides in the order you want them arranged on the Timeline. To do so, hold down the Ctrl key and click to select the stills or clips one at a time in the Media panel. After you've gathered your slides and chosen More, Create Slideshow, set the Ordering option to Selection Order. An alternative method of arranging your photos in the Media panel is to use List view (click More and choose View, List) and sort the stills alphanumerically by clicking the word Name at the top of the media list. (Click Name a second time to reverse the sort order.)
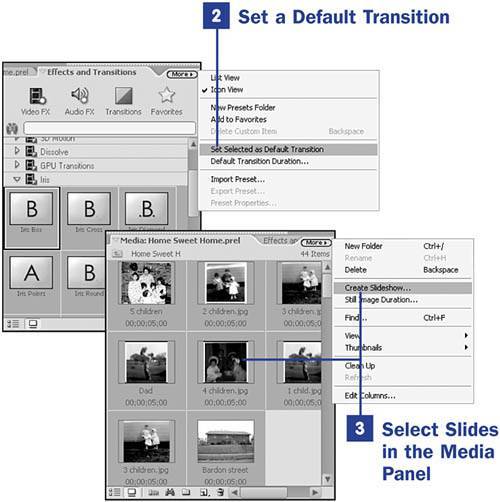
TIP You can easily change the names of your clips or stills so that this sorting method puts them in the order you prefer. To do so, click the name of any clip, pause a moment and then click again (or right-click and select Rename). The still or clip's name becomes an editable field. Type the new name and press Enter. Changing the name of a clip in the Media panel does not change the name of the file on your computer's hard drive. The only thing that changes is how the clip is displayed in Premiere Elements and, ultimately, how that clip is sorted by the Media panel. | 2. | Set a Default Transition
Your slideshow can be set to generate with a transition between each slide on the Timeline. If you choose this option, the default transition placed between each slide is initially a Cross-Dissolve.
To change the default transition, open the Effects and Transitions panel and browse to your preferred transition (see 46 Add a Video Transition). Note that clicking any transition starts a thumbnail preview of that transition. The current default transition will be outlined.
When you have selected your preferred transition, click the More button in the Effects and Transitions panel and select Set Selected as Default Transition. A blue box appears around the transition indicating that it is now your program default.
| 3. | Select Slides in the Media Panel
Select the stills or clips you want to use in the slideshow either by holding down the Shift key and selecting the first and last of the series (all clips between are automatically selected) or by holding down the Ctrl key and clicking to select individual clips in the Media panel.
TIP As an alternative to ordering the clips in the Media panel as described in step 1, you can hold down the Ctrl key and click in the Media panel to select the clips or stills in the order you want them to appear. NOTE The Create Slideshow feature loads your clips or stills to the Timeline in the order you have arranged them in the Media panel or by the order in which you select them. | 4. | Set Characteristics of the Slideshow
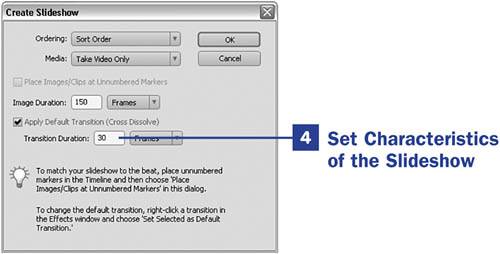
With all your stills or clips selected, click the More button in the Media panel and choose Create Slideshow. The Create Slideshow dialog box opens.
If the Ordering option is set to Sort Order, the slides appear on the Timeline in the order they are arranged in the Media panel. If, rather than ordering the clips in the Media panel, you selected them in the order you want them to appear in your slideshow, choose the Selection option to instruct the program to sort your clips in the order you selected them.
Disable the Place Images/Clips at Unnumbered Markers option and enable the Apply Default Transition (Cross Dissolve) option (which you specified in step 2) if you want to use a transition and set the duration of the transition in frames or seconds. You can also set the Image Duration in frames or seconds.
Click OK. A slideshow is automatically generated on your Timeline, beginning at the position of the current time indicator (CTI).
|
|