Project, like the other Microsoft Office System applications, has many different printing options that let you control how views and reports will be printed. This section examines the tasks required to set these options so that you will understand how to control these settings when printing your project.
Defining Paper Size and Orientation
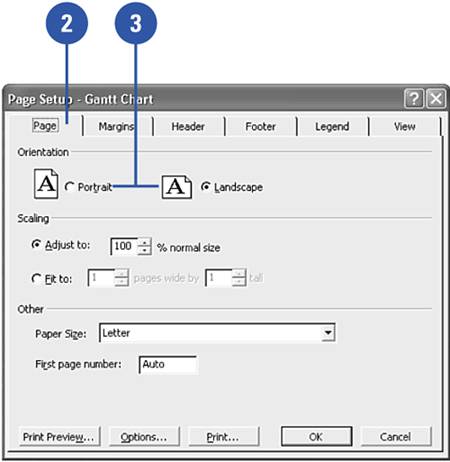
Click the File, Page Setup menu item.
Select the Page tab of the dialog.
Select Portrait or Landscape from the Orientation section.
For Your Information
Views As Reports
Some views are better suited to a portrait layout rather than a landscape layout. Project defaults this setting to landscape because most views, such as Gantt Chart or Usage, tend to be landscape-type views. Each view retains its own Page Setup settings, so changing the settings in the Resource Sheet view will not change the settings you have established for the Gantt Chart view.
Adjusting the Page Scaling
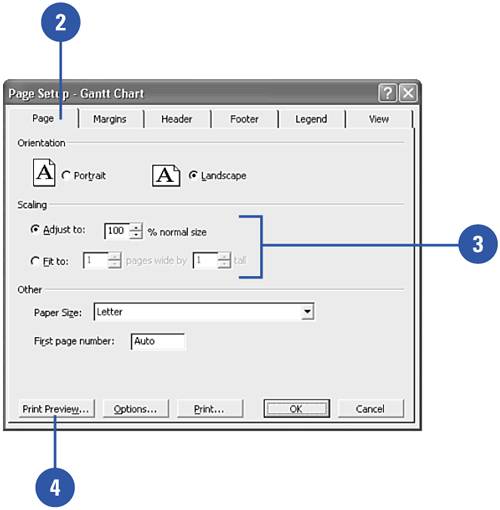
Click the File, Page Setup menu item.
Select the Page tab of the dialog.
In the Scaling section, set the Adjust To or the Fit To settings to the desired value.
Click the Print Preview button to see the effect of your changes.
Repeat steps 3 “4 until you have the scaling settings adjusted properly.
For Your Information
Using Print Scaling
Scaling can be used to fit more information from your view onto each page. If you need to show larger portions of the table or a larger section of the chart area than the page size allows, you can adjust the scaling down to fit more on the same size page.
You can also use the Fit To controls to define a set number of pages that Project should scale the view to.