Tables are the "grids" that make up the left side of Gantt Chart views, Usage views, and the entire Resource Sheet view. They are the part of Project that looks familiar if you have used Excel or other spreadsheet applications. We have already looked at some quick, "in the view" methods for inserting, hiding, and moving fields within tables. We will now look at how to create new tables, as well as how to edit and apply them to existing views.
Creating a New Table
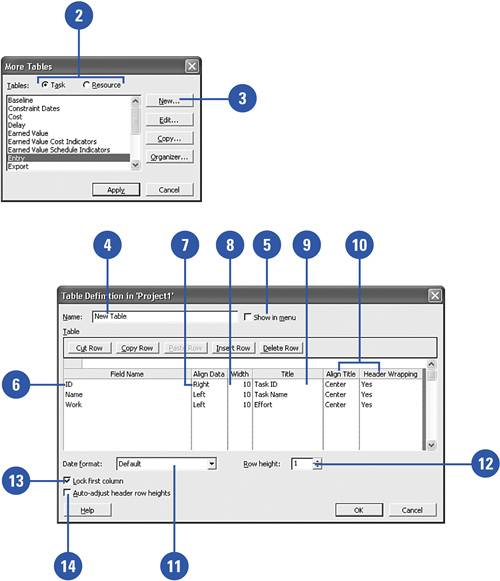
Click View, Table, More Tables.
Select Task to create a task table, or Resource to create a resource table.
Click the New button.
Enter a name for your table.
The Show In Menu check box controls whether the table should appear in the View, Table menu.
Click into the top row of the Field Name column and select the first field for your table.
Define the alignment of the data to be shown in the field.
Enter a width for the field.
Enter a title for the field if you want the title to be different from the field name.
Select an alignment and a header wrapping option.
Select a date format for the table.
Select a row height for the table.
The Lock First Column check box controls whether the first row can be used to select entire rows.
The Auto-Adjust Header Row Heights check box automatically allows the header row height to grow based on the wrapping of the header titles.
For Your Information
Field Layout
The top-to-bottom listing of fields in the Table Definition dialog equates to the left-to-right listing of fields in the view. The field below a given field in the dialog is the field that appears to the given field's right as seen in the view.
Applying a New Table to an Existing View
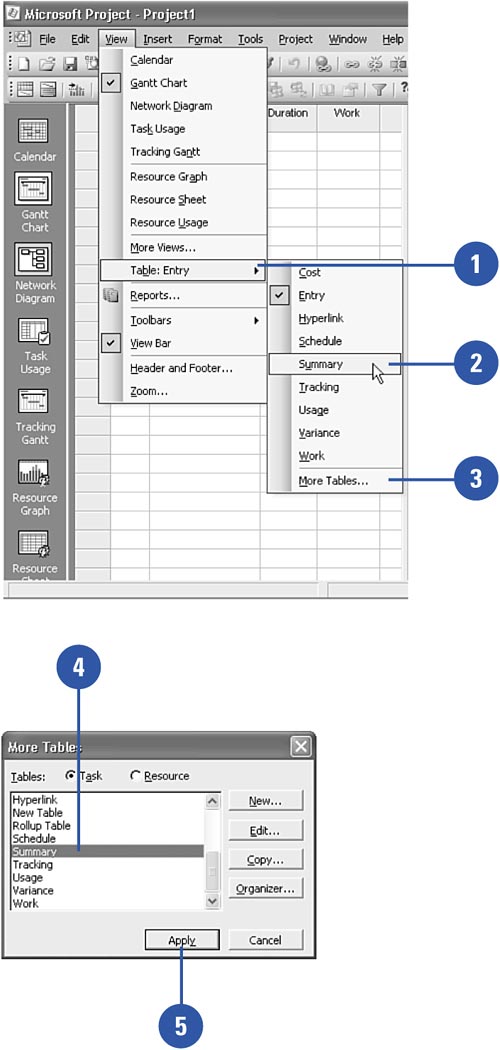
Click the View, Table menu to show the list of tables.
If the table you want to apply is shown in the menu, select it and it will be applied.
If the table you want to apply is not shown, select More Tables.