Repairing Problems Caused by the Lens
|
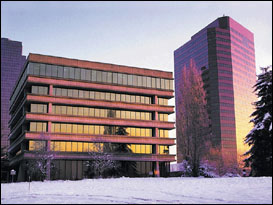
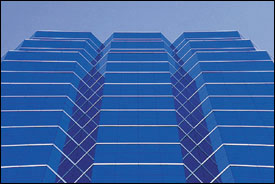
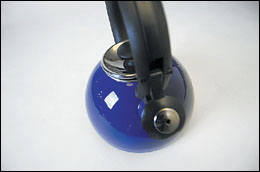
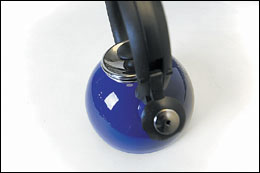
In Photoshop CS2, Adobe introduced a new filter that is pretty much a "one-stop-shop" for repairing the most common problems caused by the camera's lens, including pincushion and barrel distortion, horizontal and vertical perspective problems, chromatic aberrations, and vignetting. Before CS2, you could only fix chromatic aberrations and vignetting if you were shooting RAW, because the fixes only appear in Camera Raw, but now you can apply these quick fixes on JPEG images as well. Problem OnePerspective DistortionStep OneThe first problem we're going to tackle is some perspective distortion. In the example shown here, the bases of the buildings look smaller than the tops (especially the building on the left), which gives the photo an almost cartoon-like perspective (but believe me, your client won't think it's funny). 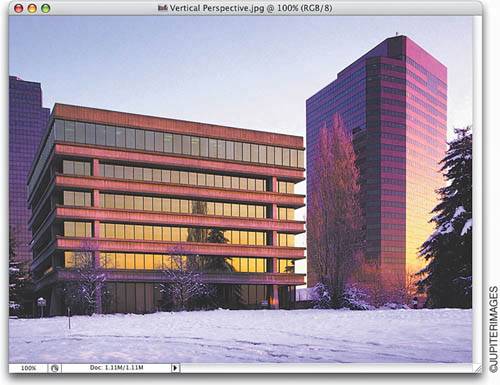 Step TwoTo fix this problem (caused by the lens), go under the Filter menu, under Distort, and choose Lens Correction. When the dialog appears, turn off the Show Grid checkbox (it's on by default), then go to the Transform section (near the bottom-right side of the dialog) and drag the Vertical Perspective slider to the right until the buildings start to look straight and not so top-heavy. When you make this correction, the filter pinches the top third of your photo inward, which leaves transparent gaps along the top and upper-side edges of your photo (you can see the checkerboard in these areas). 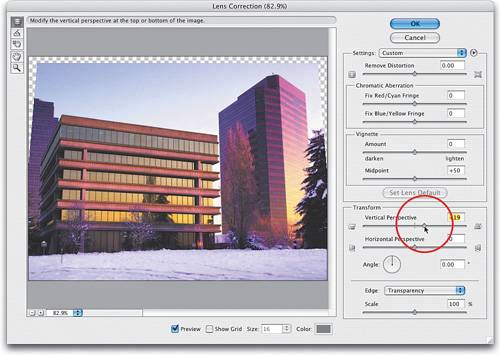 Step ThreeThe Edge pop-up menu at the bottom of the Transform section lets you decide how to deal with these edge "gaps" caused by the perspective repair. From the pop-up menu, choose Edge Extension, which extends the edge areas of your photo to cover those gaps, and click OK to apply the fix. Note: You'll still need to do some clean-up to hide some of the stretched areas created by the Edge Extension, so just use the Clone Stamp tool (S) or the Healing Brush (J). 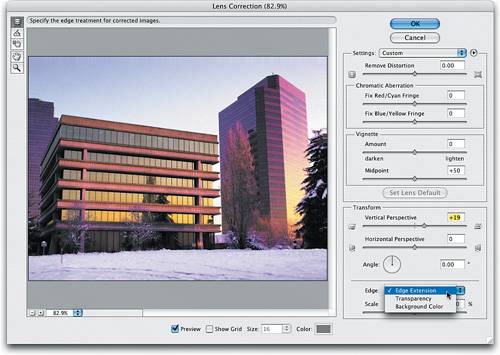 Before: The bases of the buildings are smaller than the tops. After: The perspective distortion is corrected. Problem TwoBarrel DistortionStep OneAnother common lens correction problem is called barrel distortion, which makes your photo look bloated or rounded. So, open the Lens Correction filter again, but this time you're going to drag the Remove Distortion slider (in the top right of the dialog) slowly to the right to "pucker" the photo inward from the center, removing the rounded, bloated look. If you want a more visual way to do this correction, try the Remove Distortion tool (it's at the top in the Toolbox on the left). Click-and-drag it toward the center of your photo to remove barrel distortion (or toward an edge to remove pincushion distortion, in which the sides of your photo appear to curve inward). It's hard to make minor adjustments using the tool, so you'll probably wind up using the slider most of the time. 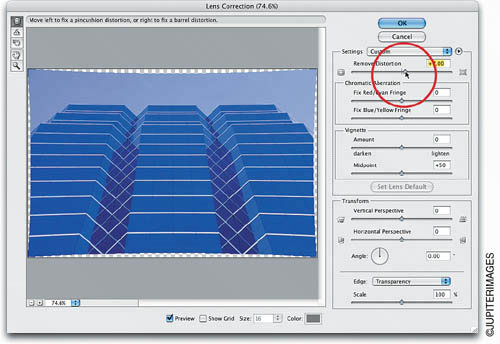 Step TwoWhen you click OK, the correction will leave gaps around the edges, so get the Crop tool (C) and re-crop the image to hide the missing edges. It's hard to see the difference in the small images below, but try this technique, and you'll see the difference. 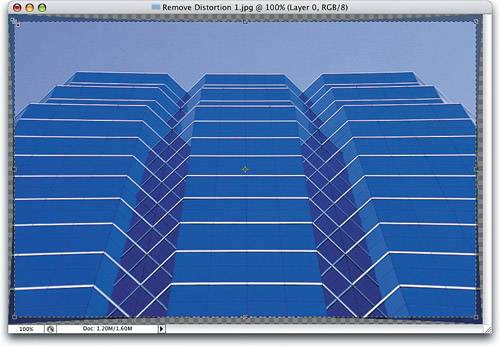 Before After (removing the bloating caused by barrel distortion) Problem ThreeLens VignettingStep OneVignetting is a lens problem where the corners of your photo appear darkened. To remove this problem, go back to the Lens Correction filter. 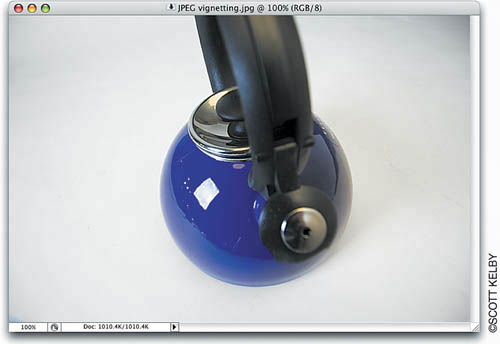 Step TwoIn the Vignette section of the dialog, drag the Amount slider to the right, and as you do you'll see the edges brighten. Keep dragging the slider until the edges match the brightness of the rest of the photo. The Midpoint slider (just below the Amount slider) determines how far into the photo your corner brightening will extend. In this case, you have to extend it just a little bit by dragging the slider to the left (as shown here), then click OK. Note: You can also fix chromatic aberrations (colored-edge fringing). To see what that is and how to fix it using this filter (which works similarly to Camera Raw), check out the "Fixing Chromatic Aberrations" tutorial in Chapter 3. 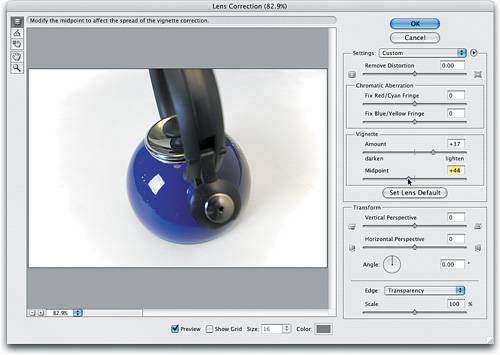 Before: You can see the dark vignetted areas in the corners. After: The vignetting is completely removed. |


|
EAN: N/A
Pages: 187
- ERP Systems Impact on Organizations
- The Second Wave ERP Market: An Australian Viewpoint
- Enterprise Application Integration: New Solutions for a Solved Problem or a Challenging Research Field?
- Intrinsic and Contextual Data Quality: The Effect of Media and Personal Involvement
- Development of Interactive Web Sites to Enhance Police/Community Relations