Color Correcting One Problem Area Fast
|
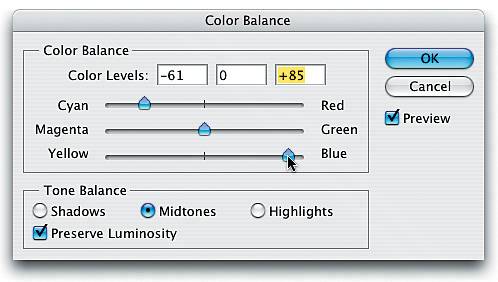
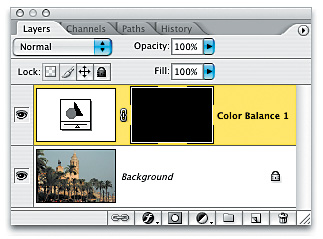
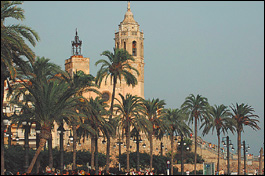
Color Correcting One Problem Area Fast!This particular technique really comes in handy when shooting outdoor scenes, because it lets you enhance the color in one particular area of the photo (like the sky or water), while leaving the rest of the photo untouched. Real estate photographers often use this trick when shooting home exteriors to make it look like the sky was bright and sunny when they took the shot (even though the weather doesn't always cooperate). Here you'll use the technique to make the grayish sky look blue. Step OneOpen an image containing an area of color that you would like to enhance. In this example, we want to make the sky blue (rather than gray). Go to the Layers palette and choose Color Balance from the Create New Adjustment Layer pop-up menu at the bottom of the Layers palette (it's the half-white/half-black circle icon, fourth from the left). A new adjustment layer named Color Balance 1 will be added to your Layers palette, but the name will probably be cut off by default. If you want to see the layer's name, you'll have to widen your Layers palette by clicking-and-dragging its bottom-right corner.  Step TwoWhen the Color Balance dialog appears, drag the top slider to the left toward Cyan to add some bright blue into your sky, and then drag the bottom slider to the right toward Blue until the sky looks as blue as you'd like it. When the sky looks good to you, click OK. When you do this, the entire photo (building and all) will have a heavy blue cast to it. Step ThreePress the letter X to set your Foreground color to black. Then press Option-Delete (PC: Alt-Backspace) to fill your adjustment layer's mask with black, which hides the blue layer. Step FourNow you'll reveal parts of the blue layer using the Brush tool. Press the letter X to toggle your Foreground color to white. Press B to switch to the Brush tool, and then in the Options Bar, click on the thumbnail to the right of the word "Brush" and choose a large, soft-edged brush from the Brush Picker. Begin painting over the sky and the blue is revealed. If you accidentally paint over the building, press the X key to toggle your Foreground to black, and the original color will reappear. (Note: You may need to change the Opacity of your Brush to about 50% in the Options Bar when painting around detailed areas.) 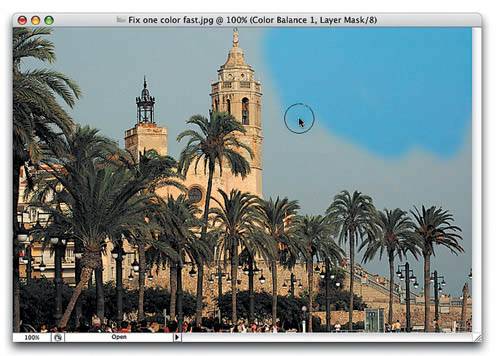 Tip If you feel the blue needs to be tweaked, try changing the blend mode of this adjustment layer to Screen (or Overlay) in the Layers palette, and then lower the Opacity a bit. Before After (making the sky bluer in Normal blend mode) |
|
EAN: N/A
Pages: 187