Instant Red-Eye Removal
| When I see a digital camera with the flash mounted directly above the lens, I think, "Hey, there's an automated red-eye machine." In studio situations, you don't have to deal with this as much, because your flash probably wouldn't be mounted directly above your lensyou're using bounce flash, holding the flash separately, you've got studio strobes, or one of a dozen other techniques. Elements has had instant red-eye removal for a while now, but the red-eye removal in this version gives significantly better results. Step One©MATT KLOSKOWSKI 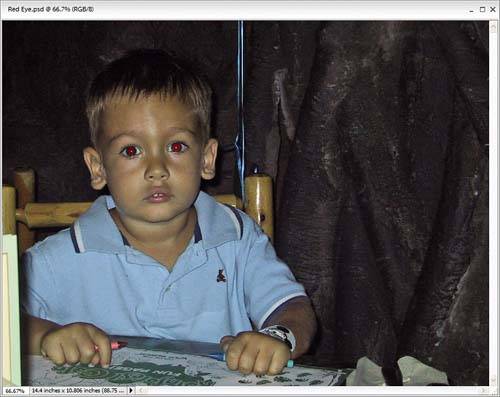 Open a photo where the subject has red eye. Step TwoPress Z to switch to the Zoom tool (it looks like a magnifying glass in the Toolbox) and drag out a selection around the eyes (this zooms you in on the eyes). Now, press the letter Y to switch to the Red Eye Removal tool (its Toolbox icon looks like an eye with a tiny crosshair cursor in the left corner). There are two different ways to use this tool: click or click-and-drag. We'll start with the most precise: which is click. Take the Red Eye Removal tool and click it once directly on the red area of the pupil. It will isolate the red in the pupil and replace it with a neutral color. Instead, now you have "gray" eye, which doesn't look spectacular, but it's a heck of a lot better than red eye. 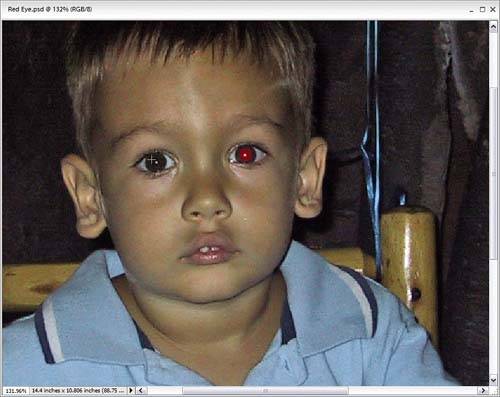 Step Three
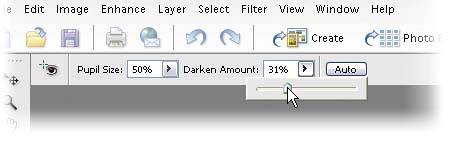
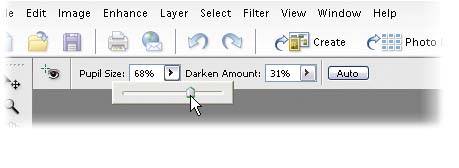
If the gray color that replaces the red seems too "gray," you can adjust the darkness of the replacement color by going to the Options Bar and adjusting the Darken Amount. To get better results, you may have to adjust the Pupil Size setting so that the area affected by the tool matches the size of the pupil. This is also done in the Options Bar when you have the Red Eye Removal tool selected. Now, on to the other way to use this tool (for really quick red-eye fixes).  Step FourIf you have a lot of photos to fix, you may opt for this quicker red-eye fixjust click-and-drag the Red Eye Removal tool over the eye area (putting a square selection around the entire eye). The tool will determine where the red eye is within your selected area (your cursor will change to a timer), and it removes the red. Use this "drag" method on one eye at a time for the best results. Before
After
|


EAN: 2147483647
Pages: 201