Removing Red Eye and Recoloring the Eye
| This technique is a little more complicated (not hard, it just has a few more steps) but the result is more professional. After you remove the red eye and replace it with the more pleasing "gray eye" (like in the previous "Instant Red-Eye Removal" trick), you're going to restore the eye to its original color. Step One©DAVE MOSER  Open a photo where the subject has red eye. Step Two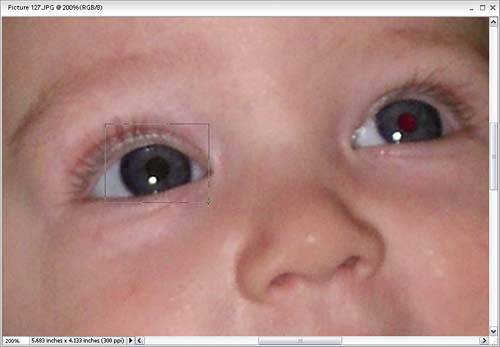 Zoom in close on one of the eyes using the Zoom tool (the magnifying glass, which you access by pressing the Z key). Use the technique shown on the previous pages, which removes the red eye and replaces it with "gray eye," then repeat this step on the second eye. Note: You might not want to do this late at night if you're home alone, because seeing a huge, scary eye on your screen can really give you the willies. Step Three Press the L key to switch to the Lasso tool, and draw a very loose selection around one entire eye. The key word here is loosestay well outside the iris itself, and don't try to make a precise selection. Selecting the eyelids, eyelashes, etc., will not create a problem. Once one eye is selected, hold the Shift key, and then use the Lasso tool to select the other eye in the same fashion (giving you both eyes as selections). Step Four
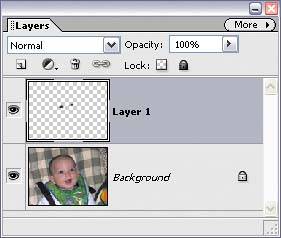
Once you have loose selections around both eyes, press Control-J to instantly copy-and-paste them onto a new layer in the Layers palette. This does two things: (1) It pastes the copied eyes on this layer in the exact same position as they are on the Background layer, and (2) it automatically deselects for you. Now you have just a pair of eyes on this layer. Step Five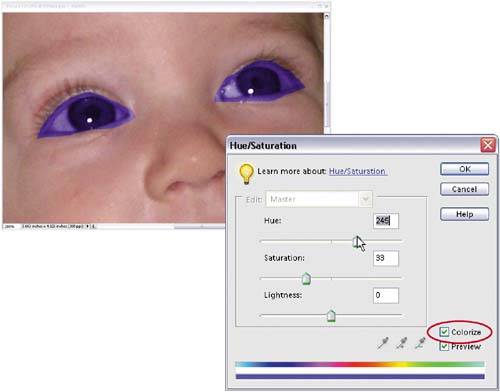 While you're on this "eyes" layer, go under the Enhance menu, under Adjust Color, and choose Adjust Hue/Saturation. In the dialog, click on the Colorize checkbox (in the bottom right-hand corner). Now you can choose the color you'd like for the eyes by dragging the Hue slider. Don't worry about the color being too intense at this point; you can totally adjust that later. So if you want blue eyes, choose a deep blue and you'll "dial in" the exact shade later. Click OK to apply the color to the irises and the area around them as well. (Don't let this freak you out that other areas around the iris appear blue. We'll fix that in the next step.) Step Six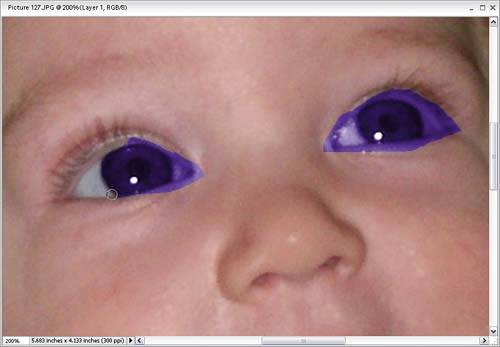 Press the E key to switch to the Eraser tool. Press D to make sure your Background color is white. Choose a small, hard-edged brush (from the Brush Picker up in the Options Bar), and then simply erase the extra areas around the iris. This sounds much harder than it isit's actually very easyjust erase everything but the colored iris. Don't forget to erase over the whites of the person's eyes. Remember, the eyes are on their own layer, so you can't accidentally damage any other parts of the photo. Step Seven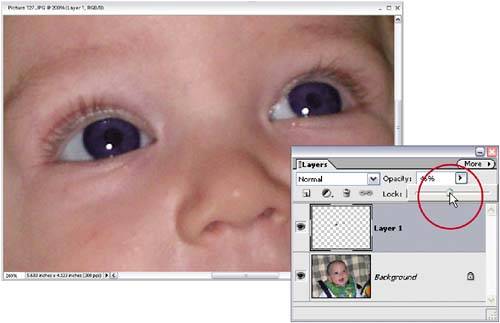 If the eye color seems too intense (and chances are, it will), you can lower the intensity of the color by simply adjusting the opacity of this layer (using the Opacity slider in the upper right-hand corner of the Layers palette) until the eyes look natural. Step Eight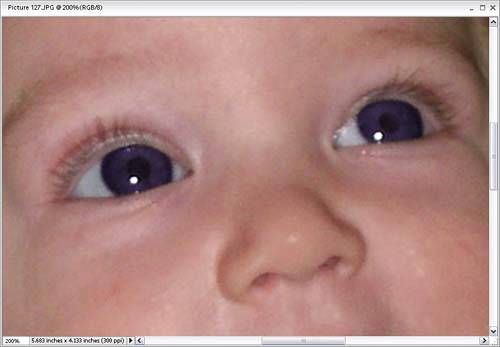
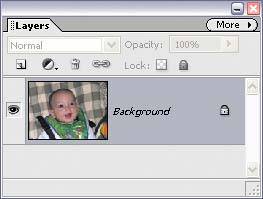
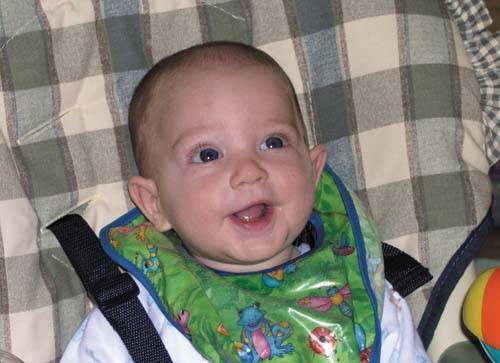
To finish the red-eye correction and recoloring, press Control-E to merge the colored eye layer with the Background layer, completing the repair. Before
After
|

EAN: 2147483647
Pages: 201
- Chapter III Two Models of Online Patronage: Why Do Consumers Shop on the Internet?
- Chapter V Consumer Complaint Behavior in the Online Environment
- Chapter IX Extrinsic Plus Intrinsic Human Factors Influencing the Web Usage
- Chapter XI User Satisfaction with Web Portals: An Empirical Study
- Chapter XV Customer Trust in Online Commerce