Drag-and-Drop Instant Color Correction
| This is a wonderful timesaving trick for quickly correcting an entire group of photos that have similar lighting. It's ideal for shots where the lighting conditions are controlled, but works equally well for outdoor shots, or really any situation where the lighting for your group of shots is fairly consistent. Once you try this, you'll use it again and again and again. Step One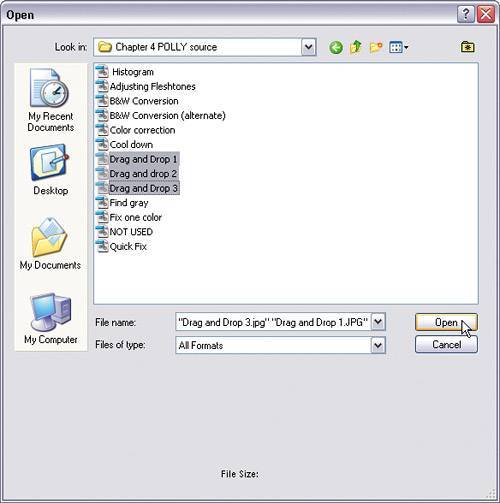 First, here's a tip-within-a-tip: If you're opening a group of photos, you don't have to open them one by one. Just go under the File menu and choose Open. In the Open dialog, click on the first photo you want to open, then hold the Control key and click on any other photos you want to open. Then, when you click the Open button, Elements will open all the selected photos. (If all your photos are contiguous, hold the Shift key and click on the first and last photos in the list to select them all.) So now that you know that tip, go ahead and open at least three or four images, just to get you started. Step Two
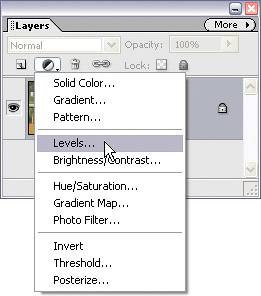
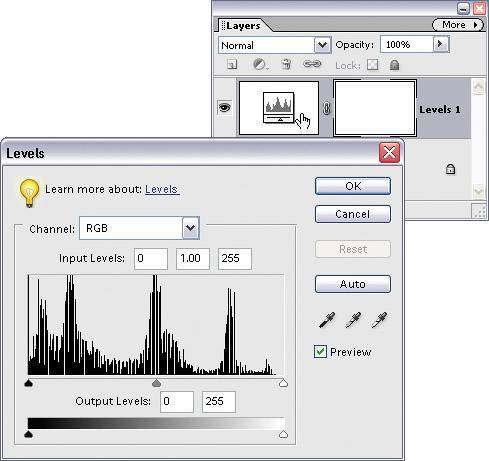
At the top of the Layers palette, click on the Create Adjustment Layer pop-up menu and choose Levels. Note: An adjustment layer is a special layer that contains the tonal adjustment of your choice (such as Levels, Brightness/Contrast, etc.). There are a number of advantages to having this correction applied as a layer, as you'll soon see, but the main advantage is that you can edit or delete this tonal adjustment at any time while you're working, plus you can save this adjustment with your file as a layer. Step Three©ISTOCKPHOTO/STEFAN SIEMS 
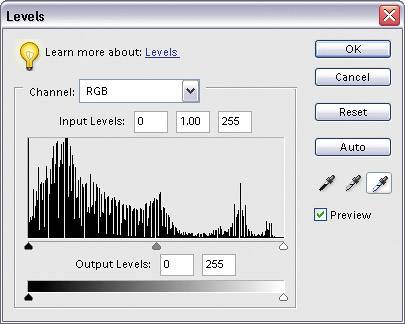
When you choose this adjustment layer, you'll notice that the regular Levels dialog appears, just like always. Go ahead and make your corrections using Levels (see "Color Correcting Digital Camera Images" earlier in this chapter), and when your correction looks good, click OK. In the Layers palette, you'll see that a new Levels adjustment layer is created. Step Four©ISTOCKPHOTO/STEFAN SIEMS 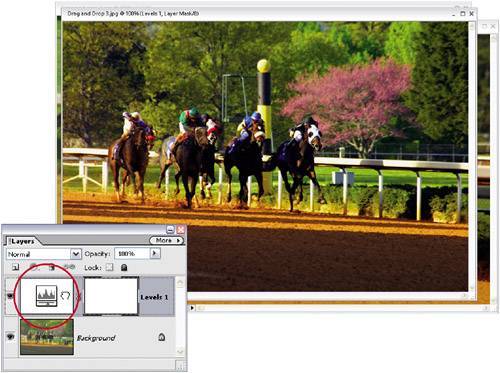 Because you applied this correction as an adjustment layer, you can treat this adjustment just like a regular layer, right? Right! And Elements lets you drag layers between open documents, right? Right again! So, go to the Layers palette, click on the Levels adjustment layer thumbnail, and drag-and-drop this layer right onto one of your other open photos. That photo will instantly have the same correction applied to it. This technique works because you're correcting photos that share similar lighting conditions. Need to correct 12 open photos? Just drag-and-drop it 12 times (making it the fastest correction in town!). Step Five©ISTOCKPHOTO/STEFAN SIEMS 
Okay, what if one of the "dragged corrections" doesn't look right? That's the beauty of these adjustment layers. Just double-click directly on the adjustment layer thumbnail for that photo, and the Levels dialog will reappear with the last settings you applied still in place. You can then adjust this individual photo separately from the rest. Try this "dragging-and-dropping-adjustment-layers" trick once, and you'll use it again and again to save time when correcting a digital roll that has similar lighting conditions. |
EAN: 2147483647
Pages: 201