Softening the Mask for Complex Shapes


Softening the Mask for Complex Shapes

Irregular shapes present a bit more of a challenge when you are trying to soften the mask edge. In most cases, a simple gradient overlay won't really work. However, there's another way to fake a soft edge. You can use the Soften Fill Edges option under Modify > Shape.

This time, you use the mask shape to create a hole in a second shape on the Gradient layer. Sounds a little strange , doesn't it? However, after you have a hole in the shape of your mask, you can use Soften Fill Edges (Modify > Shape > Soften Fill Edges) to expand a gradiated fill into the masked area.

The Soften Edges dialog box has three settings:

  • Distance. Number of pixels over which the edge will be softened. The minimum setting is 1px, and the maximum is 144px. Your setting is dependent on the effect you are trying to achieve.

  • Steps. Number of curves created for the softened edge. The more curves, the softer the edge. Be careful, however, because the more curves you add, the longer the shape takes to draw. The minimum setting is 1, and the maximum setting is 50.

  • Direction. Can be Expand or Inset. Expand creates the curves starting at the outside edge, moving outward. This enlarges the shape. Inset creates the curves starting at the outside edge, moving inward. This does not change the overall shape size .

The next exercise demonstrates how this method works.

Exercise 9.3 Creating Soft Edges for Irregular Shapes

This file already has been started for you. The mask has been set up and a blank Gradient layer has been added.

  1. Open irregular_mask.fla from the Chapter_09/Assets folder on the CD.

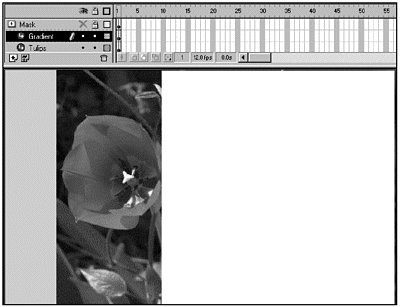
  2. Select the Gradient layer and use the Rectangle tool to draw a white rectangle with no stroke that completely covers the large red tulip and the green mask (see Figure 9.6).

    Figure 9.6. To soften the edges on an irregular shape, you start by creating a screening layer between the mask and the shape you want to mask.

    graphics/09fig06.gif

  3. Select the Mask layer, and then unhide and unlock it. Copy the green mask (tulip shape).

  4. Lock and hide the Mask layer.

  5. Select the Gradient layer and select Edit > Paste in Place. Click the work area to deselect everything on the Stage.

  6. Select the green shape on the Gradient layer and delete it. You now should have a tulip-shaped hole in the white rectangle.

  7. Select the white shape and choose Modify > Shape > Soften Fill Edges. In the Soften Edges dialog box, make the following changes:

    Distance: 20 px

    Number of Steps: 10

    Direction: Expand

    Tip

    When you are creating an irregular mask that you'll be using to punch out space in another layer, make absolutely sure that your mask is solid. If there are any empty pixels in the mask, those will cause you problems when you try to soften the edges. If you have problems with the entire center of the hole filling when you choose Soften Fill Edges, empty pixels are the first thing to check.

  8. Click the work area to deselect the white shape.

  9. Make the Mask layer visible and lock all layers . You now can see the effect you created.

You just as easily could create the same effect using the Gradient layer with no mask, but by using the mask you don't need to cover the entire Stage with the white shape. In fact, now you can go back in and trim the white shape down to the minimum necessary area to save on file size.

Not only can you have multiple layers under one mask, you can have multiple masked layers in the same file.

You aren't limited to using just one mask per file. You can use as many as you'd like. Just remember that the more masks you use, the harder you are tasking the CPU.

You can start to have some real fun with masking effects when you start applying Actions to the movie clips being masked.


Inside Flash
Inside Flash MX (2nd Edition) (Inside (New Riders))
ISBN: 0735712549
EAN: 2147483647
Year: 2005
Pages: 257
Authors: Jody Keating

flylib.com © 2008-2017.
If you may any questions please contact us: flylib@qtcs.net