Softening the Mask for Simple Shapes Masks in Flash can't use gradients. They are, by default, opaque . If you want a soft edge around your masked image, you have to fake it. You fake it by using a gradient (Window > Panels > Fill > Linear or Radial Gradient) in the shape of your mask either above the masking layer or in the stack of layers being masked. The most effective gradient to apply is the one that meets the following criteria: -
Has a single color -
Matches the background color -
Has an Alpha Transparency of 0% at the center -
Has an Alpha Transparency of 100% at the outer edge You'll probably want most of the gradient to be transparent. This is easy to accomplish when you have three gradient pointers that are set to the background color. The two left-most pointers will have an Alpha Transparency of 0% and the right-most pointer will have an Alpha Transparency of 100%. You can have up to eight gradient pointers, but you must have a minimum of two. To add a pointer, click beneath the Gradient Definition bar. To remove a pointer, click it, and drag it away from the bar. If you want to experiment with this technique, the next exercise walks you through the process. Exercise 9.2 Creating Soft Edges with a Gradient -
Open softmask.fla from the Chapter_09/Assets folder on the CD. The mask for this file has already been set up; you just need to add the gradient for a softening effect. -
Add a new layer between the Tulips and Mask layers and name it Gradient. -
Open the Library and make a duplicate of the circle graphic (right or Control-click the Circle symbol and choose Duplicate) and name it Gradient. -
Double-click the new symbol you just created to open it in Symbol-Editing mode. -
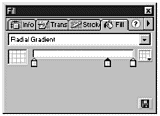
Select the Fill panel (Window > Panels > Fill) and choose Radial Gradient from the drop-down menu. In this case, you'll want an all white gradient that has an Alpha Transparency of 0% at the center and an Alpha Transparency of 100% at the outer edge. -
Set up three white gradient pointers. The first one should be to the far left of the Gradient Definition bar, the second about three- quarters of the way to the right, and the third one should be on the far right. (See Figure 9.4.) Figure 9.4. When you set up your gradient, you want the center of the circle to have an Alpha Transparency of 0% and the outer edge to have an Alpha Transparency of 100%.  -
To change the transparency for the gradient pointers, click the pointer and launch the Mixer panel (Window > Panels > Mixer). Make the appropriate changes using the Alpha slider. Change the transparencies to these settings: Left: 0% Middle: 0% Right: 100% -
Switch to the Paint Bucket tool and click the center of the circle shape on the Stage to fill it with the new gradient. Switch back to the main timeline. -
Unlock the Mask layer and copy the circle graphic. Switch to the Gradient layer and choose Edit > Paste in Place. -
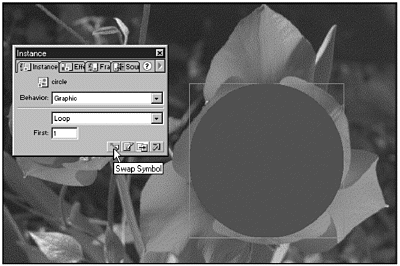
With the Circle graphic in the Gradient layer selected, open the Instance panel (Window > Panels > Instance) and click the Swap Image icon. (See Figure 9.5.) Figure 9.5. Use the Swap Symbol icon on the Effects panel to swap in the Gradient symbol.  -
Select the Gradient symbol in the Swap Symbol dialog and click OK. -
Lock all your layers and you should be able to see your mask with a softened edge. You can adjust your gradient to get the look and feel you want. You also could have placed the Gradient layer above the Mask layer for the same effect. Gradients work fine for simple shapes, such as ovals and rectangles, but what about irregular shapes?  |

