Section 6.4. Fixing Device-Specific Problems
|
6.4. Fixing Device-Specific ProblemsMore often than not, problems are unique to a particular type of component. For example, modems often suffer similar types of problems, and not necessarily the same as those that affect other types of hardware. The following guidelines should help you solve most component-specific problems (as opposed to general lockups or application error messages).
6.4.1. Video Cards (Display Adapters)Most likely, without the correct video driver installed, you still should be able to use Windows at a bare-minimum resolution of 640 480 with an 8-bit color depth (256 colors); this is a standard mode supported by all video adapters and is Windows's default display mode. If you can display this mode but no others, odds are you don't have the proper drivers installed. In fact, nearly all video card problems are caused by faulty or incorrect video drivers. Whether or not you're currently experiencing problems with your video, you can often significantly improve your video card's performance and possibly the stability of your entire system by installing the latest drivers available from the manufacturer of your video card. Such optimized drivers can increase speed, offer higher resolutions with more colors, give you more control over advanced settings, yield superior performance in games (discussed in Chapter 5), and offer better stability than the plain-vanilla drivers that come with Windows (likely the ones you're using now).
Most modern video cards are based upon a certain chipset (controller), usually identifiable by the large, square chip in the center of the card itself. (Obviously, the chipset will be nearly impossible to identify in a laptop, at least without the manual or original invoice within reach.) If the chip is covered with a sticker or cooling fan, you should be able to remove it to see what's printed on the chip surface. Common chipset manufacturers include nVidia, ATI, and 3D Labs. In many cases, Windows will be able to detect the type of chip even if it can't determine the specific make and model of the card. If you can determine the type of chipset your video adapter uses, you should be able to use either a generic video driver made for that chipset (typically available at the chipset manufacturer's web site), as well as a driver for another card that uses the same chipset.
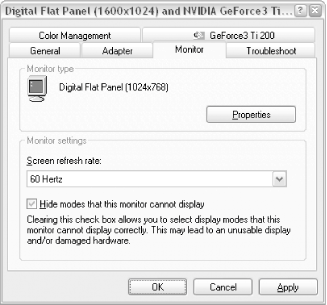
If you're experiencing general video problems, such as display corruption, crashing, or poor performance, try disabling some features of your video driver. Such settings are typically found in Control Panel 6.4.2. MonitorsIf Windows knows what type of monitor you're using, it can determine which resolutions and color depths it's able to support. In Windows XP, monitors have drivers, although they do little more than inform Windows of the monitor's capabilities. Plug and Play monitors allow Windows to automatically identify them, though you may still have to supply a driver when prompted. To see if your monitor is properly identified, go to Control Panel
One of the lesser-known settings that can affect your display quality is the refresh rate (also under the Monitor tab), although the setting is less important when you're using a flat-panel display (and is practically meaningless for digital flat-panels). Although the maximum refresh rate is not dependent on the amount of your card's memory, you may have to lower your resolution to achieve a higher refresh rate, especially for older video cards. Windows should theoretically automatically adjust your refresh rate to the highest setting your card supports, but this is not always the case. If you notice that your display appears to be flickering, especially under florescent lights, you'll need to raise your refresh rate, either by adjusting the refresh rate setting directly or by lowering your resolution or color depth. Consequently, if you hear a slight whine from your monitor, it actually means your refresh rate is too high. The minimum refresh rate you should tolerate is 72 Hz. People with corrective lenses seem to be more sensitive and might require a higher setting to be comfortable. Most cards available today support refresh rates of 75 Hz and higher, so this is usually not a problem. To change the refresh rate, go to Control Panel If the colors displayed on your monitor look washed out or too saturated, try playing with your monitor's contrast and brightness controls. Calibrate your monitor so that black appears dark black and not washed-out gray, and everything else should pretty much fall into place. (The easiest way to do this is to open a Command Prompt window, discussed in Chapter 10, and press Alt-Enter to switch to full-screen mode.) Try turning the contrast control all the way up and the brightness control somewhere between its minimum and middle positions. Some better monitors also have color temperature and gamma adjustments; don't be afraid to mess around with these to fine-tune your display.
For problems using multiple monitors, see the discussion of video cards earlier in this section. 6.4.3. MotherboardsMotherboards can be finicky, but most problems are indeed caused by the components on the board, such as processors, memory, add-on cards, and the power supply, all discussed elsewhere in this section. Here are some motherboard-specific troubleshooting tips.
Your motherboard's chipset is responsible for coordinating the flow of data between your processor, memory, and PCI/AGP bus. Chipset manufacturers (commonly including Intel, VIA, and Serverworks) sometimes have newer drivers for some of the system devices upon which Windows depends; it's a good idea to look for such drivers if you're experiencing crashing or other problems. Some motherboards support two (or more) processors, which use symmetric multiprocessing (SMP) to boost performance. Unlike Windows 9x/Me, Windows XP fully supports SMP, and is able to work with the motherboard's chipset to distribute processing load among the CPUs. For instance, one CPU handles the foreground process while the other handles the background processes, making Windows XP extraordinarily responsive on a multiprocessor machine. Or, if a program crashes and eats up all your CPU cycles on a single-processor system, your computer hangs; on a multiprocessor system, the other CPU just takes over and you can safely shut down the errant task or even continue working. The problem is that multiprocessor motherboards require special chipsets that typically have much less industry support than their single-CPU cousins, making them especially finicky and troublesome when it comes to add-ons (like high-performance video cards). If you're having trouble getting a multi-CPU system to work, check with the manufacturer for a list of approved hardware. See http://www.2cpu.com for more information on SMP. Check with the manufacturer of the motherboard to see if newer firmware (see Section 6.3.7, earlier in this chapter) for your motherboard is available; newer motherboards allow you to update the BIOS by simply downloading and running a small program.
Even the newest motherboards come with jumpers. If you're trying to solve a nasty problem, it's best to go through the "setup" portion of your motherboard's manual and verify that each jumper is set correctly. Finally, all motherboards have built-in hard-disk controllers, serial, parallel, and USB ports. Many boards also have integrated SCSI controllers, network adapters, video cards, and sound cards, all of which can save money and open up additional PCI slots for other devices. Problems arise when these devices conflict with other hardware in your system; for instance, if you install a video card, make sure you disable the on-board video if applicable. See "Which Slots to Use for Internal Devices," earlier in this chapter, for other ways to avoid conflicts. 6.4.4. ProcessorsThere's really nothing you can do to diagnose a bad CPU chip (recognizable by frequent system crashes or your machine's inability to boot up at alll) other than to simply replace it. If you have a dual-processor motherboard, you're fortunate in that you can remove only one of the processors to see if that solves the problem. Otherwise, your best bet may be to take your motherboard, complete with CPU and memory, to your local mom-and-pop computer store, ask them to test it for you, and replace components as needed. Improper or inadequate cooling is the main cause of a malfunctioning processor (e.g., your computer will crash if the CPU gets too hot), so make sure those fans are firmly attached, free of excessive dust, and running smoothly. See "Overclock Your Processor" in Chapter 5 for CPU cooling tips. 6.4.5. MemoryBad memory can manifest itself in anything from frequent error messages and crashes to your system simply not starting. Errors in your computer's memory (RAM) aren't always consistent, either; they can be intermittent and can get worse over time. Any modern computer will use memory modules, but don't be fooled into thinking there's a well-established standard. Older machines use EDO or FPM SIMMs, newer ones use PC100 or PC133 DIMMs, and the newest machines, at the time of this writing, use RDRAM. Within each of these categories are different speeds, capacities, and even standards. Problems due to using the wrong kind of memory are not uncommon, especially in generic and noncommercially built machines. To find out the type of memory you should use, consult the documentation that accompanies your computer or motherboard. If you have no such literature, check the web site of the computer or motherboard manufacturer and find out for sure before you just jam something in there. Odds are your friend's old memory modules will not only not work in your system, but may also potentially cause permanent damage. The first thing you should do is pull out each memory module and make sure there isn't any dust or other obstruction between the pins and your motherboard (use a dry tissue or lens cleaning paper; don't use any liquids or solvents). Look for broken or bent sockets, metal filings or other obstructions, and, of course, any smoke or burn marks. Make sure all your modules are seated properly; they should snap into place and should be level and firm (don't break them testing their firmness, of course). If all that is in order, there are three ways to determine if your RAM is actually faulty. The first way is to use a software testing program capable of checking physical memory. Use the program to run a continual test of your RAM and have it repeat the test many times, perhaps overnight. The problem with testing your RAM with any type of software is that not only are they not 100% reliable, but once you've found a problem, you need to follow the next method anyway to find and replace the faulty module. The second method requires a friendly, patient, and helpful person at a small computer storea rare commodity these days, especially with the popularity of the large, faceless mega-super computer marts filled with inexperienced technicians. Look for a local mom-and-pop store, and see if they have a memory-testing device. These devices are too expensive for the average user, but most people who sell computer memory should have one. Take all your memory modules in and ask them to check them for you. Not only is this test very reliable, but they'll be able to instantly match whatever memory you need, at least in theory. Hopefully they won't charge you for this service, especially because they'll likely be selling you a replacement. The third method of finding and replacing bad memory is to go to your local computer store and just buy more. It may only be necessary to buy a single additional module, because most likely only one module in your system is actually faulty (make sure you get the right kind). Next, systematically replace each module in your computer with the one you've just acquired, and test the system by turning it on. If the problem seems to be resolved, you've most likely found the culpritthrow it out immediately. If the system still crashes, try replacing the next module with the new one, and repeat the process. If you replace all the memory in your system and the problem persists, there may be more than one faulty memory module, or the problem may lie elsewhere, such as a bad CPU or motherboard (or you may even find that you're not using the correct memory in the first place).
You can, of course, also take this opportunity to add more memory to your system (possibly replacing all your existing modules). Adding memory is one of the best ways to improve overall system performance; see the "How to Buy Memory" sidebar for more information.
6.4.6. USB Controllers and DevicesUSB is the answer to most of the headaches caused by serial (COM) ports, parallel (printer) ports, keyboard and mouse ports, and, in some circumstances, SCSI ports. USB is fully PnP-compliant, so not only should a USB controller not give you any trouble, neither should any USB devices (at least in theory). In fact, if you're having trouble with a device that connects to a serial or parallel port or if you've simply run out of free ports, get an inexpensive serial-to-USB or parallel-to-USB adapter, and plug your "vintage" device into it. Although most computers only come with one or two USB plugs, the USB system can handle up to 128 devices; if you've run out of plugs, a USB hub will expand your USB bus easily. Note that hubs can cause problems for some devices (such as uninterruptible power supplies) that may not support being plugged into a hub. Some hubs have their own power supplies, necessary to provide adequate power to devices that get their power from the USB bus, so check the hub power if you're experiencing problems with any of the devices plugged into it.
If can't get Windows to recognize your USB controller or any USB devices attached to it, try entering your computer's BIOS setup program (see Appendix B) and look for USB settings. Usually, it's simply a matter of enabling the USB hardware already in your system.
6.4.6.1 USB power management issuesPower management is a common cause of USB problems; if Windows is able to shut down your USB controller to save power, it sometimes won't be able to power it back up again, which will prevent some USB devices (especially scanners) from working. To prevent Windows from "managing" power to your USB controller or devices, follow these steps:
6.4.6.2 What about FireWire?FireWire, or IEEE-1394, is an alternative to USB, favored for more data-intensive applications because of its speed (though USB 2.0 is now roughly on par). FireWire devices are typically more expensive and less common than USB devices, and can sometimes be a little finicky, but are otherwise fairly straightforward. If you're having trouble getting a FireWire device to work, it's almost certainly the fault of the device's driver software. The controller itself shouldn't need any troubleshooting, especially if it's built in. But cheaper add-on FireWire controllers have been known to be problematic, so if all else fails, try replacing your FireWire controller. 6.4.7. Hard DisksThese drives almost never need special drivers, unless they use some proprietary interface (such as external drives hooked up to a parallel, USB, or FireWire port). Windows will support virtually all IDE drives right out of the box, as well as most SCSI controllers and devices. To get Windows to recognize an IDE hard disk connected to your system, you'll need to do three things:
Occasionally, a system will be in bad enough shape that it won't even boot. Although it's possible that the hard disk has crashed and is unrecoverable, it's just as likely that the motherboard or hard-disk controller has died. In this case, your best bet at recovering the data on that drive is to connect the drive to another functioning system and attempt to access the data there. See Section 6.5 later in this chapter for related information.
6.4.8. IDE ControllersMost hard drives available today are the IDE/ATA /Ultra DMA type; the controllers for these drives are almost always built into the motherboard. If your motherboard develops a problem with the controller, you should be able to disable the controller and obtain a separate controller for a few bucks. The most common problem, though, is with IDE cables. The cheap cables that come with most computers can develop flaws, causing symptoms ranging from occasional errors to Windows not being able to recognize a drive at all. 6.4.9. SCSI ControllersMost SCSI controllers are either supported by Windows out of the box or have native Windows drivers you can use (which either come with the card or are available from the manufacturer's web site). For the most part, all SCSI controllers are fairly well supported, with recent drivers nearly always available. If you're experiencing a SCSI problem, you should first check to see if newer drivers for your card are available. If you're unable to find drivers for your SCSI card, you may still be able to use it in Windows if you can find a driver for another card that uses the same SCSI controller chip (sometimes called a miniport driver). For example, you may have a sound card that has a built-in SCSI controller intended for your CD drive. If that SCSI controller chip just happens to be made by Adaptec, for example, you should be able to use a driver for the corresponding Adaptec product that runs off the same chip. Next to drivers, the two most common problems with SCSI controllers and the devices that attach to them are bad cables and incorrect termination. When diagnosing any SCSI problems, it's best to have replacements handy for your SCSI cable(s), so you can easily swap them to help isolate the problem. The use of improper or non-SCSI adapters and connectors is also a common culprit; for example, you can't use a standard SCSI-III cable to connect Ultra160 SCSI devices.
As for termination, a SCSI chain (the long string of devices connected by cables) won't work properly unless it's correctly terminated. By either using the built-in termination on your SCSI controller and SCSI devices or attaching standalone terminators, make sure that both ends of the chain (but nothing in the middle) are terminated. Active terminators are best and are absolutely required for Ultra160 and Ultra320 SCSI buses. The SCSI card itself should be terminated (or its self-termination feature be turned on), unless you have both internal and external devices, in which case only the devices at the end of each side should be terminated. All SCSI controllers also have a built-in BIOS, and most have a corresponding setup page (accessible when your computer boots) that let you configure a bunch of different SCSI parameters. Each SCSI device attached to your SCSI controller may have different requirements, so check the documentation that came with your devices and make sure the SCSI controller's settings (max data rate, sync-negotiation, termination power, etc.) match the requirements of each specific device. For problems with specific devices connected to SCSI controllerssuch as CD drives, scanners, hard disks, and removable drivesrefer to the corresponding topics elsewhere in this section. 6.4.10. CD and DVD Drives, Recordable and OtherwiseMost CD drives don't need special drivers. In fact, if you plug in a CD drive and then start up Windows, it should detect it and display an icon for it in My Computer automatically. If your drive isn't detected, first check the controller. Most CD-ROMs connect to your IDE or SCSI controller; if your drive isn't recognized, most likely the controller isn't working or you don't have the right drivers for your controller installed, as mentioned earlier. Common causes of problems include dirt and dust, not only in the drive but on the discs as well. A can of compressed air is a good solution to this problem, as is a clean shirt,[7] against which you can rub the occasional dirty disc.
Most CD drives are cheap and easily replaceable; if yours is giving you any trouble, throw it out and get a new one. Most of the more annoying problems with these drives involve CD and DVD writers, and those are a little more difficult to solve. Here are a few tips:
6.4.11. Tape DrivesThe best thing you can do to keep a tape drive running smoothly and reliably is to keep it clean. Dust and dirt translate into poor performance, lost data, or even an early death. Some (but not all) tape drives require that you use cleaning tapes on a regular basis; consult with your drive's documentation for details. Most tape devices require proprietary drivers from their manufacturers, mostly because there is currently no "standard" driver for them. The common exception is SCSI; all you should need to do is plug in your SCSI tape drive and make sure the drivers for the SCSI controller are installed and working. The backup program you use will then come with generic drivers for SCSI tape drives (as does the backup software that comes with Windows XP). See Section 6.5, later in this chapter, for more information on backup software. 6.4.12. Flash Cards and Other Removable DrivesRemovable drives are as varied as the problems you're likely to have with them. As with other hardware, the first step in troubleshooting these drives is to make sure the drivers are correct and up-to-date. If you're using a USB flash card reader, and you've eliminated the possibility of a problem with the USB controller or cable, then the culprit is likely the flash media itself. If you're having trouble reading from or writing to a flash card, try formatting it, not with Windows but with the camera, MP3 player, or PDA with which it's used. The most common cause of problems with flash cards is an incorrect or unsupported filesystem (e.g., a card formatted as FAT32 in a camera that can only read FAT). See Chapter 5 for more information on filesystems. One important option that is available for some removable media drives, such as digital camera memory card readers, is write caching. Write caching, typically disabled by default in Windows XP, can improve performance by waiting until your computer is in an idle state before physically writing data to the drive. While write caching is always enabled for hard disks, it's not always advisable for removable drives because the media can be ejected when there's still data waiting to be written, which can mean lost data. Open Device Manager (devmgmt.msc), right-click the drive, and choose the Policies tab (if the tab isn't there, this option isn't available for the selected drive). The Optimize for quick removal option disables write caching, and the Optimize for performance option enables it. While the second option will improve performance, it should only be used for drives and readers with electronic (not mechanical) eject buttons; such drives will be capable of requesting that any pending data be written before the media is actually ejected, thereby preventing any lost data. 6.4.13. ModemsIf you're having trouble with an analog modem that is 32 Kbps or slower, throw it out immediately. You can get a brand new 56 Kbps modem for less money than it would cost in long-distance support calls to find drivers for the old one. If you only use your modem to connect to the Internet, consider a malfunctioning modem an excuse to get DSL or cable Internet. Settings for your modem can be found in Device Manager (devmgmt.msc); just open the Modems category, and double-click your modem to view its Properties sheet. The more interesting settings are as follows:
6.4.13.1 Getting the right driver for your modemWindows might simply recognize your modem as a "standard modem" if it can't autodetect the make and model, even though a driver for your modem may be included with Windows. Although the "standard modem" driver isn't ideal, you can often get by with it in a pinch. A driver made especially for your modem will usually yield the best performance and reliability, but if it's not available, you can sometimes use a driver for another product by the same manufacturer, as long as it's rated the same speed (e.g., 56 K). If Windows doesn't identify your modem or if it identifies it as an "unknown device," there are two possibilities that could cause this problem. First, your modem could be a proprietary model (always something to avoid, although often inevitable in laptops), which you simply won't be able to use without a manufacturer-supplied driver. Second, the serial port to which your modem is connected may be misconfigured or conflicting with another serial port in your system; see the discussion of serial ports in Appendix B for a solution. Occasionally, a functioning modem can stop working temporarily. Modems constantly receive commands from your computer, so it's possible for the modem to become confused if it is sent a garbled or incomplete command. The easiest way to correct a confused modem is to turn it off and then on again. If the modem is an internal model, you'll need to completely power down your computer and then turn it on again; simply pressing the reset button or restarting Windows may not be sufficient. If you know the software is installed and configured correctly, there are external factors that can either prevent modems from working or slow their performance. Start by removing all other electronic devices from the phone line, including answering machines, fax machines, autodialers, and standard telephone handsets. Any of these can actually interfere with the modem, preventing it from detecting the dial tone or causing it to hang up prematurely. Other factors include bad phone cables and wall sockets; try replacing your old phone cord with a brand new one, just long enough to reach the wall jack. A noisy phone line can also cause slow performance and frequent disconnects; contact the phone company to investigate.
6.4.13.2 Diagnosing slow or unreliable modem connectionsThe most common cause for slow connection speeds is a noisy phone line. Noise can corrupt the data being transferred; if your modem gets corrupted data, the data must be sent again. If 15% of the data needs to be resent, it will take 15% longer to transfer any given file. Start by connecting a telephone handset to the phone line or to the jack labeled "phone" on the back of your modem, and make a normal call. If you hear any crackling or interference, it means the line is very noisy (you may not be able to hear low-to-moderate noise, however). If you suspect line noise, try replacing the phone cord or even the entire wall jack. Note that the phone cord shouldn't be any longer than is absolutely necessary. Also, make sure there isn't anything else connected to the line, especially between the computer and the wall. That is, any answering machines, fax machines, and telephones should be plugged into the back of your modem (the jack labeled "phone"), and your modem should be plugged directly into the wall. These devices can interfere with transmission since the signal must pass through them in order to reach your computer. 6.4.14. Network Interface Cards (NICs)In most cases, Windows will detect your network adapter and install the correct drivers for it automatically. However, there are so many different types and manufacturers of network cards, and so many of those are completely proprietary that you may be out of luck if you can't obtain drivers made specifically for yours. Isolating networking problems can be especially difficult, because you're not dealing with a standalone device. If your printer stops working, you know immediately where the problem is, but if your network stops working, it could be your card, the network cable, the hub, your colleague's network card, your network drivers, your colleague's network drivers, or any number of other things. See Chapter 7 for detailed network troubleshooting assistance. Because there are no "generic" or "standard" network drivers, if you can't find a driver for your network adapter, or if it has stopped working, just throw it out. Brand-new Ethernet adapters are ridiculously cheap and most likely superior to the antique you'd be replacing. If you're having problems with your network card in a desktop computer, try moving it to a diffrerent slot. If you're dealing with a network adapter built into your motherboard or laptop, check your BIOS (see Appendix B) for applicable settings, and contact your motherboard or laptop manufacturer for the latest drivers. 6.4.15. Wireless NICs and RoutersEverything that applies to network cards, discussed in the previous topic, applies to wireless network cards as well. However, there's a peculiarity that affects both wireless NICs and wireless routers alike, and it has to do with the fact that most manufacturers of wireless equipment rush their products to market before they're ready. For this reason, the first thing you should do when you set up any wireless equipment, as well as the instant you start experiencing problems, is to download and install the most recent version of the firmware available (discussed earlier in this chapter). Not only will this likely fix connection and performance problems, but it will sometimes provide more features and interface improvements (where applicable). 6.4.16. Sound CardsIt seems that the better sound card technology gets, the more troublesome these devices are. In the old days, troubleshooting a sound card involved only eliminating conflicts by finding an IRQ that wasn't used by another device in your system. All modern sound cards are now Plug and Play, which leaves only the driver and its physical placement in your system to contend with.
Many sound cards come with extra drivers that offer support for older DOS games. Unless you specically need these, it's best to remove them entirely. Sound drivers intended for Windows XP will be different than those written for earlier versions of Windows, so make sure you have your manufacturer's latest drivers installed. If you can't get Windows XP-specific drivers, it may be time for a new sound card. If you're getting poor sound quality in games, make sure you have the latest version of Microsoft's DirectX layer (available at http://www.microsoft.com/directx). To solve game-specific problems, check the game developer's web site for suggested settings and workarounds; see "Get the Most Out of Your Games, Speed-Wise" in Chapter 5 for more tips. 6.4.17. PrintersWhether you're using USB or an older parallel cable, bad cables are a frequent cause of problems. If Windows is having trouble recognizing your printer, or it seems to be printing too slowly, try replacing the cable. Although USB doesn't have a practical limit on distance, parallel cables do. Some parallel-based printers won't function if they're too far away from your computer, so try a shorter cable. Remove any switching boxes, printer-sharing devices, and extraneous connectors unless they're absolutely necessary. If your parallel port is built into your motherboard (as most are), you should go to your system BIOS setup screen (see Section 6.4.3 topic earlier in this chapter) to make sure your parallel port is configured for its optimal setting (usually ECP). Refer to Appendix B for details.
If you're experiencing poor printing speed or frequent errors with a USB printer, try eliminating any USB hubs, if applicable. See the discussion of USB controllers earlier in this chapter. As with most other peripherals, getting the right drivers is essential. Now, Windows can print plain text (without fonts or graphics) on nearly any printer without knowing what kind of printer you have. If you don't have a driver made especially for your model, you still may be able to substitute another printer's driver. For example, if you have a Hewlett Packard 700-series inkjet printer, you might be able to get it to work with drivers for HP's 600 series. A problem that plagues many printers is that the drivers provided by the printer manufacturer try to do too much and, as a result, bog down your system (and your printing) with extraneous programs and dialog boxes. If Windows XP supports your printer out of the box, consider abandoning the fancy drivers that came with your printer in favor of the plain-vanilla ones Microsoft provides. Also, since many printers are compatible with Hewlett Packard's PCL printer control language (PCL3, PCL5, etc.), you may be able to use the driver for the classic Hewlett Packard Laserjet Series II (for older laser printers) or the Hewlett Packard Deskjet (for older inkjet printers). If you have a Postscript laser printer, you should be able to use the driver for one of the Apple LaserWriter varieties. Aside from drivers and cabling, common printer problems involve incorrect paper: use laser paper for laser printers and inkjet paper for inkjet printersavoid the "multipurpose" junk. Also, the ink cartridges in inkjet printers are usually cheaply made and therefore are one of the first things to fail; simply installing a new ink cartridge will fix many printing problems. 6.4.18. Scanners and CamerasScanners not only require the appropriate drivers to function in Windows, but special scanning software as well; as with tape drives, the software and hardware are typically sold as a pair. If you can't find a driver or software that specifically supports your scanner, you're probably out of luck. However, because many companies simply repackage scanners made by other manufacturers, you may be able to obtain a driver from the original equipment manufacturer (OEM) of the stuff under the hood. As for cameras, because there are so many different kinds, probably the only productive discussion involves how they connect to your computer. Modern digital cameras either connect through a serial port, a USB port, or a FireWire port; any communication problems will probably be addressed by fixing the ports (or adapters, where applicable) themselves. Scanners commonly are connected through USB ports but can also plug into parallel and SCSI ports; an older scanner may connect to a proprietary controller card. See Section 6.4.17 for help with parallel ports, Section 6.4.9 for help with SCSI, and Section 6.4.6 for help with USB, all earlier in this section. 6.4.19. KeyboardsMost keyboards are exceptionally cheap and flimsy, a fact that has its pros and cons. On the plus side, if something goes wrong, the keyboard will be easy and inexpensive to replace. However, cheapness has its price, and a cheap keyboard typically won't last that long. Double-click the Keyboard icon in Control Panel to adjust the various settings of your keyboard. Moving the Repeat Rate slider all the way to the right will do wonders to make your computer seem faster, especially when scrolling through a long document or moving the cursor through a lot of text. The Repeat Delay is different, thoughjust adjust this to your liking, and test the setting in the box below. Sticky or dirty keys can slow things down when you're typing; you can pull your keys off one by one and remove whatever is caught underneath. Some people have actually been successful cleaning the entire keyboard by immersing it in plain water (unplugged, of course) and reconnecting it when completely dry. Another suggestion is to lay out a piece of newspaper, invert the keyboard, and give it a good spanking to dislodge dust, food, and any small critters that might be living inside. 6.4.19.1 ErgonomicsKeep in mind that most keyboards haven't been effectively designed for use with the human hand, no matter what Microsoft says in trying to market their "Natural" keyboard; true ergonomic keyboards are adjustable, not just shaped funny. True ergonomic keyboards are now getting more affordable and more popular. Some of the more radical designs have split, movable keypads, curved to fit the motion and shape of your hands, and reduce the distance your wrists and fingers have to travel to press the keys. Try one before buying, though: they aren't for everyone. Your best defense in reducing hand and back strain is to position your keyboard (and yourself, if you have an adjustable chair) so that your elbows are at the same level (distance from the floor) as your hands and your arms are well supported. And if your chair tilts forward, it may induce a more comfortable sitting and typing position. Another way to reduce typing strain is to just not use your keyboard at all. Products like Dragon NaturallySpeaking (http://www.dragonsys.com) and IBM ViaVoice (http://www.ibm.com) support so-called "natural-speech" dictation, which allow you to speak comfortably into a microphone and dictate as you would to a human assistant or inhuman tape recorder, often at much higher speeds than are possible with hand entry. These can be quite effective but, like everything else, aren't for everyone. Some of the material in this book was actually dictated with such software (fry two guest witch cent ounces). A wrist rest may be comfortable, but they sometimes put too much pressure on the median nerves in your wrists. If you're experiencing wrist pain or numbness, try eliminating the wrist rest for a day or two, or simply move it so that it supports your palms instead of your wrists. If you're experiencing any pain or numbness in your hands, wrists, arms, back, or neck, drop this book immediately and talk with a physician. In short, take repetitive stress injuries seriously. 6.4.19.2 The Num Lock, Scroll Lock, and Caps Lock keysEver since IBM introduced the "enhanced" 101-key keyboard with two sets of cursor keys back in 1984, the Num Lock key on most keyboards is turned on by default, nudging people to use the standard cursor keys rather than the numeric keypad to control the cursor. This may seem an inconsequential setting, but it affects a basic function of the primary input device, the keyboard, and can therefore be quite important. Some of us prefer the numeric keypad, and therefore prefer NumLock to be turned off; others prefer the opposite. In most cases, you can choose the default (on or off) in your computer's BIOS setup, as described in Appendix B. However, this doesn't always work, and Windows may override the setting. To override Windows, and choose the default setting for your Num Lock, Scroll Lock, and Caps Lock keys, follow these steps:
6.4.20. Mice and Other Pointing DevicesIf you have any software that came with your mouse (such as "Intellipoint" for Microsoft mice and "Mouseware" for Logitech mice), it's probably unnecessary and just taking up memory and disk space. Unless you need the advanced features, such as programming a third mouse button, you probably should remove said software, because Windows supports nearly all mice out of the box.
Double-click the Mouse icon in Control Panel to adjust the sensitivity of your mouse. You can also adjust the double-click speed and turn on "pointer-trails" to increase visibility on laptop displays. The mouse is a primary method of input, and fine-tuning these settings can go a long way toward improving your relationship with your mouse. One of the most common problems with mice is the pain they can cause in your wrist and hand, due to the unnatural position in which they force your hand to rest. A stylus (pen) will afford a more natural and comfortable position, not to mention more precise control over the pointer on your screen. You can get a pressure sensitive, cordless, battery-less stylus and a tablet for under a hundred bucksmore than a mouse, but worth it if you use Photoshop or other graphics software. My advice: try a tablet before you invest in another rodent. 6.4.21. Power SuppliesDon't overlook the power supply! Every time I encounter a problem that seems to have no reasonable explanation, the culprit has been the power supply. I'm beginning to think it's a conspiracy. Say, all of a sudden, one of your storage devices (hard disk, tape drive, etc.) starts malfunctioning, either sporadically or completely. You try removing and reinstalling the drivers (if any), you replace all the cables, and you take out all the other devices. You may even completely replace the device with a brand new oneand it still doesn't work. Odds are your power supply needs to be replaced. Your computer's power supply powers all of your internal devices, as well as some of your external ones (i.e., the keyboard, the mouse, and most USB devices). If your power supply isn't able to provide adequate power to all your hardware, one or more of those devices will suffer. The power supplies found in most computers are extremely cheap, a fact that ends up being the cause of most power supply problems. This means that it doesn't make too much sense to replace one cheap unit with another cheap unit, even if the replacement has a higher wattage rating. Power supplies are rated by the amount of power they can provide (in watts); most computers come with 200-300W supplies, but many power users end up needing 350-400W. The problem with power ratings, however, is that most of those cheap power supplies don't hold up under the load. A cheap 400W unit may drop under 300W when you start connecting devices, but better supplies can supply more than enough power for even the most demanding systems, and will continue to provide reliable operations for years to come. A well-made power supply will also be heavy and have multiple fans, as well as being a bit more expensive than the 20-dollar landfill fodder lining most store shelves. Possible exceptions are portable computers, which may not have user-replaceable power supplies. However, the need for increased power is generally only applicable to a desktop system that can accommodate several additional internal devices, so the matter is pretty much moot. |


|
EAN: 2147483647
Pages: 97
- ERP Systems Impact on Organizations
- Data Mining for Business Process Reengineering
- Healthcare Information: From Administrative to Practice Databases
- Relevance and Micro-Relevance for the Professional as Determinants of IT-Diffusion and IT-Use in Healthcare
- Development of Interactive Web Sites to Enhance Police/Community Relations