1.2 A Crash Course in the Basics of Windows XP
1.2 A Crash Course in the Basics of Windows XPWindows XP, although technically an incremental upgrade to Windows 2000, has been positioned as the direct replacement to Windows Me, officially marking the end of the DOS-based Windows 9x/Me line. Windows XP is indeed the long-anticipated operating system designed to finally unify both lines of Windows, bringing the bullet-proof stability of NT to home and small business users, and the industry support of Windows 9x/Me to corporate and power users. The following brief sections illustrate the layout of the Windows XP interface and identify the important concepts and components . Continue to Chapter 2 for tips and shortcuts for working with files, windows, and applications. 1.2.1 The DesktopLike most modern operating systems that use graphical user interfaces (such as the Mac, Unix, and earlier versions of Windows), Windows XP uses the metaphor of a desktop with windows and file folders laid out on it. This desktop metaphor is provided by a program called Windows Explorer ( explorer.exe ), which runs automatically every time you start Windows. Figure 1-1 shows the default Windows XP Desktop. Figure 1-1. The layout of the Windows XP Desktop is much cleaner than previous versions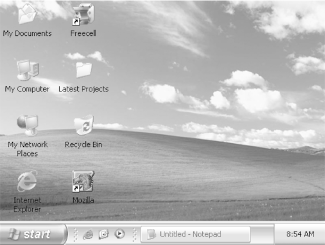 1.2.2 Point and ClickWindows XP offers several settings that affect the way the interface responds to mouse clicks, all of which are documented in Chapter 4. The default setting (the way it works when you first install Windows XP) will also be the most familiar to most users, as it is fairly consistent with the way that most computer software works.
1.2.3 Windows and MenusAny open window contains a frame with a series of standard decorations, as shown in Figure 1-2. To move a window from one place to another, click on the title bar and drag. Figure 1-2. Windows are typically decorated with a title bar, title buttons, a menu bar, and a scrollable client area Most types of windows are resizable, meaning that you can stretch them horizontally and vertically by grabbing an edge or a corner with the mouse. Among the buttons on most title bars are two resizing shortcuts: maximize and minimize. If you click the maximize button (the middle button in the cluster in the upper-right corner of most windows), the window will be enlarged to fill the screen, but will no longer be resizable. If you click the minimize button (the left-most button in the cluster), it will shrink out of sight and appear only as a button on the taskbar. One or two scrollbars may appear along the bottom and far right of a window, listbox, or text input area. Scrollbars allow you to move the viewport of the window or box so that you can see all its contents. This behavior is often counterintuitive for new users because moving the scrollbar in one direction causes the window's contents to move in the opposite direction. Look at it this way: the scrollbar doesn't move the contents, it moves the view of the contents. Imagine a very long document with very small type. Moving the scrollbars is like moving a magnifying glass ”if you move the glass down the document and look through the magnifier, it looks like the document is moving up. If multiple windows are open, only one window has the focus . The window with the focus is usually the one on top of all the other windows (but not always), and is usually distinguished by a border and title that are darker in color , or otherwise distinguished from the rest. The window with the focus responds to keystrokes, although any window will respond to mouse clicks. To give a window the focus, just click on any visible portion, and it will pop to the front (be careful not to click a button or other control on the window, as the click may activate the feature in addition to bringing the window to the top of the pile). You can also click a taskbar button to activate the corresponding window (even if it's minimized), but often the most convenient method is to use the keyboard: hold the Alt key and press Tab repeatedly to cycle through open windows, and then release Alt when the desired program icon is highlighted. Just as only one window can have the focus at any given time, only one control (text field, button, checkbox, etc.) can have the focus at any given time. Different controls show focus in different ways: pushbuttons and checkboxes have a dotted rectangle, for instance. A text field (edit box) that has the focus is not visually distinguished from the rest, but it is the only one with a blinking text cursor (insertion point). To assign the focus to a different control, just click on it, or use the Tab key (hold Shift to go backwards ). NOTE The Desktop is a special case: although it can have the focus, it will never appear above any other windows. To access something on the Desktop, you have three choices: minimize all open windows by holding the Windows logo key (not on all keyboards) and pressing the D key, right-click an empty area of the Desktop and select Show the Desktop, or press the Show Desktop button on the Quick Launch taskbar to temporarily minimize all running applications. Most windows have a menu bar, commonly containing standard menu items such as File, Edit, View, and Help, as well as any application-specific menus. Click a single menu item to drop it down and then click any item in the menu as needed. Click outside of a menu or press the Esc key to get out of the menu. Figure 1-3 illustrates menus. Figure 1-3. Menus are easy to use, but nested menus can be cumbersome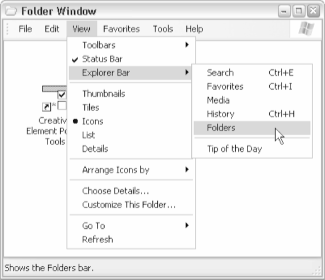 1.2.4 Files, Folders, and DisksFiles are the basic unit of long- term storage on a computer. Files are organized into folders (also called directories ), which are stored on disks.
NOTE Windows XP's filesystem is case- preserving , but also case-insensitive. For example, the case of a file named FooBar.txt will be preserved with the capital F and B, but if you were to type FOObar in a File 1.2.5 File Types and ExtensionsMost files have a filename extension, the (usually three) letters that appear after the last dot in any file's name . Common file extensions include .xls (for Excel spreadsheets), .txt (for plain text files), .html (for hypertext markup language files, commonly known as web pages), and .jpg (for JPEG image files). Although all these files hold very different types of data, the only way Windows differentiates them is by their filename extensions. By default, file extensions are hidden, but it's best to have them displayed. Go to Control Panel
Windows uses a file's extension to determine what to do when the file is double-clicked and right-clicked; this system is known as file types or file associations. To see all the configured file extensions on your system, go to Control Panel
|
 Open dialog box, Windows would recognize it as the same file.
EAN: 2147483647
Pages: 154