Apply Filters
The options available from the Filter menu are similar to those available from the Effect menu. However, as mentioned at the beginning of this chapter, after you apply a filter, you can no longer edit the original underlying structure of the object s path .
The good side of this is that you can edit the new path that the filter generates. Figure 14-19 shows a drop shadow effect from the Filter menu (top) and a drop shadow effect from the Effect menu (bottom), with similar option settings. As you can see, the results are similar.
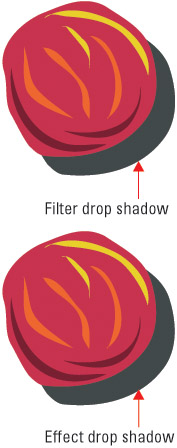
Figure 14-19: Applying drop shadows to an image ”filter vs. effect
Now take a look at the underlying paths, as revealed in Outline view. As you can see in Figure 14-20, the paths and anchors of the object with the filter-generated drop shadow are entirely changed, while the paths and anchors of the object with an effect-generated drop shadow are unchanged ”the drop shadow isn t visible when the path is revealed.
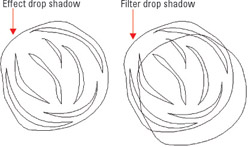
Figure 14-20: The filter and effect drop shadows look similar; the real difference is in how the underlying path is handled.
Apply Filters for Vectors
Both the Effect and Filter menu are divided into two sets of filters. The filters that apply to vector paths are mostly (but not entirely) listed in the top section of the menu, and the filters that apply to bitmap objects are organized on the bottom part of the menu. Since bitmaps aren t defined by vector paths, there s little advantage in using an effect on a bitmap instead of a filter, so we ll explore bitmap effects and filters in their Filter menu versions.
The options available from the Filter Distort and Filter Stylize submenus are very similar to those available from the Effect Distort & Transform and Effect Stylize menus .
The Filter Colors menu has several options for adjusting the coloring of single objects or groups of objects. Filter Colors Adjust Colors opens the Adjust Colors dialog box, which can be used to change the fill color, stroke color , or both colors of selected objects, as shown in Figure 14-21.
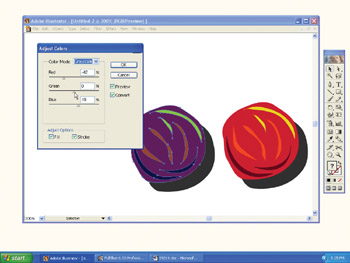
Figure 14-21: Adjusting a set of colors
Other options in the Filter Colors submenu apply to groups of three or more selected objects. The various blend options take two objects and generate colors for objects in between them. This works something like a gradient blend ”merging from the starting color to the ending color. Figure 14-22 shows the Filter Colors Blend Horizontally option being used to generate colors starting from the green on the left and ending with the red on the right.
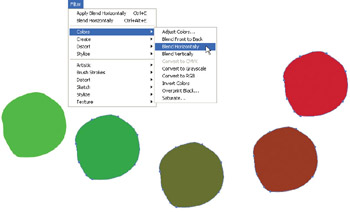
Figure 14-22: Blending colors with a filter
| Note | The options accessible in the Filter Colors submenu are similar to options available for combining overlapping colors in the Transparency palette. Chapter 17 explores how overlapping colors interact in the Transparency palette. |
The Filter Create Object Mosaic menu option transforms a bitmap image into a mosaic (large squares of color). Filter Create Crop Marks generates printer crop marks around any selected object(s) ”vector or bitmap.
Apply Filters for Bitmaps
The bitmap effects on the bottom part of the Filter menu can be applied only to raster images. These raster objects can either be placed (using File Place) or converted (using Object Rasterize).
| Tip | Objects using Effect Rasterize to display as bitmaps cannot be used with bitmap filters. They aren't really raster objects; they just display that way. |
The sets of effects available in the bottom half of the Filter menu are very truncated versions of effects available in Photoshop. They re used for applying effects to bitmaps ”again, if this is the terrain you are entering, you ll want to use Photoshop or another bitmap editor for anything more complicated than very basic effects.
Different effects provide different option sliders, but you can always preview the changes in the small preview area right in the dialog box. Use the plus (+) and minus ( “) buttons to zoom in and out. Zooming out shows more of your image, while zooming in displays the details of the effect. Each of these bitmap filters can be previewed in a dialog box, as shown in Figure 14-23.
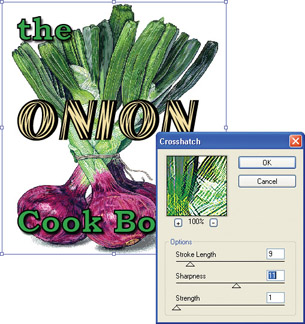
Figure 14-23: Checking out a bitmap filter
Experiment with settings in the dialog box and watch the filter effect appear on the artboard . Then click OK to assign the filter.
EAN: 2147483647
Pages: 175
- Using SQL Data Manipulation Language (DML) to Insert and Manipulate Data Within SQL Tables
- Using Keys and Constraints to Maintain Database Integrity
- Writing External Applications to Query and Manipulate Database Data
- Writing Advanced Queries and Subqueries
- Exploiting MS-SQL Server Built-in Stored Procedures